- Help Center
- ECM Synchronika
- General Maintenance
-
Getting Started
-
Espresso 101
-
Warranty, Ordering & Returns
-
Bezzera BZ10
-
Bezzera Duo DE
-
Bezzera Duo MN
-
LUCCA A53 (Direct Plumb & Mini) by La Spaziale
-
LUCCA M58 by Quick Mill
-
LUCCA S58 by Profitec
-
LUCCA X58 by Quick Mill
-
La Marzocco Linea Mini
-
La Marzocco GS3
-
Lelit Bianca
-
Lelit Elizabeth
-
Lelit Victoria
-
ECM Synchronika
-
ECM Special Edition Classika PID
-
ECM Mechanika V Slim
-
ECM Casa V
-
ECM Puristika
-
Profitec Pro 300
-
Profitec Pro 400
-
Profitec Pro 500
-
Profitec Pro 600
-
Profitec Pro 700
-
Profitec Pro 800
-
Rocket Appartamento
-
Rocket R58 / Cinquantotto
-
Rocket Giotto
-
Rocket R Nine One
-
La Spaziale S2 EK
-
Rancilio Silvia
-
Rancilio Silvia Pro
-
Rancilio Silvia Pro X
-
Izzo Alex Duetto
-
Quick Mill
-
Breville Oracle
-
Dalla Corte Mina
-
Slayer
-
Lucca Grinders
-
Baratza Grinders
-
LUCCA Atom 75
-
Eureka Grinders
-
ECM Grinders
-
Compak Grinders
-
Fellow ODE Grinder
-
Mahlkonig Grinders
-
Profitec Grinders
-
Breville Grinders
-
Dalla Corte Grinders
-
Macap Grinders
-
Fiorenzato Grinders
-
General Troubleshooting
-
Like New & Trade-In Program
-
Eureka Mignon Libra
-
Eureka Mignon Libra User Manual
-
Rocket Boxer Setup Guide
-
Rocket Boxer Timer User Manual
-
Baratza Encore ESP Setup Guide
-
Baratza Encore ESP User Manual
-
Fellow Opus User Manual
-
Fellow Opus Setup Guide
ECM Synchronika: Gauge Replacement
If you are needing to change out the pump pressure or steam pressure gauge on your ECM Synchronika espresso machine, this article will show you how to do so. Both pump pressure and steam pressure gauges are replaced in the same way. (Difficulty ☕☕☕)
Tools Needed:
- 2.5mm Allen key
- Adjustable wrench
1. Turn the machine off, unplug it and allow it to fully cool down.
2. Remove the panels of the Synchronika: ECM Synchronika Panel Removal Instructions
3. Remove the capillary tube from the back of the gauge.
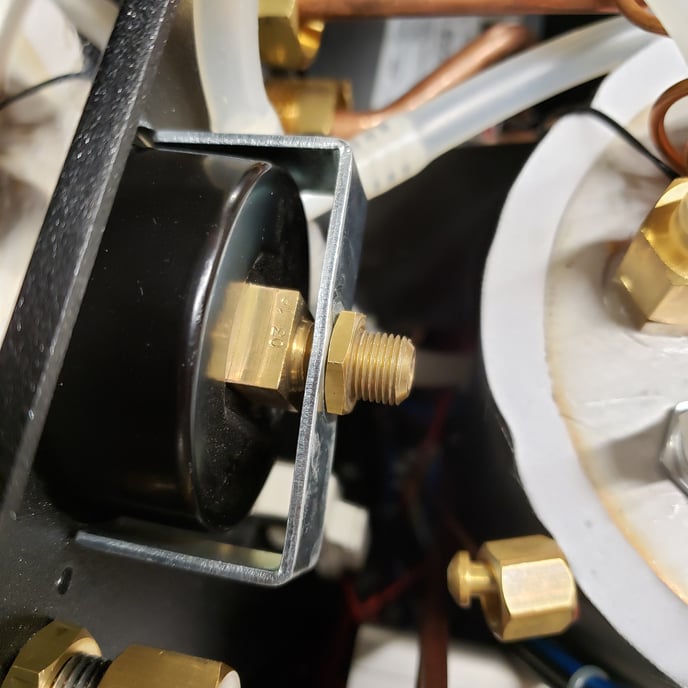
4. Remove the collar from the gauge threads which will free the bracket up, you can take the gauge out of the front of the machine now.
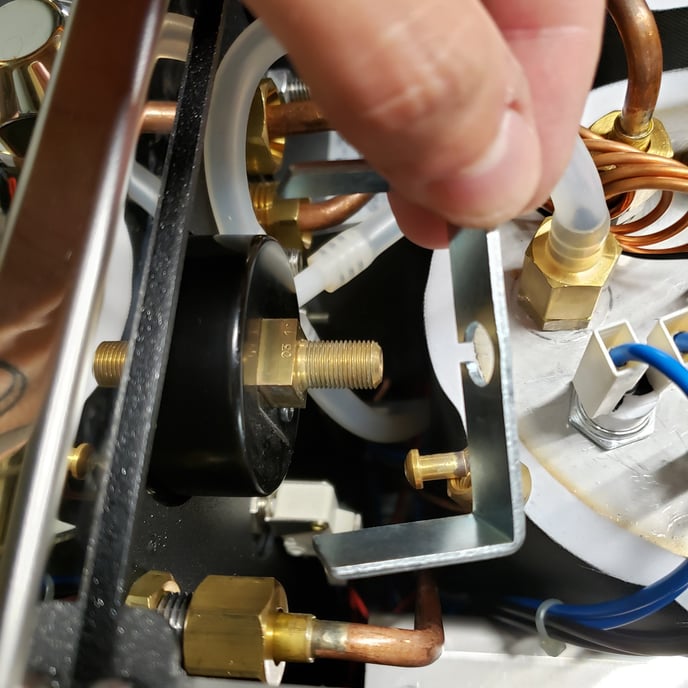
5. Install the new gauge from the front and put the bracket on the backside of it.
6. Tighten down the bracket with the collar.
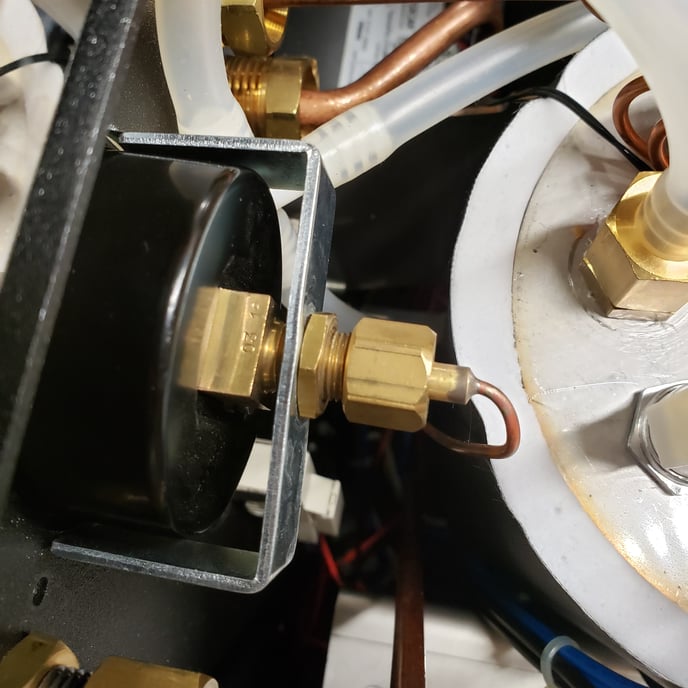
7. Reattach the capillary tube. DO NOT OVERTIGHTEN. Capillary tubes are malleable and can break if tightened too much.
8. Test the machine with the panels removed to check for leaks, tighten capillary tube fitting as needed.