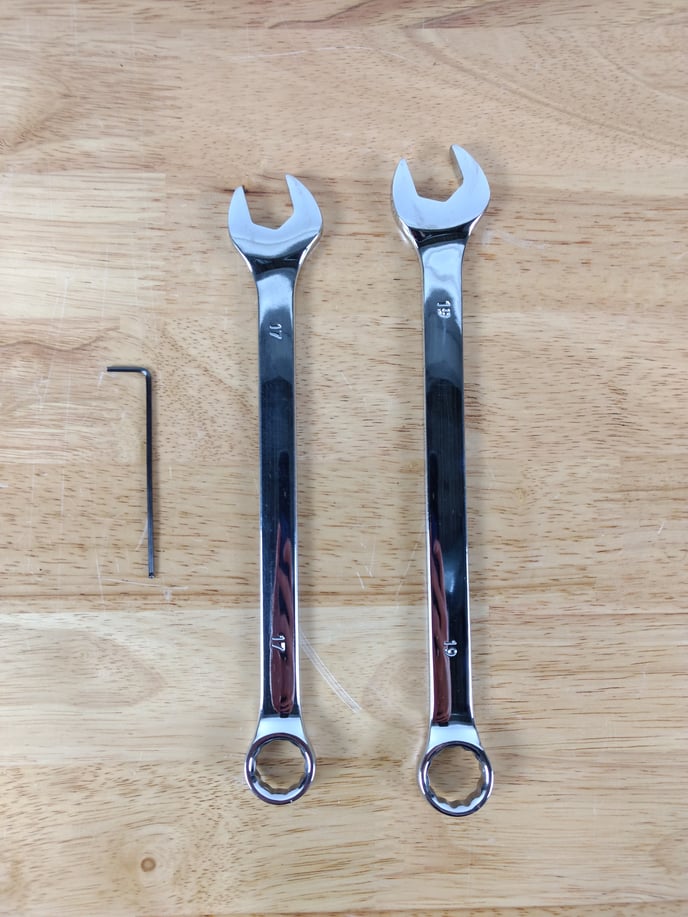
- Help Center
- LUCCA Tempo
- General Maintenance
-
Getting Started
-
Espresso 101
-
Warranty, Ordering & Returns
-
Like New & Trade-In Program
-
General Troubleshooting
-
LUCCA A53 Mini/Mini Vivaldi
-
LUCCA A53 Direct Plumb
-
LUCCA Accessories
-
LUCCA M58 by Quick Mill
-
LUCCA Solo
-
LUCCA Tempo
-
LUCCA X58 by Quick Mill
-
LUCCA S58 by Profitec
-
La Marzocco Linea Mini
-
La Marzocco GS3
-
Lelit Mara X
-
Lelit Bianca
-
Lelit Elizabeth
-
Lelit Victoria
-
ECM Synchronika & Synchronika II
-
ECM Special Edition Classika PID
-
ECM Mechanika V Slim
-
ECM Mechanika VI Slim
-
ECM Casa V
-
ECM Puristika
-
Profitec MOVE
-
Profitec RIDE
-
Profitec JUMP
-
Profitec GO
-
Profitec Drive
-
Profitec Pro 300
-
Profitec Pro 400
-
Profitec Pro 500
-
Profitec Pro 600
-
Profitec Pro 700
-
Profitec Pro 800
-
Rocket Appartamento
-
Rocket R58 / Cinquantotto
-
Rocket Giotto
-
Rocket R Nine One
-
Rocket Boxer
-
La Spaziale S2 EK
-
Rancilio Silvia
-
Rancilio Silvia Pro
-
Rancilio Silvia Pro X
-
Sanremo YOU
-
Ascaso Steel DUO
-
Breville Barista Pro
-
Breville Oracle Touch
-
Flair Classic Espresso Maker
-
Flair 58 Pro 2
-
Flair 58 Plus Espresso Maker
-
LUCCA Grinders
-
WEBER WORKSHOPS Grinders
-
Baratza Grinders
-
Eureka Grinders
-
Eureka Mignon Zero
-
ECM Grinders
-
Fellow Grinders
-
Fellow Tally Precision Scale
-
Mahlkönig Grinders
-
DF64 Grinder
-
Quick Mill
-
Izzo Alex Duetto
-
Bezzera BZ10
-
Bezzera Duo DE
-
Bezzera Duo MN
-
Dalla Corte Mina
-
Compak Grinders
-
Dalla Corte Grinders
-
Profitec Grinders
-
Breville Grinders
-
Macap Grinders
-
Fiorenzato Grinders
-
Slayer
LUCCA Tempo: Inspecting the Steam Valve Stem
If your steam wand isn't fully closing or has a persistent leak, here's how to inspect the valve seat gasket or replace the valve stem.
Tools required:
- 17mm combination wrench
- 18mm combination wrench
- 2mm hex key (optional

Begin with the machine fully cooled and unplugged from the power source.
- Remove the top panel from the machine.
- Identify the steam valve:
- Loosen the retaining nut using the two combination wrenches.
To avoid straining nearby connections the following trick may be helpful. Using one hand, pinch the wrenches together like so: - Slide the retaining nut off of the valve stem. If necessary, remove the knob.
- Next, unthread the valve stem until it is free from the machine. If the knob has been removed it may be helpful to temporarily reattach this using the two 2mm setscrews.
- The valve seat gasket is now visible. Inspect this area and within the valve body for debris that may interfere with seating.
Note - Adding a little Molykote to the two o-rings on the valve stem and the threads themselves can help smooth out the valve's actuation.