Please read carefully before using your Profitec Pro 600.
If you have any other questions, be sure contact us.
Setup Video
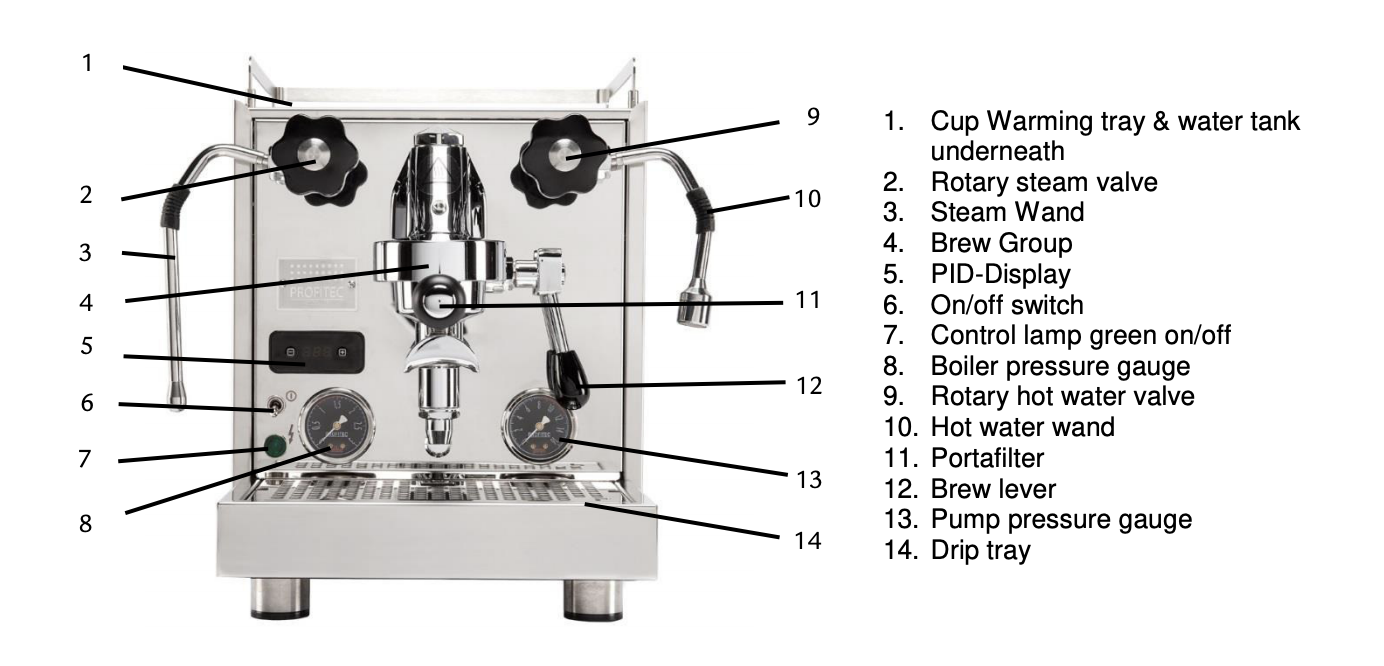
Machine Diagram
Included Accessories
- Black handle Profitec single-spouted portafilter
- Black handle Profitec double-spouted portafilter
- Single basket
- Double basket
- Grouphead brush
- Backflush blank
- Water test strips
Water
Espresso machines have specific requirements when it comes to water. There are two primary considerations: filtration and hardness.
Filtration gets rid of tiny particles, such as sand or rust, in your water. If these particles were allowed to enter your machine they could cause all manner of trouble, particularly by clogging the precise valves and mechanisms in your espresso machine. Almost any water filter will do the job, whether it’s the one built into your fridge, a Brita, or a whole house filter. Ensuring that this filter is replaced in proper time will be important to ensure machine health.
Water hardness is equally important. First, use the water hardness test strips included with your machine to test the water you plan to use with your machine. Ideally, we want a hardness of between 35-85 ppm (parts per million). Hardness refers to the dissolved solids in your water. Common dissolved solids are things like magnesium, calcium, and various forms of sodium. These dissolved solids are what make water, and therefore espresso, taste good. But too much will result in scale buildup in your machine. Scale can cause irreparable damage to your machine by clogging and forming a mineralized layer over the surface of metal parts. The process of descaling is even more damaging, eating away at the machines metal internals. Luckily, scale can be entirely avoided by keeping your water hardness within the recommended TDS range of 35-85 ppm.
There are numerous methods to soften your water should its dissolved solid content be too high.
A note on RO (Reverse Osmosis) or Distilled Water
Taste aside, espresso machines require some mineral content in order to function properly. Their steam boiler fill probes, in particular, use the conductivity of water to detect the water level. With no dissolved solids, they’ll overfill, giving you water instead of steam. You must add some mineral content back in. Our recommendation is Third Wave Water packets which are designed to offer ideal flavor and to be safe for your machine.
Reservoir Solutions
Our first recommendation is an in-reservoir water softening pouch. They’re affordable, last 4-6 months, and are very effective. Using RO water purchased by the gallon in combination with Third Wave Water packets is another great option.
Direct Plumb Solutions
For machines that are plumbed in, we recommend our Water Softening and Filtration kit. It includes everything you’ll need to ensure the water is safe for your machine and delivers the best taste for your espresso.
No matter what solution you pick we recommend testing the water coming from your machine’s group head every few months. City water hardness changes seasonally and softening systems wear out. Routine testing will ensure you keep your machine safe.
First time setup with reservoir
- Lift off cup warming tray.
- Take out the water tank and rinse it thoroughly.
- Fill the water tank with fresh filtered and softened water, place it back into the water tank guides and replace the cup warming tray.
- Plug the machine into an electrical outlet and position the brew lever upwards. Turn the machine on by placing the metal power switch in the upper position. The coffee boiler is now being heated and the green control lamp will come on. Both boilers will be heated in succession.
- As soon as water is released through the brew group, position the brew lever back downward. The coffee boiler is now filled with water.
- Top off the reservoir with more water to replace all the water used so far. When the fresh water in the water reservoir drops to a certain level the machine shuts off and the PID-display turns off. This protects the boilers, but will prevent use of the machine.
- As soon as the steam boiler is filled with water, the pump will become quiet and the PID-display will show the current temperature of both boilers.
- Wait until the boiler pressure gauge indicates a value of about 1.0 – 1.25 bars (Note: steam will vent from the circular port directly above the drip tray occasionally, particularly as the boilers come to temp.)
- The machine is now fully operational.
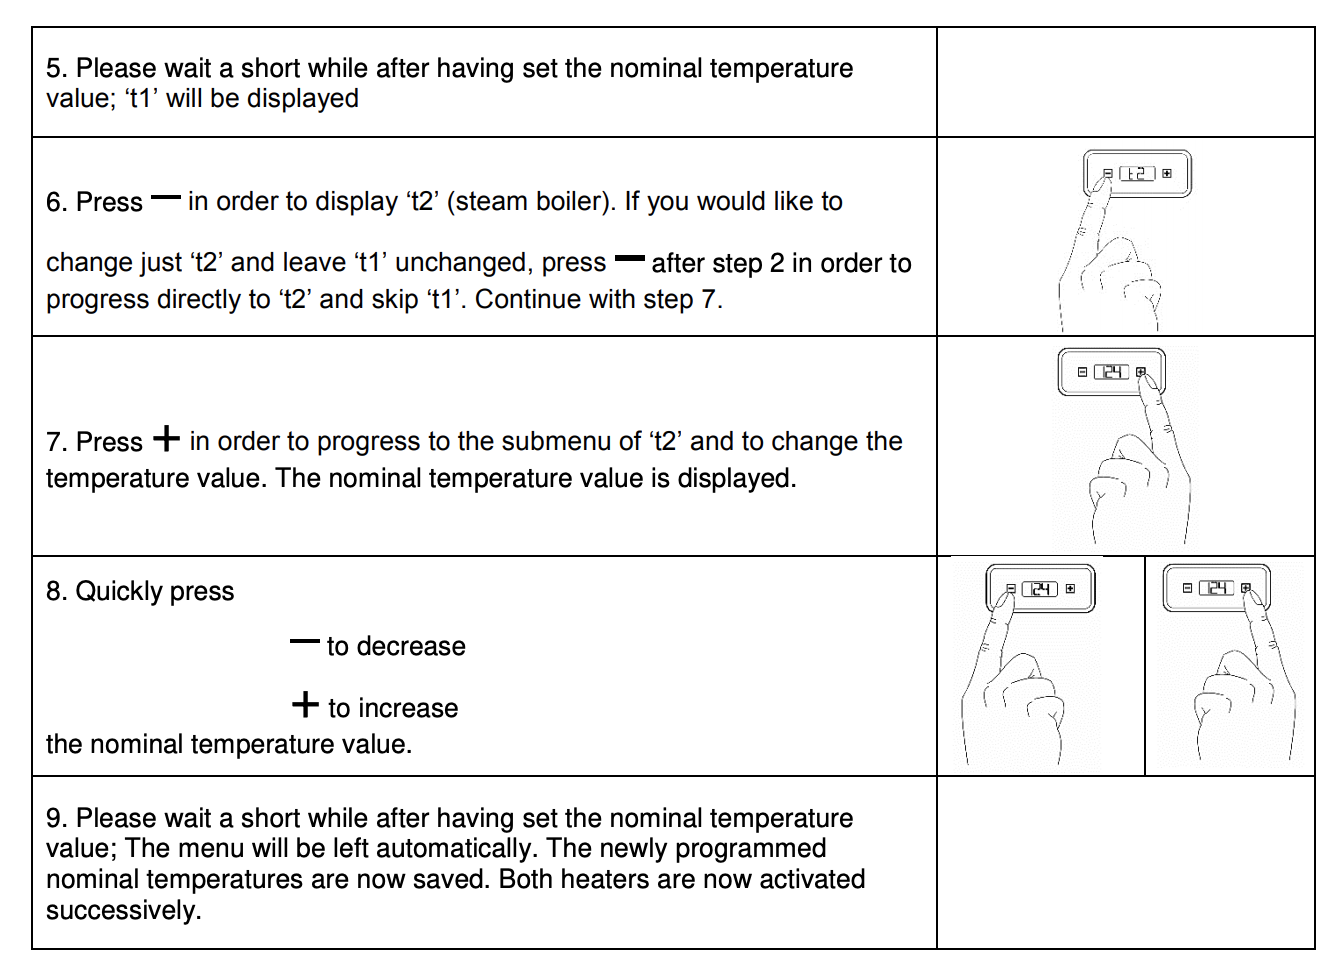
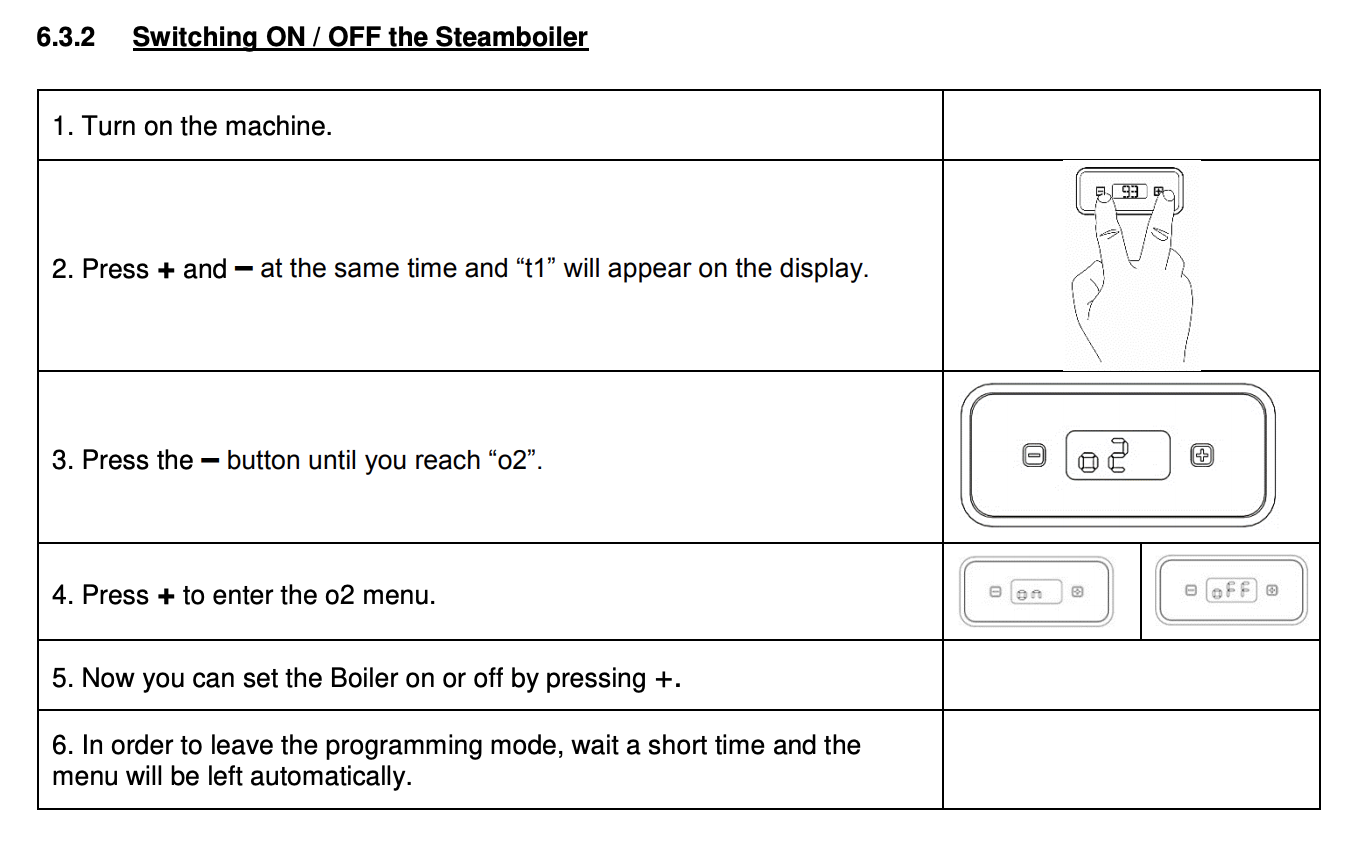
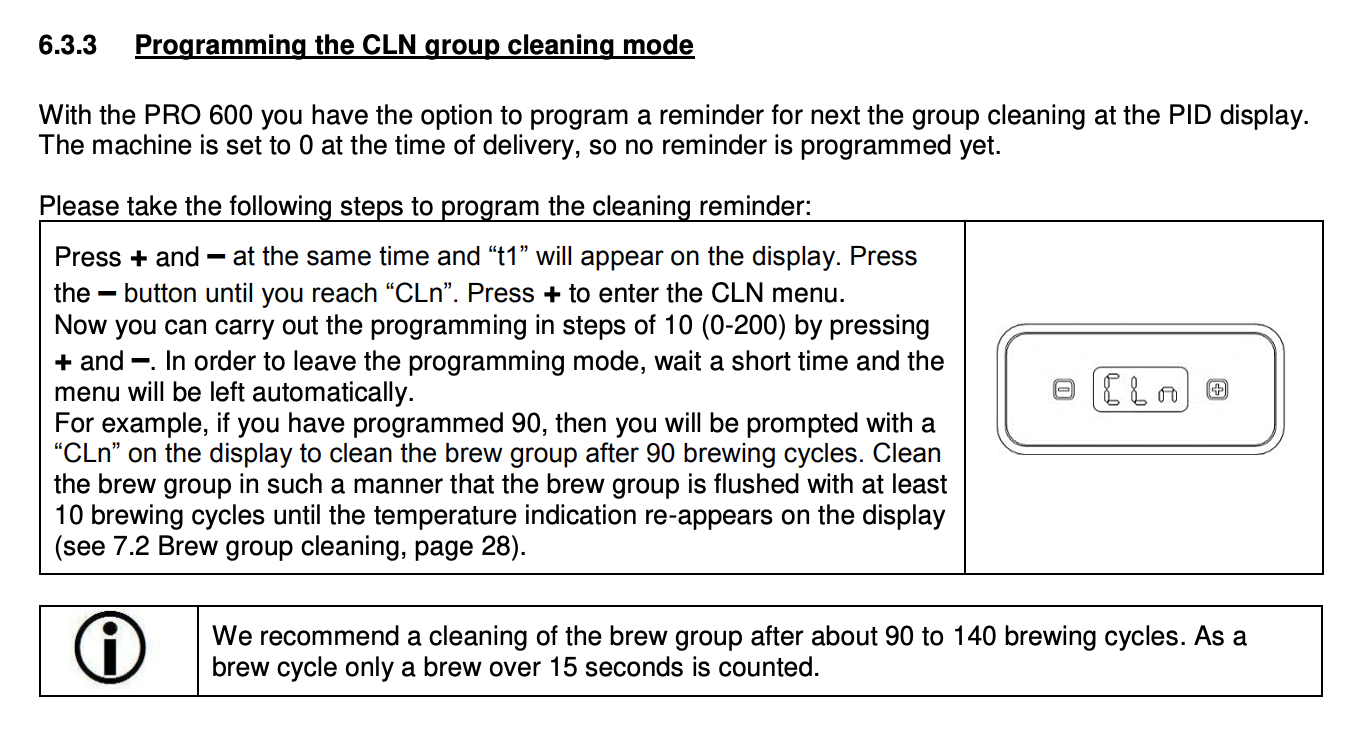
Programming PID and Settings
Technical Details
For a complete list of technical details, please see the spec table on our product page.
Now you're ready to start pulling shots! Check out our Espresso 101 section to learn about steaming milk, latte art, our suggested starter espresso recipe, grinder dial-in tips and much more.
Looking for Help with Flow Control?
Helpful Links
- Espresso 101
- More on Water and Setup
- Clive Blog
- Espresso Machine Cleaning & Maintenance
- Manufacturer Manual in PDF
Still have questions? Reach out to our coffee experts and technicians.