- Help Center
- Warranty, Ordering & Returns
- Repackaging Instructions
-
Getting Started
-
Espresso 101
-
Warranty, Ordering & Returns
-
Bezzera BZ10
-
Bezzera Duo DE
-
Bezzera Duo MN
-
LUCCA A53 (Direct Plumb & Mini) by La Spaziale
-
LUCCA M58 by Quick Mill
-
LUCCA S58 by Profitec
-
LUCCA X58 by Quick Mill
-
La Marzocco Linea Mini
-
La Marzocco GS3
-
Lelit Bianca
-
Lelit Elizabeth
-
Lelit Victoria
-
ECM Synchronika
-
ECM Special Edition Classika PID
-
ECM Mechanika V Slim
-
ECM Casa V
-
ECM Puristika
-
Profitec Pro 300
-
Profitec Pro 400
-
Profitec Pro 500
-
Profitec Pro 600
-
Profitec Pro 700
-
Profitec Pro 800
-
Rocket Appartamento
-
Rocket R58 / Cinquantotto
-
Rocket Giotto
-
Rocket R Nine One
-
La Spaziale S2 EK
-
Rancilio Silvia
-
Rancilio Silvia Pro
-
Rancilio Silvia Pro X
-
Izzo Alex Duetto
-
Quick Mill
-
Breville Oracle
-
Dalla Corte Mina
-
Slayer
-
Lucca Grinders
-
Baratza Grinders
-
LUCCA Atom 75
-
Eureka Grinders
-
ECM Grinders
-
Compak Grinders
-
Fellow ODE Grinder
-
Mahlkonig Grinders
-
Profitec Grinders
-
Breville Grinders
-
Dalla Corte Grinders
-
Macap Grinders
-
Fiorenzato Grinders
-
General Troubleshooting
-
Like New & Trade-In Program
-
Eureka Mignon Libra
-
Eureka Mignon Libra User Manual
-
Rocket Boxer Setup Guide
-
Rocket Boxer Timer User Manual
-
Baratza Encore ESP Setup Guide
-
Baratza Encore ESP User Manual
-
Fellow Opus User Manual
-
Fellow Opus Setup Guide
Repackaging the Profitec Pro 500
Below you will find instructions for repackaging the Profitec Pro 500 Espresso Machine.
Before putting the machine away, follow our draining instructions which can be found here: Profitec Pro 500 Boiler Draining Instructions.
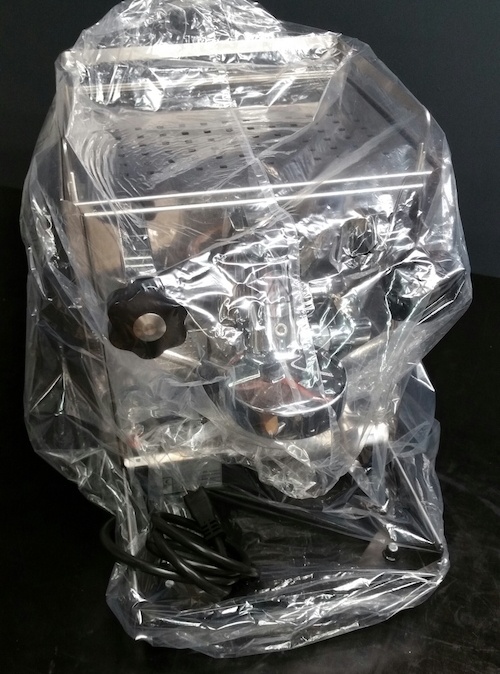
1. Place the bag over the machine, wrap the cord up and place it where the drip tray was on the outside of the bag to prevent it from scratching the face of the machine.

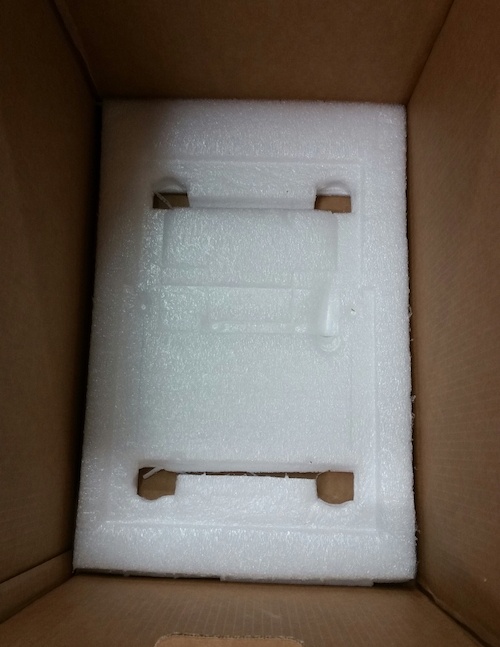
2. Check out the bottom padding, you will need to put the feet in the 4 holes at the bottom of the box when you set it in place.

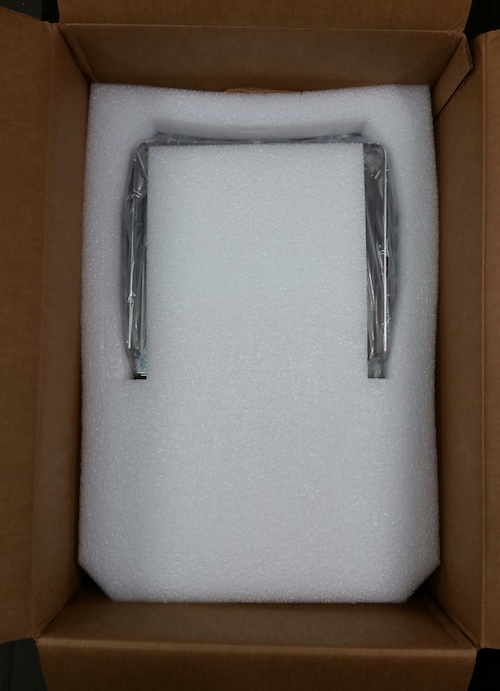
3. Once the machine is in the box, place the protective outer foam around it, going around the backside of the machine. If you have extra padding, place it underneath the grouphead to keep the cord from moving.

4. Put the top padding on the machine, with the cup rail following along with the slot in the padding.

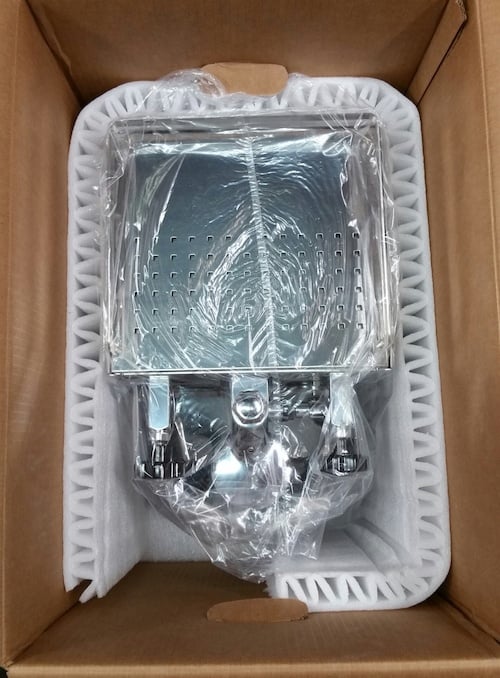
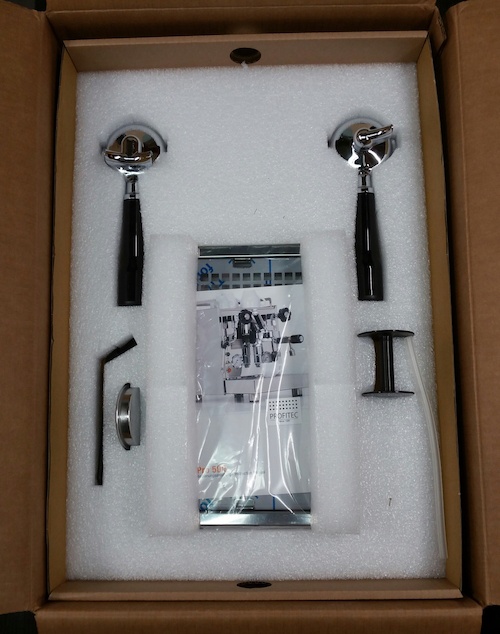
5. Put the top accessory box in, making sure everything is in place like in the photo - drip tray included. This is especially important that the drip tray does not get left on the machine as it will cause damage in shipping.

6. Place the machine box inside a larger outer box with padding on each side, top and bottom to ensure it is protected. Clive uses a 24"x24"x24" outer box when shipping the Pro 500.