- Help Center
- Profitec Pro 300
- General Maintenance
-
Getting Started
-
Espresso 101
-
Warranty, Ordering & Returns
-
Like New & Trade-In Program
-
General Troubleshooting
-
LUCCA A53 Direct Plumb
-
LUCCA A53 Mini/Mini Vivaldi
-
LUCCA M58 by Quick Mill
-
LUCCA X58 by Quick Mill
-
LUCCA Accessories
-
LUCCA S58 by Profitec
-
La Marzocco Linea Mini
-
La Marzocco GS3
-
Lelit Mara X
-
Lelit Bianca
-
Lelit Elizabeth
-
Lelit Victoria
-
ECM Synchronika
-
ECM Special Edition Classika PID
-
ECM Mechanika V Slim
-
ECM Mechanika VI Slim
-
ECM Casa V
-
ECM Puristika
-
Profitec GO
-
Profitec Pro 300
-
Profitec Pro 400
-
Profitec Pro 500
-
Profitec Pro 600
-
Profitec Pro 700
-
Profitec Pro 800
-
Profitec Drive
-
Rocket Appartamento
-
Rocket R58 / Cinquantotto
-
Rocket Giotto
-
Rocket R Nine One
-
Rocket Boxer
-
La Spaziale S2 EK
-
Rancilio Silvia
-
Rancilio Silvia Pro
-
Rancilio Silvia Pro X
-
Sanremo YOU
-
Ascaso Steel DUO
-
Breville Barista Pro
-
Breville Oracle Touch
-
Flair Classic Espresso Maker
-
Flair 58 Pro 2
-
Flair 58 Plus Espresso Maker
-
LUCCA Grinders
-
Baratza Grinders
-
Eureka Grinders
-
ECM Grinders
-
Fellow Grinders
-
Fellow Tally Precision Scale
-
Mahlkönig Grinders
-
DF64 Grinder
-
Quick Mill
-
Izzo Alex Duetto
-
Bezzera BZ10
-
Bezzera Duo DE
-
Bezzera Duo MN
-
Dalla Corte Mina
-
Compak Grinders
-
Dalla Corte Grinders
-
Profitec Grinders
-
Breville Grinders
-
Macap Grinders
-
Fiorenzato Grinders
-
Slayer
-
Eureka Mignon Zero
Profitec Pro 300: Cleaning the Check Valve
Below you will find instructions for cleaning the check valve on the Profitec Pro 300 Espresso Machine.
Tools Needed:
- 14mm Wrench
- 15mm Wrench
- 17mm Wrench
- Adjustable Wrench
- 2.5mm Allen Wrench
- 3mm Allen Wrench
1. Remove the panels of the machine: Pro 300 Panel Removal
2. Remove the hose and 14mm fitting from the flow path.
![Profitec Pro 300: Cleaning the Check Valve](https://support.clivecoffee.com/hubfs/Screenshot_2018-05-17-16-07-01-1.jpg)
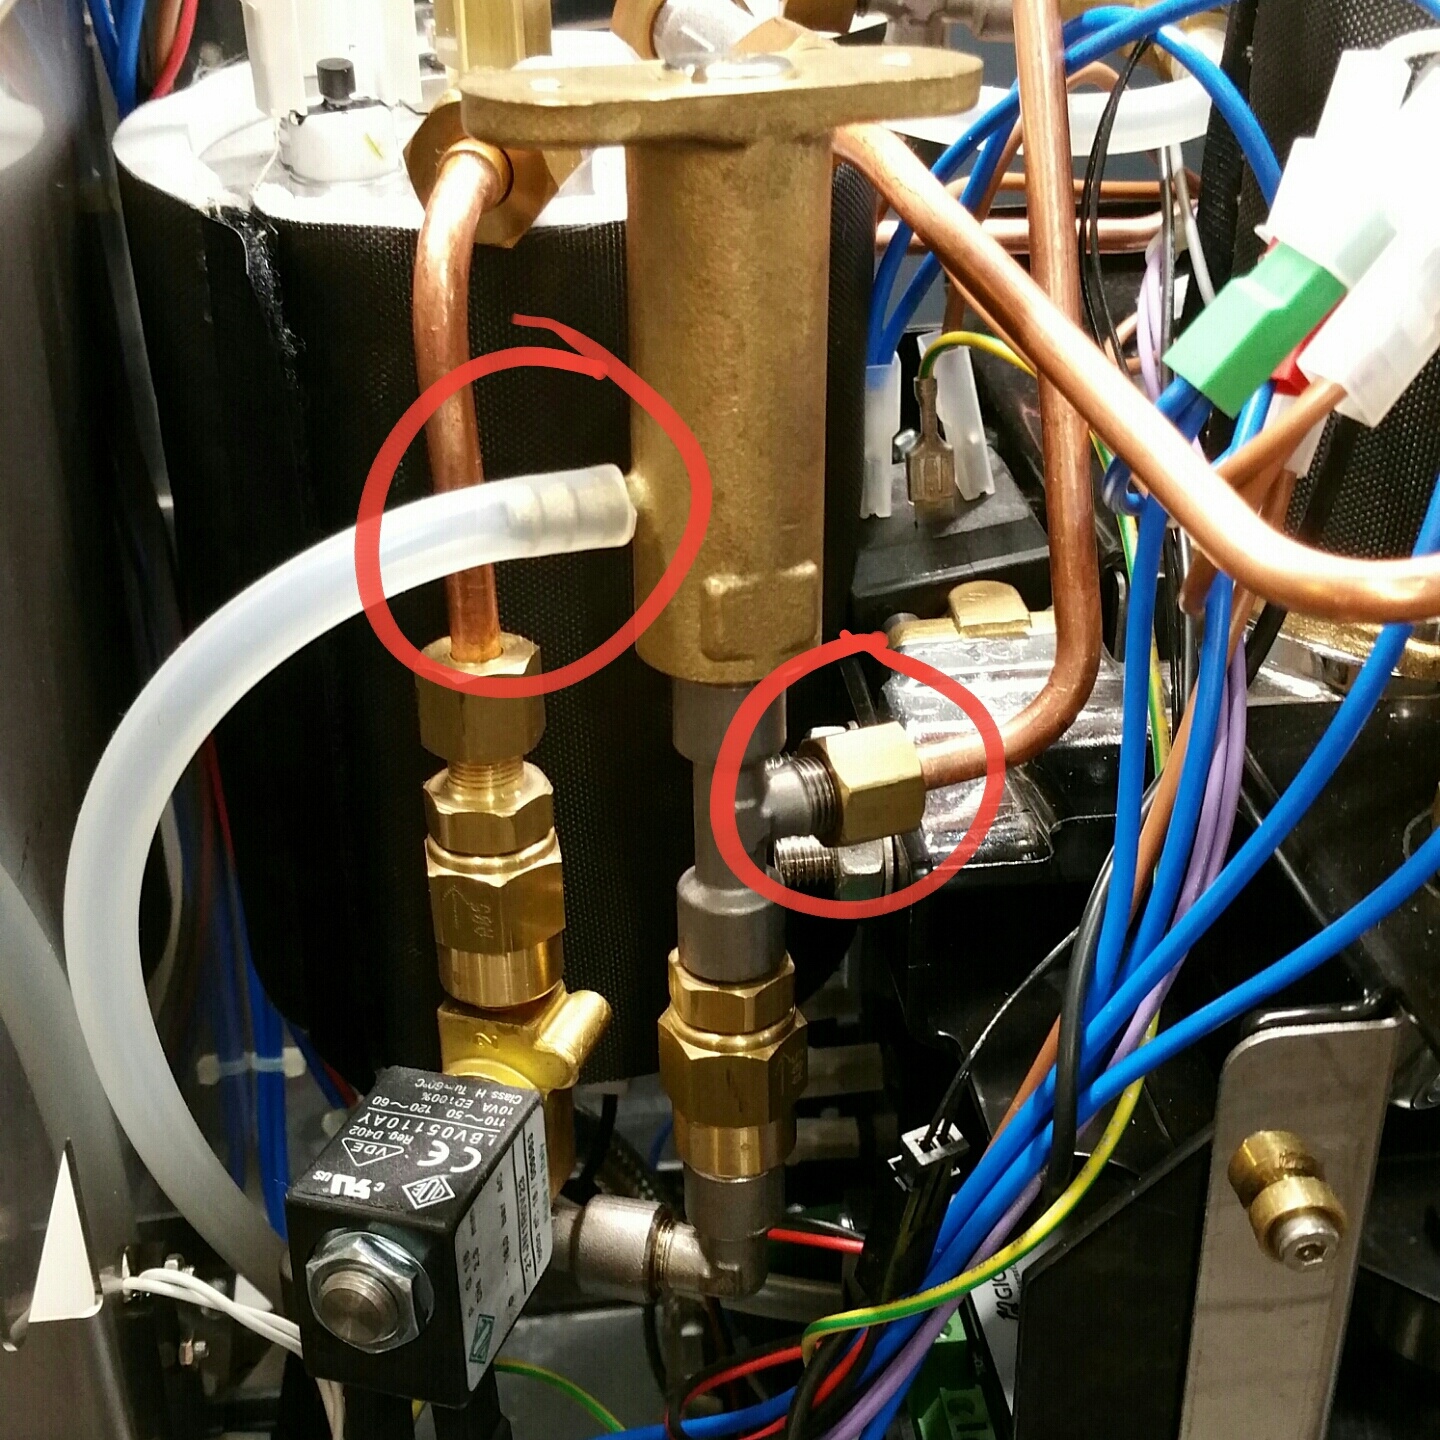
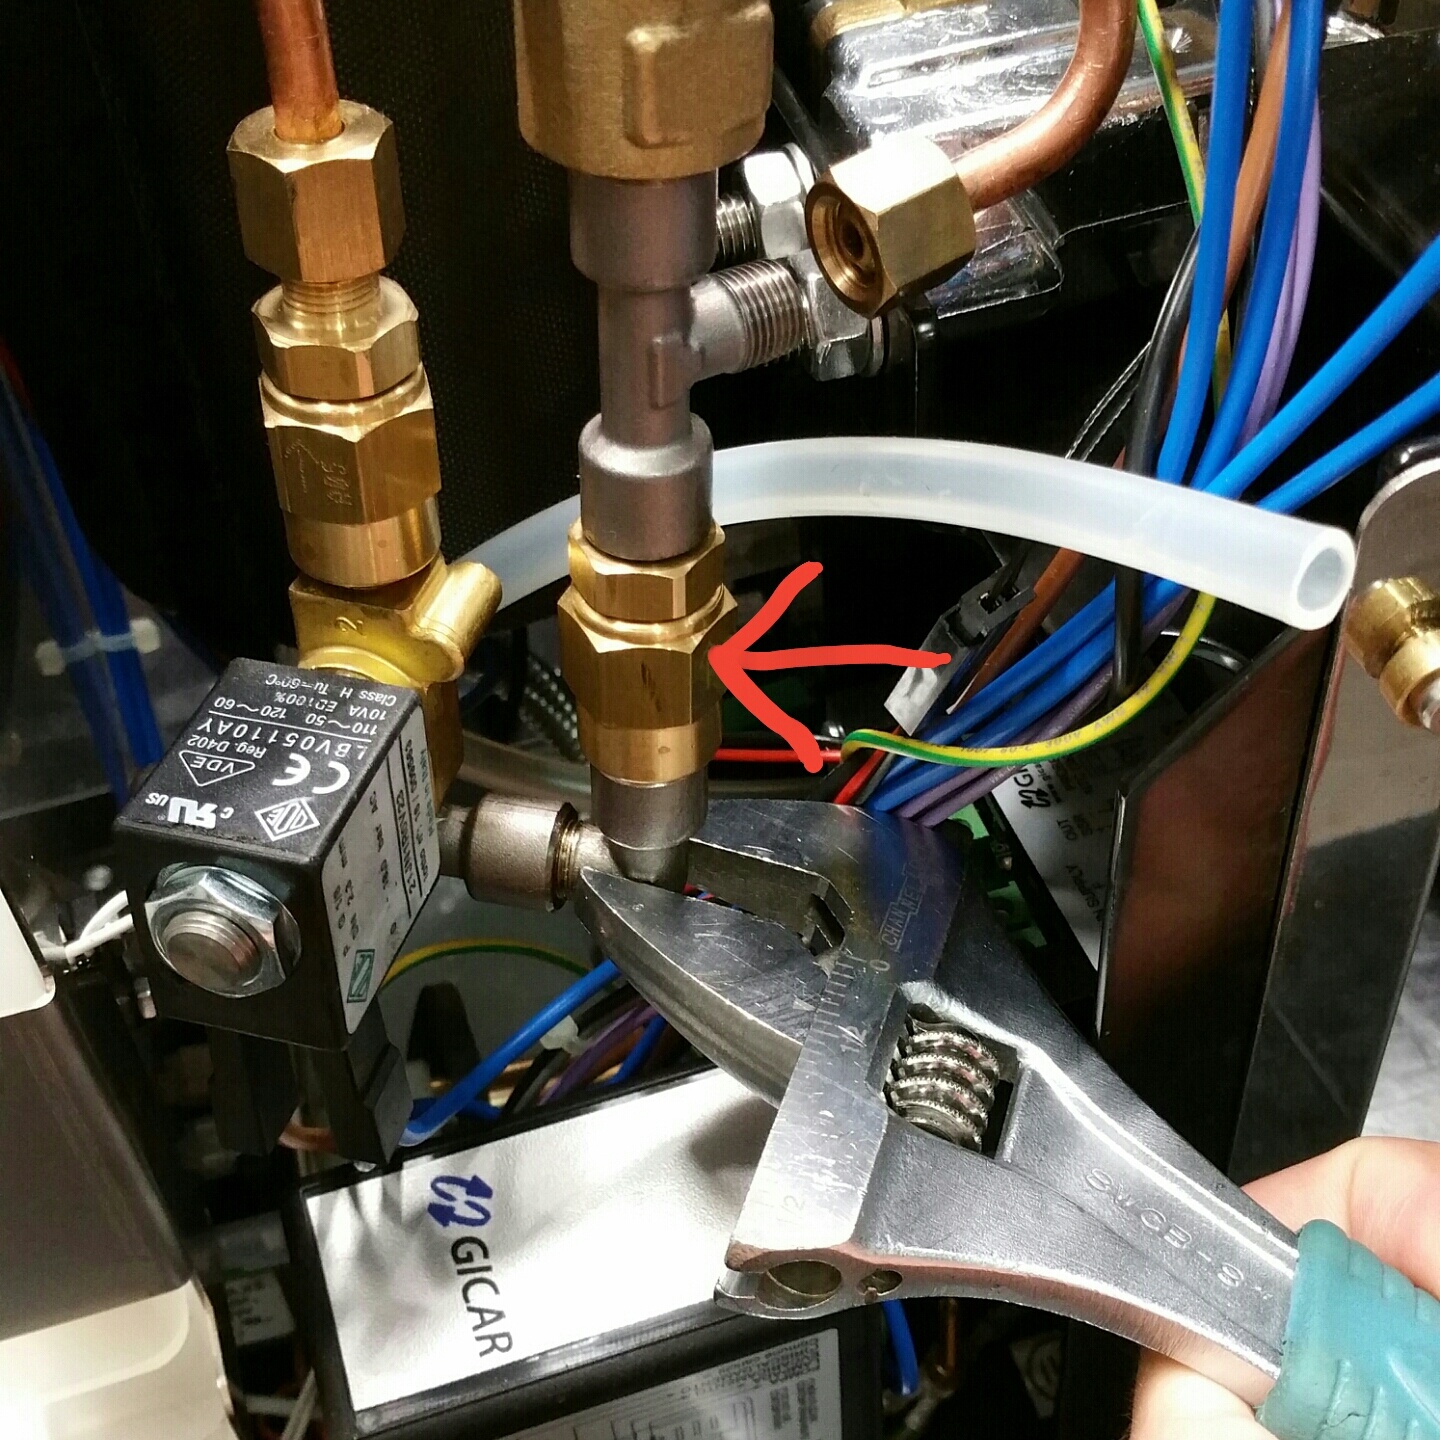
3. Hold the elbow fitting below the check valve with the adjustable wrench and use the 17mm wrench to remove the entire top portion of the flow path.
![Profitec Pro 300: Cleaning the Check Valve](https://support.clivecoffee.com/hubfs/Screenshot_2018-05-17-16-06-18-1.jpg)
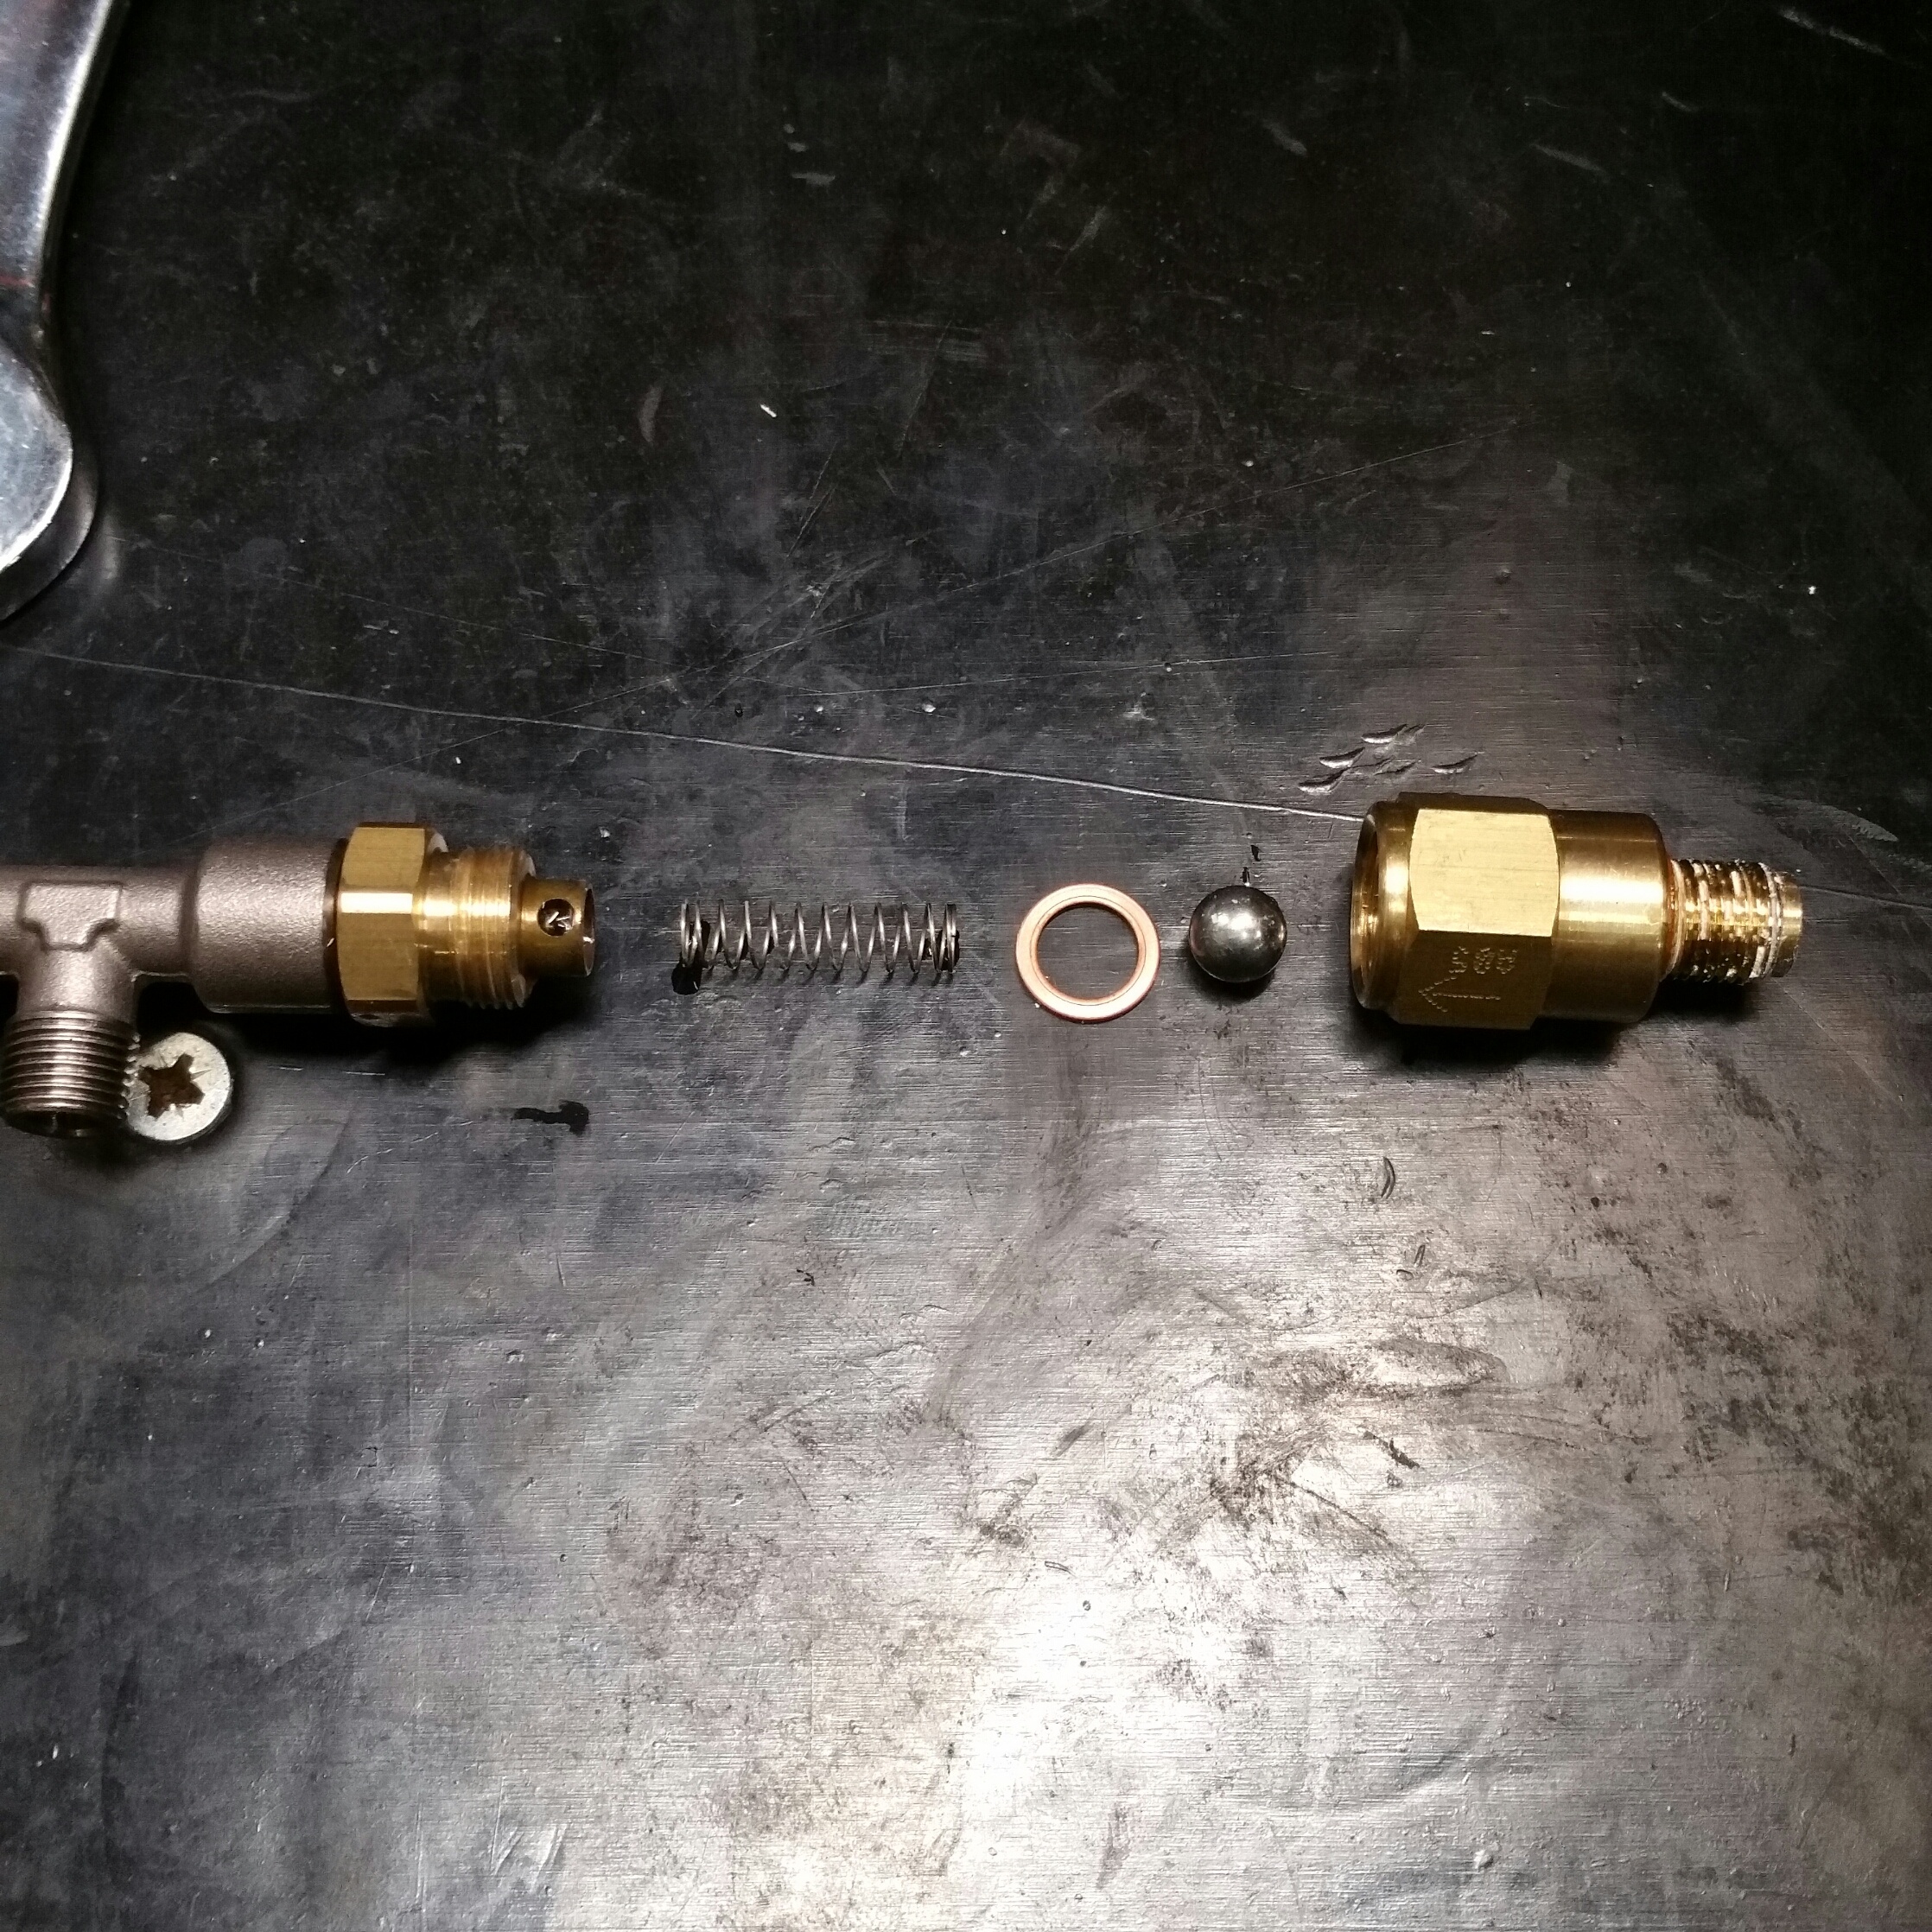
4. Separate the 2 pieces of the check valve with the 17mm and 15mm wrenches.
![Profitec Pro 300: Cleaning the Check Valve](https://support.clivecoffee.com/hubfs/Screenshot_2018-05-17-16-05-54-1.jpg)
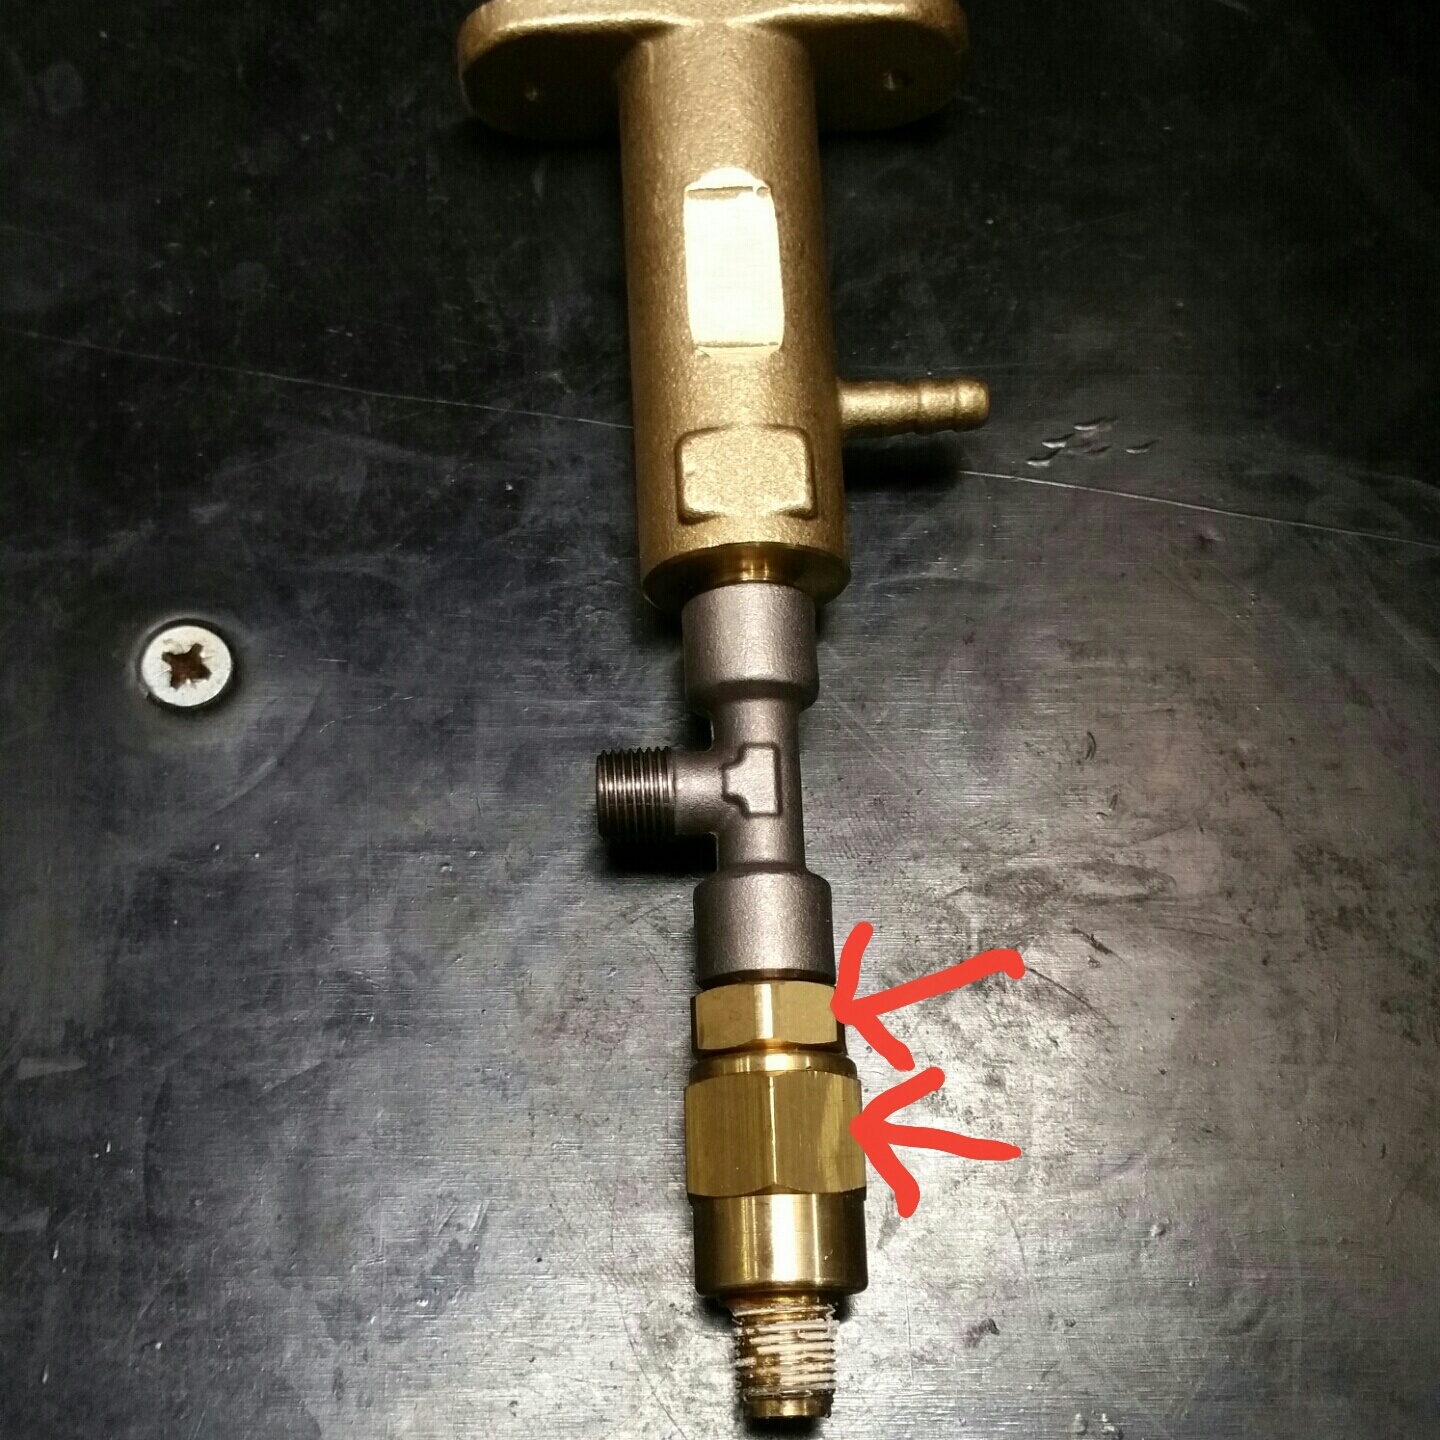
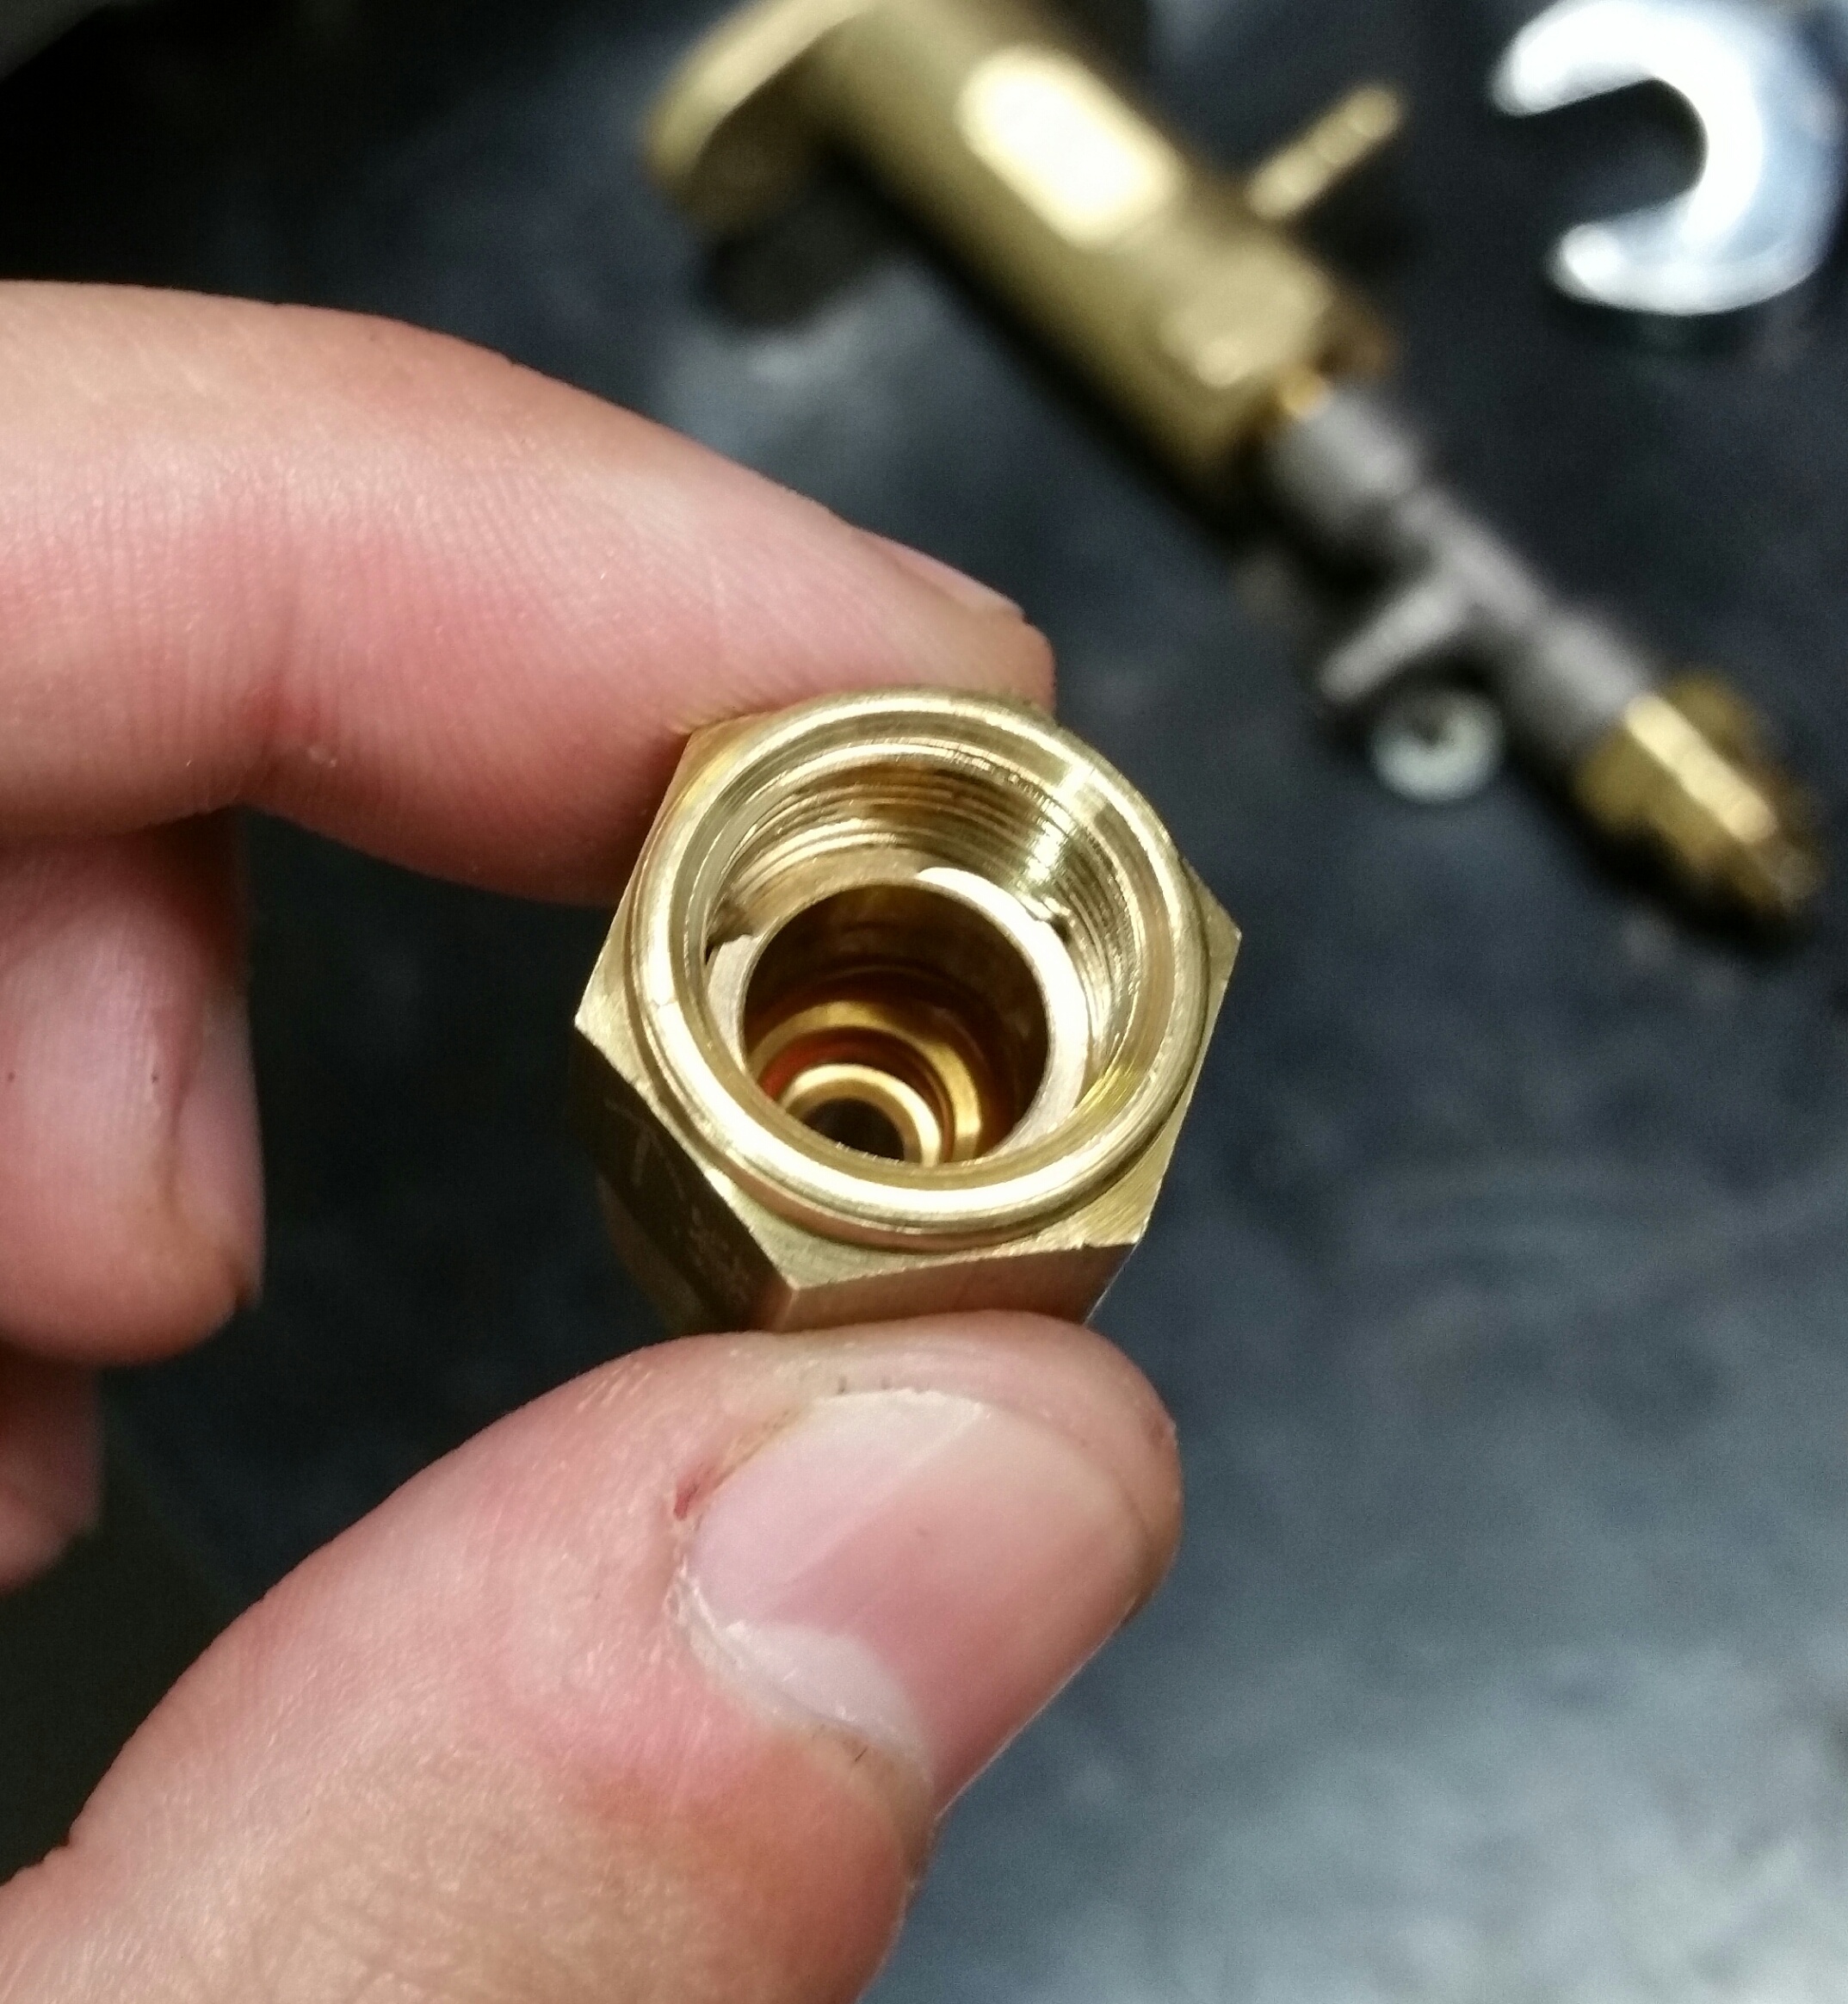
5. Ensure that all the pieces of the check valve are clean of any debris, along with the gasket at the bottom of the check valve.
![Profitec Pro 300: Cleaning the Check Valve](https://support.clivecoffee.com/hubfs/20180517_155421-1.jpg)
![Profitec Pro 300: Cleaning the Check Valve](https://support.clivecoffee.com/hubfs/20180517_155504-1.jpg)