One of the biggest pain points in learning how to be a home barista is dialing in a grinder for the first time. We have lots of videos and articles to help guide you through this process, but even for the best instruction followers, it can be daunting. Not only is it a steep learning curve, but also you are usually learning with expensive coffee. Check out the information below.
Plan to invest a full bag of freshly roasted coffee learning how to dial in your grinder, but the goal of this post is to minimize waste and simplify the learning process. Also, keep in mind that your grinder should perform better after you’ve ground a few pounds of coffee through it (this is called seasoning the burrs).
Also, don't forget to take a look at our growing library of grinder specific setup and dial-in videos. If you don't see your grinder in the video library, the following guide will provide all the necessary steps to get your grinder ready and your coffee tasting amazing.
Step 1: Out of the box and onto the counter
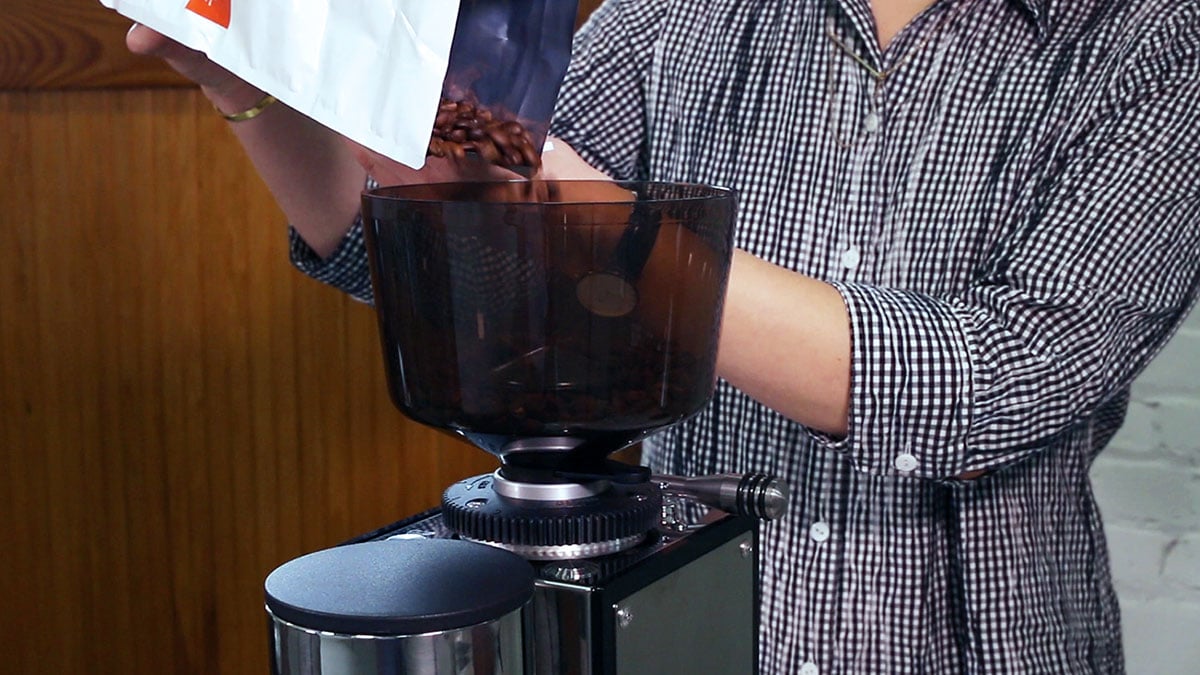
- Make sure your grinder is stable on a level surface.
- Install the hopper, open the hopper throat, pour in a bag of your favorite whole bean coffee, and turn the grinder on using the on/off switch.
Step 2: Feeling the coffee
- For this step, set your grinder to a manual or continuous setting, instead of a timed or weight based setting. This will help you avoid wasting coffee. If you have any questions about changing the setting on your grinder, check our video resources for your specific grinder or contact us!
- Grind a small amount of coffee. If no coffee comes out, gradually adjust your grinder to be more coarse until a steady flow of coffee is coming from the grinder.
- Important note: many grinders are shipped at a setting that is much more fine or coarse than you will need to make espresso. This means it may require several large adjustments before you near the ideal grind size and texture.
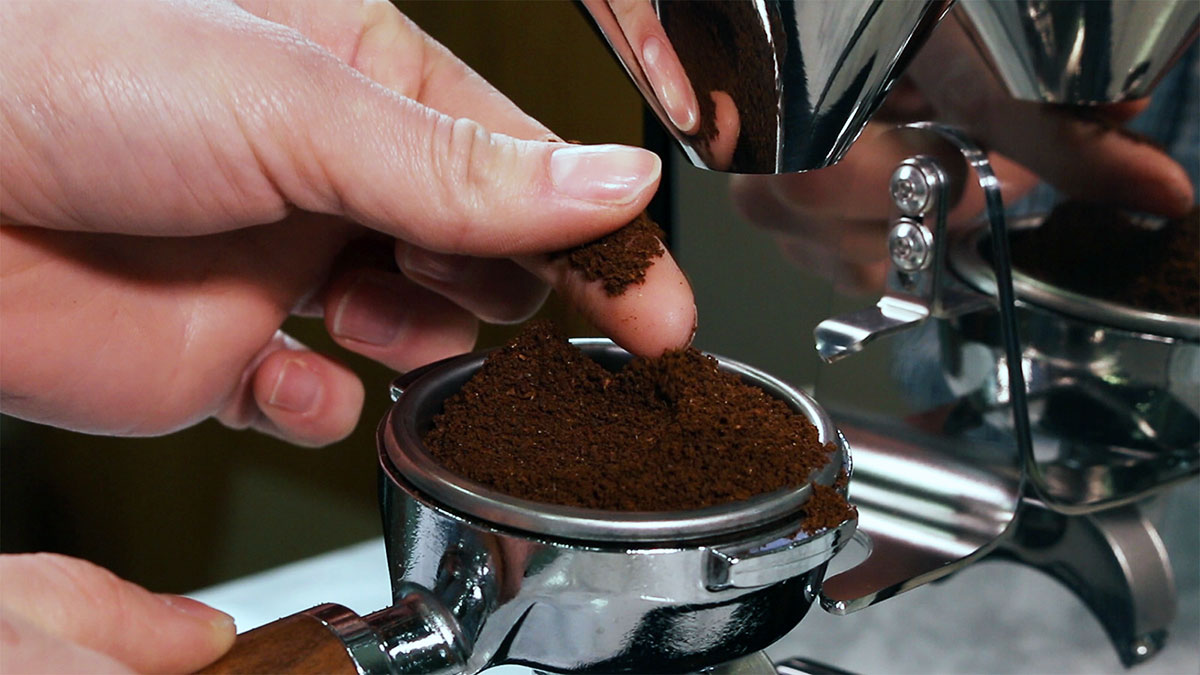
- Get your hands dirty–feel the ground coffee. Ideally, we’re looking for a texture that falls between table salt and flour.
- If the coffee looks and feels very coarse like cornmeal, you’ll have to adjust the grind finer. When the grind is set too coarse, the water will gush out of the machine when you’re pulling a shot.
If the coffee looks and feels overly fine like powdered sugar, you’ll have to adjust the grind coarser. When the grind is set too fine, the machine will be unable to push the hot water through the coffee.
Specific Grinder Recommended Settings
- For Macap grinders, adjusting course means the top collar with number indicators needs to rotate clockwise. Look for the word “grosso” to be rotating to the left.
- For Profitec grinders, the top collar needs to rotate counter-clockwise (note the arrows that point right for course, left for fine).
- For Eureka grinders, rotate the micrometric knob counter-clockwise towards “grosso”
- For Fiorenzato and Mazzer grinders, rotate the top collar clockwise towards “grosso”
- For Baratza Vario or Forte AP, the macro setting on the right should be set at 2, and adjusting courser means the left side micro adjust goes down.
- For Breville Smart Grinder, course means the grind indicator should move to the left and the numbers increase.
- For Breville Dose Control, course means the collar should rotate clockwise with the numbers increasing.
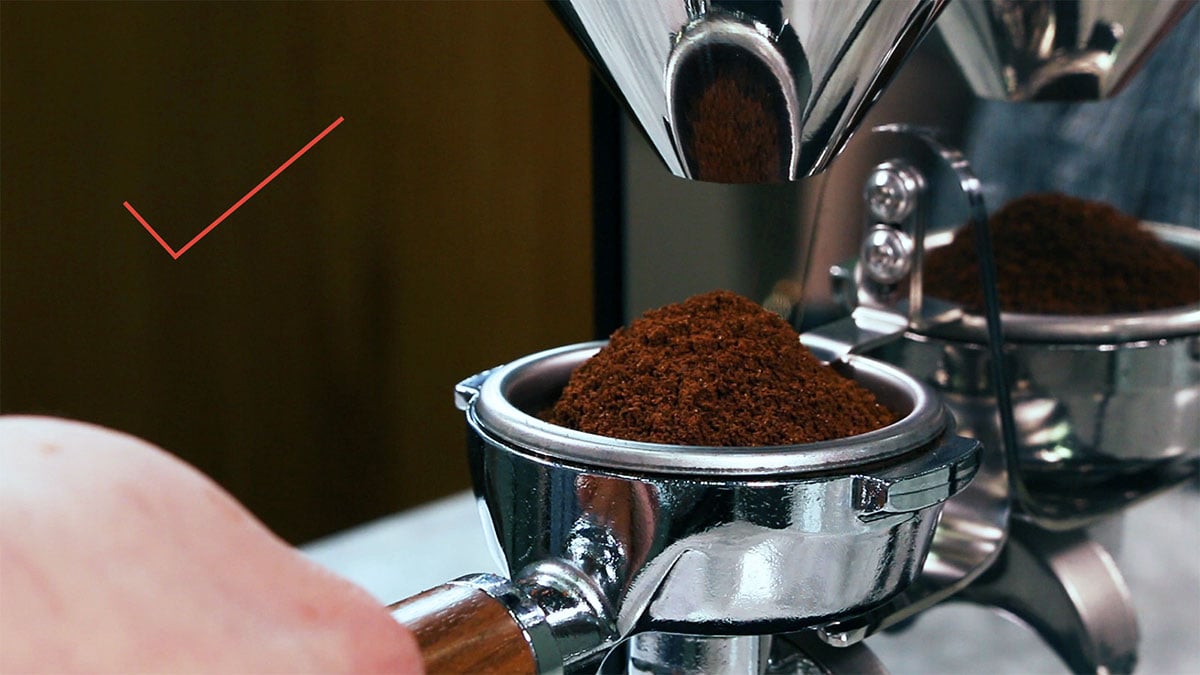
Step 3: Nailing the dose
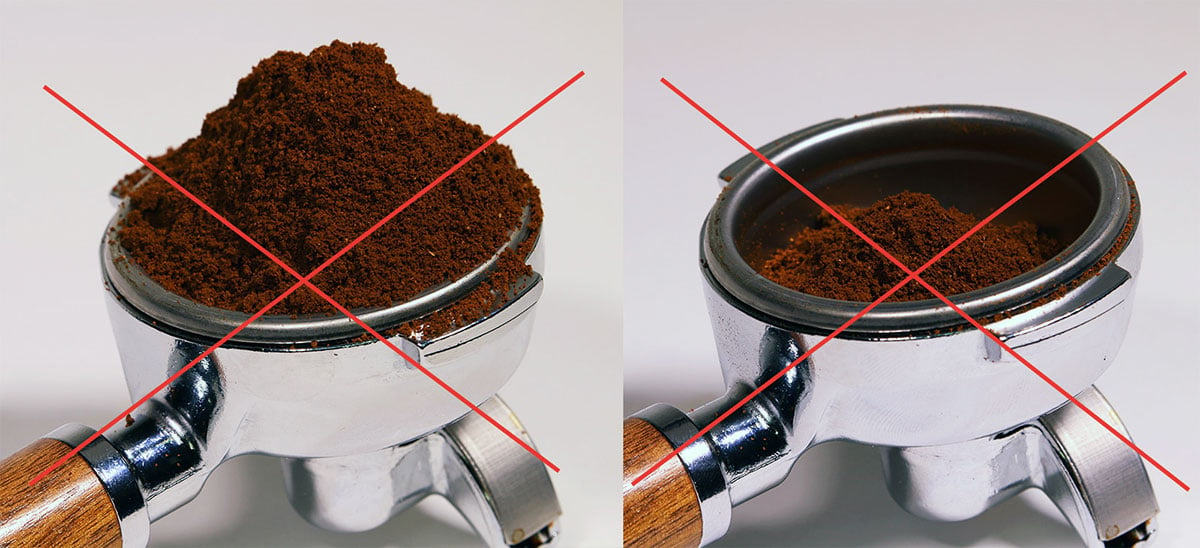
- Now grind a full dose that matches your basket size (14-18 grams for a double; 18-22 grams for a triple). The goal is to fill your basket with the recommended amount of ground coffee
- If the ground coffee is overflowing out of your basket, adjust your grind setting finer.
- If there is barely any ground coffee in your basket, adjust the grind setting coarser.
- These adjustments should be slightly less large than the ones from the previous step. Think one to two full steps on a stepped grinder, or one to two full turns on a worm drive.
Step 4: First adjustments – drop time
- Remember, your first few shots will likely need a fair amount of adjusting. These adjustments should be even more slight than Step 3.
- Grind a fresh, full dose of coffee into your basket. Compress the coffee with your tamper, taking care to make sure the tamp is level and you are applying even pressure.
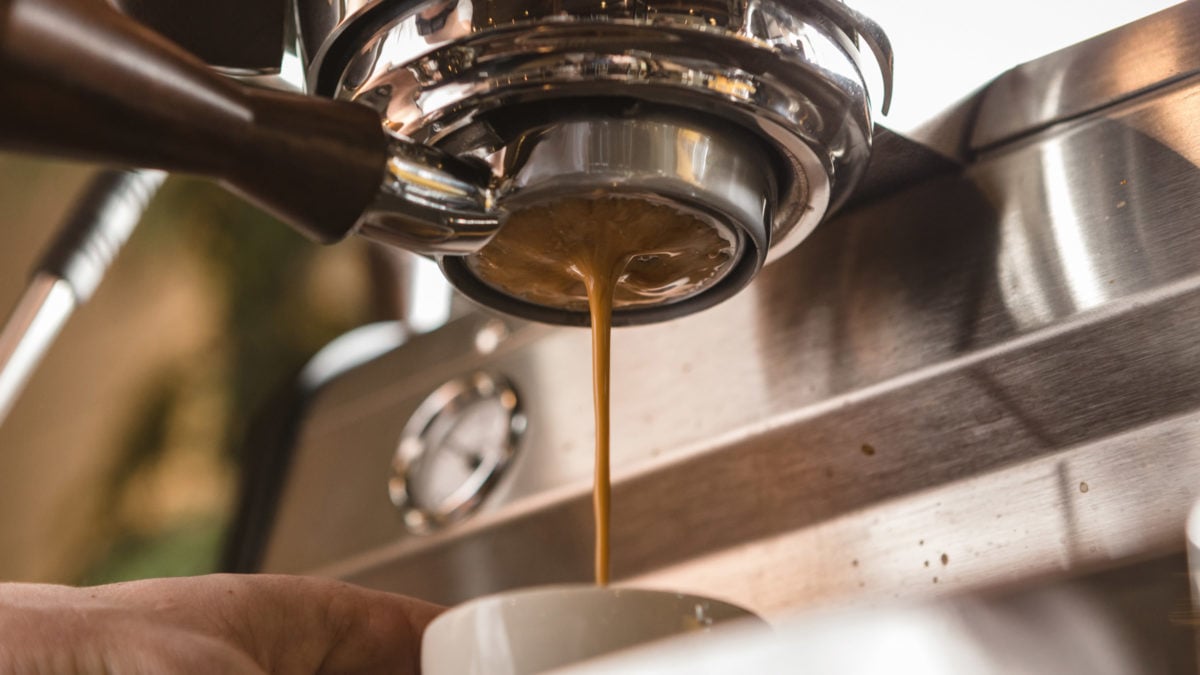
- Insert your portafilter and start your machine. We will be watching for the time of the first drips of espresso. We recommend either setting a timer or watching the display screen on your espresso machine.
We’re looking for the first few drops of espresso to drop between 6-10 seconds. If they fall outside of the window, you’ll have to adjust the grind setting. - If the shots start dripping before 6 seconds, the final espresso will likely taste sour and watery. Adjust your grind setting finer.
- If the shots start dripping after 10 seconds, the final espresso will likely taste overly strong and bitter.
- Adjust your grind setting coarser until the first drops fall in the ideal 6-10 second window.
Step 5: Next adjustments – total shot time
- Prepare your shot – grind a fresh, full dose; tamp evenly with consistent pressure.
- Insert your portafilter and start your shot. This time, we are going to be watching for the full shot time.
- Ideally, we’re looking for a shot time between 25-30 seconds. If your shot falls outside of this window, you’ll have to adjust your grind setting.
- If the shots take less than 25 seconds, the espresso will likely taste sour or thin. Adjust the grind finer.
- If the shot takes more than 30 seconds, the espresso will likely taste bitter or overly strong. Adjust your grind setting coarser.
- These adjustments should be similar to the previous steps. Think more gradual, small changes.
Step 6: Fine-tuning: adjusting for flavor
- It’s finally time to start tasting your espressos. Prepare and pull a fresh shot of espresso and taste. If it isn’t to your liking, you’ll have to make some small adjustments.
- At this step, try to make small, gradual changes instead of large shifts. Making smaller changes at this step will help you hone the flavors instead of leaving you to chase drastically different variables.
- If you want your espresso to have more body, try increasing the amount of ground coffee by increasing the time on your grinder. Alternatively, you can adjust your grind setting a little finer.
- If you want your espresso to be less sour, try adjusting your grind size finer. For a more dramatic change, you can use a little less coffee by adjusting your timer down.
- If you want your espresso to be less bitter or astringent, try adjusting your grind size coarser. Again, you may use more coffee instead, but this will make a significant change to the flavor and flow of your espresso.
- If your espresso tastes balanced, sweet and full-bodied, your grinder is dialed-in and ready to go!
Now you're ready to start pulling shots! Check out our Espresso 101 section to learn about steaming milk, latte art, our suggested starter espresso recipe, and much more!