Use the following steps to remove panels from your ECM Classika. Make sure your machine is unplugged and cool before attempting.
Tools needed:
- 3mm allen key
- 2.5mm allen key
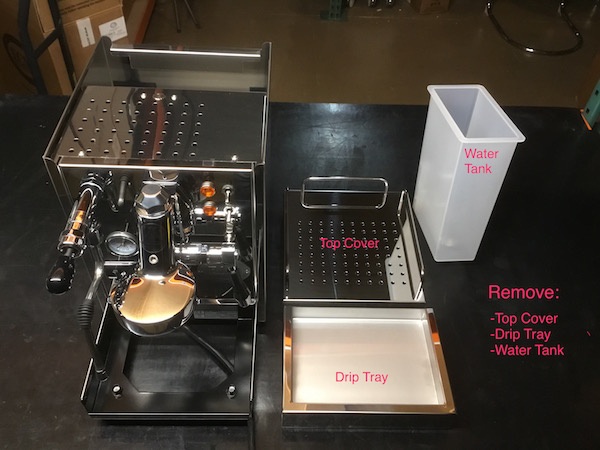
Start by removing the top cover, drip tray, and water tank.
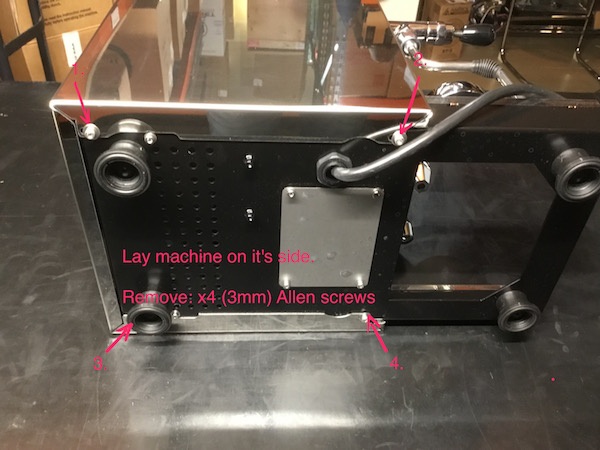
Next, lay the machine gently on its side. If need be lay it on a towel to avoid scratching the panels. Remove all four 3mm allen screws as outlined below.
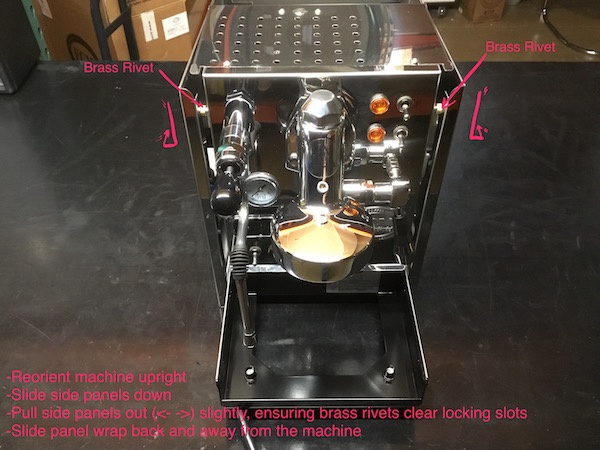
Carefully tip machine upward to rest on its feet. The panels should be loose, slide them down 1/2 inch or so. You should notice two brass pins or rivets attached to the side panels. Gently flex the side panels outward ensuring the brass rivets clear their locking slots. While maintaining a slight outward flex, slide the panel wrap back and away from the machine.
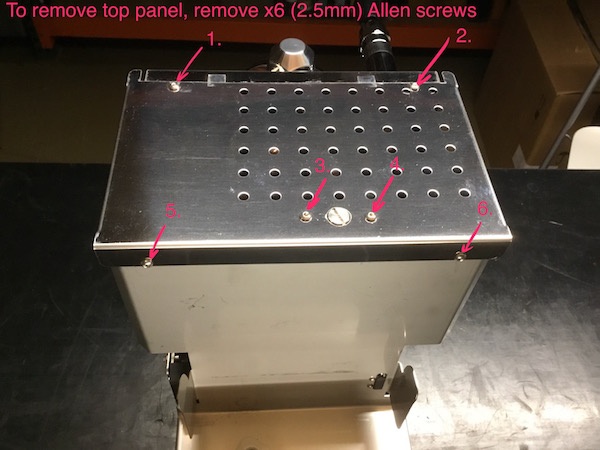
To remove the top panel, remove x6 (2.5mm) allen screws as outlined below. This can be done before or after removing the side panels.
When reinstalling panels do so gently to avoid scratching. Do not forcefully exert brass rivets or allen screws into place, they should go easily.