Before attempting this we recommend allowing the machine to fully cool off, unplugging it, and removing its water source.
Tools needed:
- 3mm Allen wrench
- 13mm or adjustable wrench
- 16mm or adjustable wrench
- Needlenose pliers
- Flathead screwdriver
- Shop towels
- Long tweezers (optional)
- New expansion valve seat (if needed)
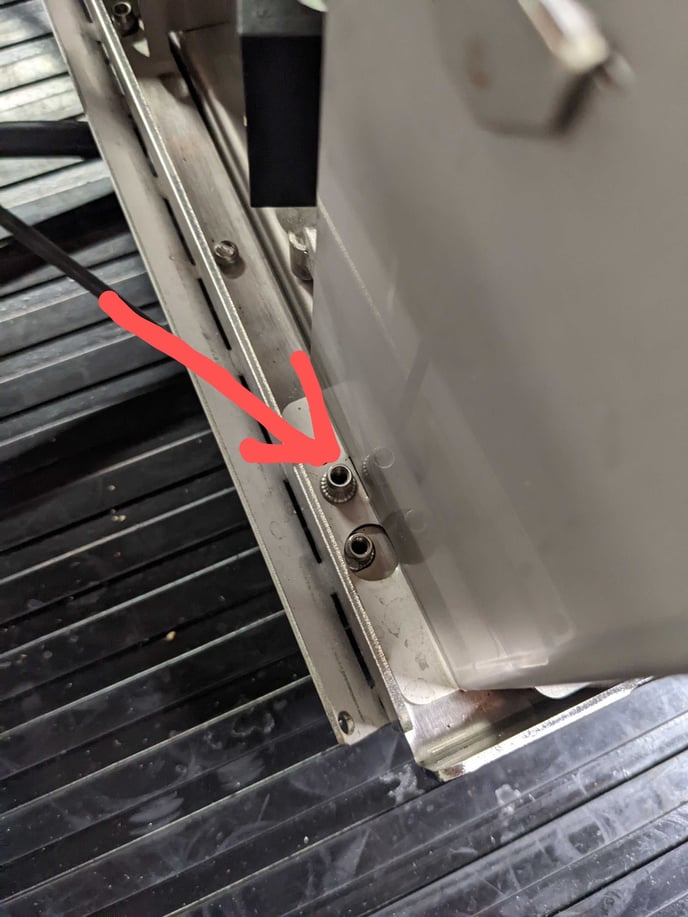
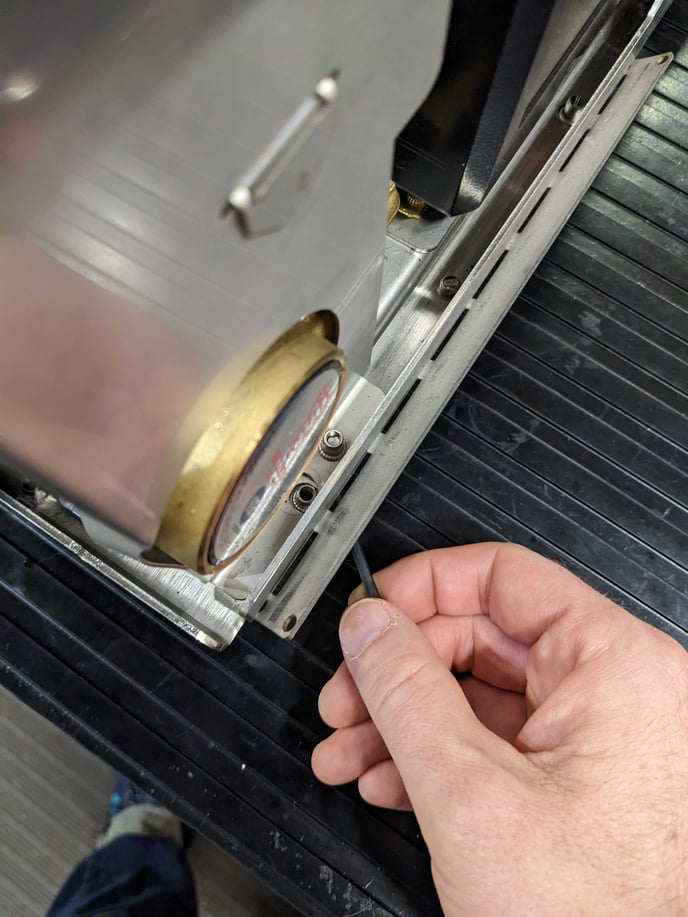
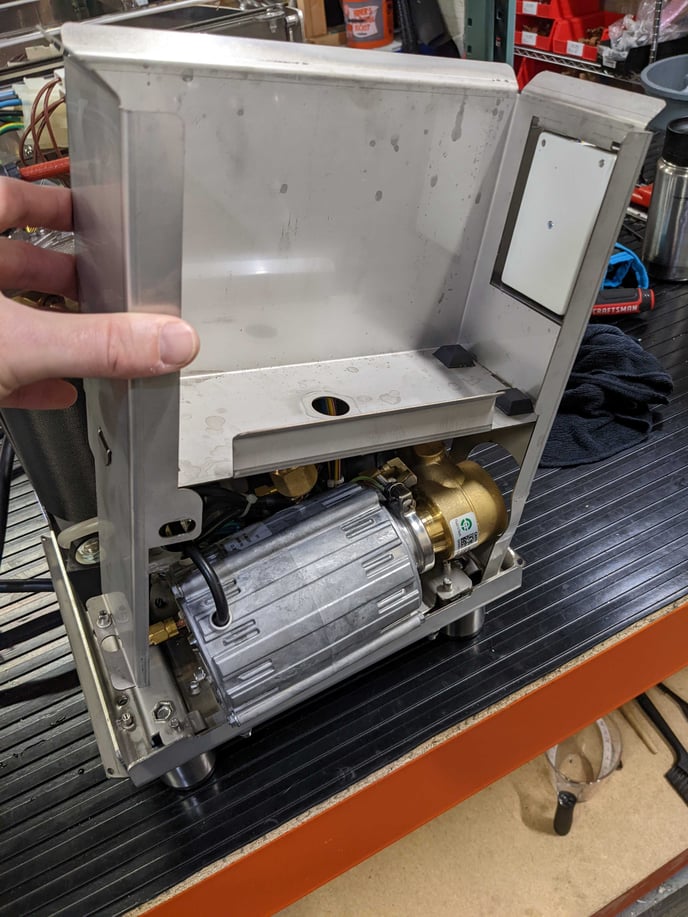
2. Turn the machine so the back is facing you. Locate and remove the mounting screws for the water tank chassis, using a 3mm Allen wrench.
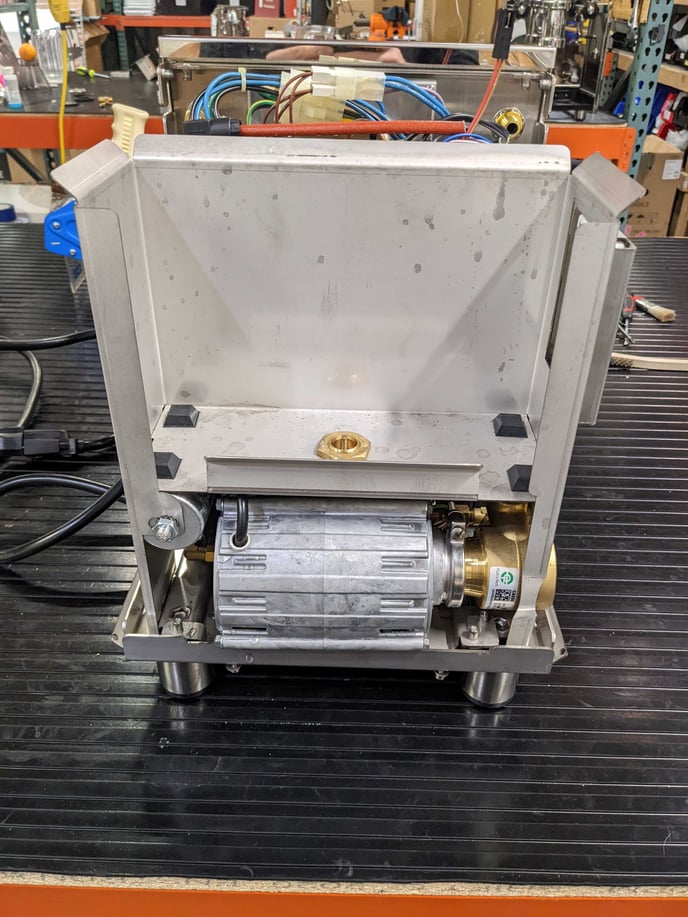
3. Turn the machine so the right side is facing you.
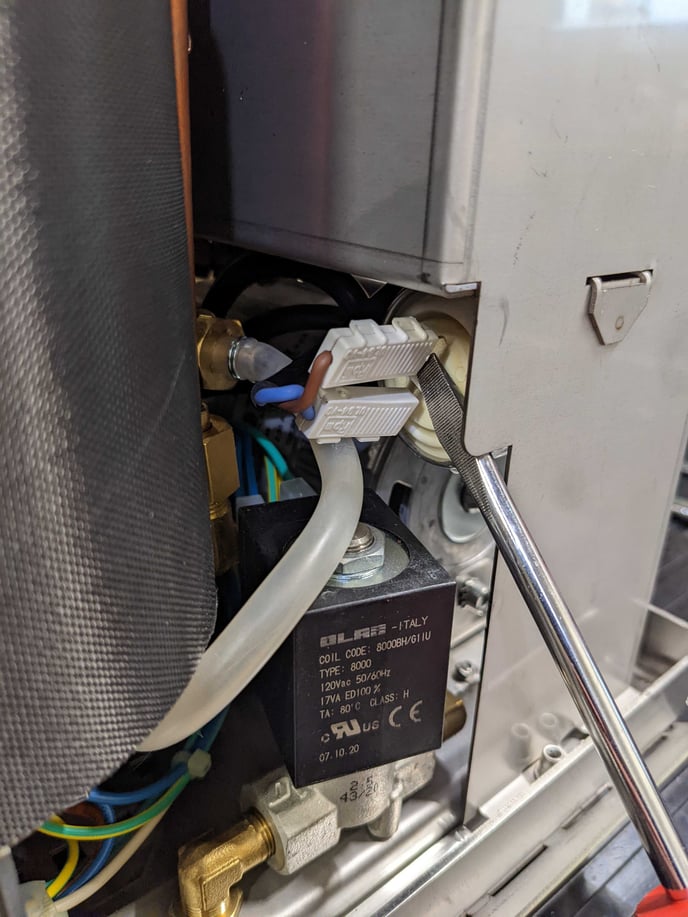
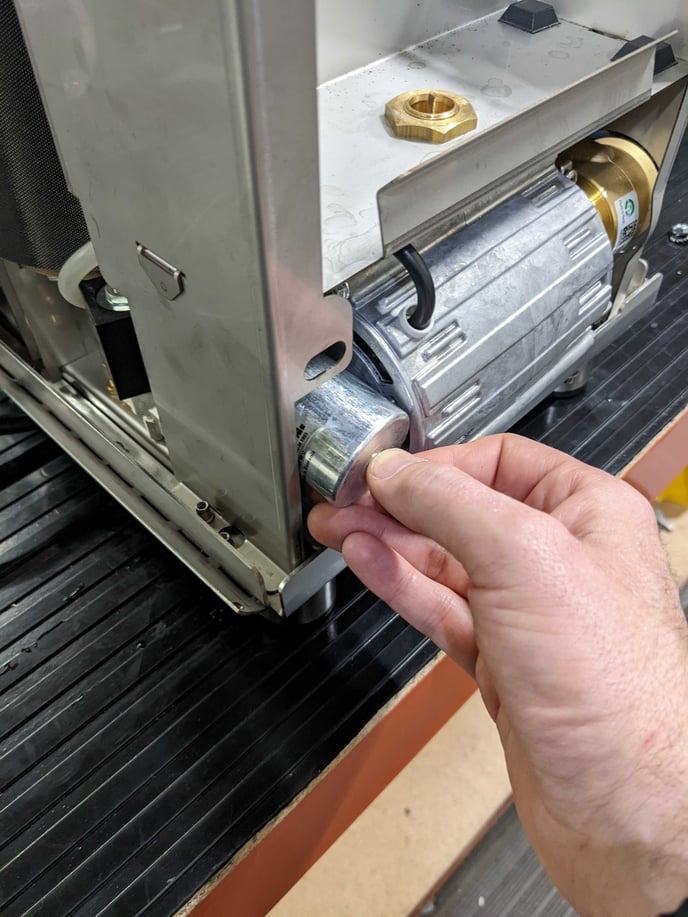
4. Remove the capacitor by first disconnecting push connections from capacitor terminals (using a flathead screwdriver to lightly pry if needed), then remove the mounting nut using a 13mm or adjustable wrench. With the nut removed slide the capacitor backwards, down, then out.
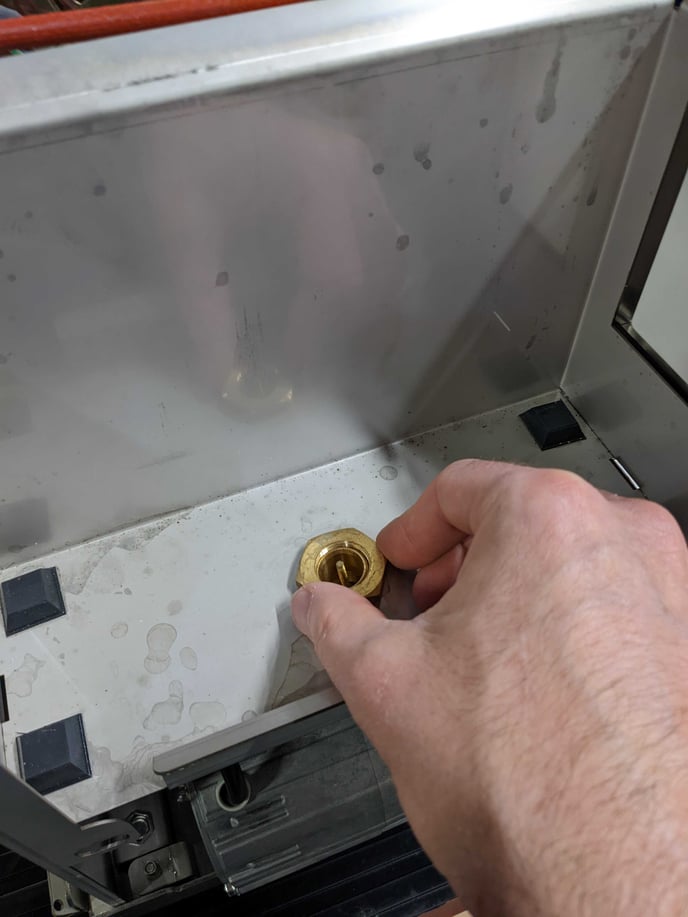
5. Remove the water tank inlet nut. (Using an adjustable wrench if needed)
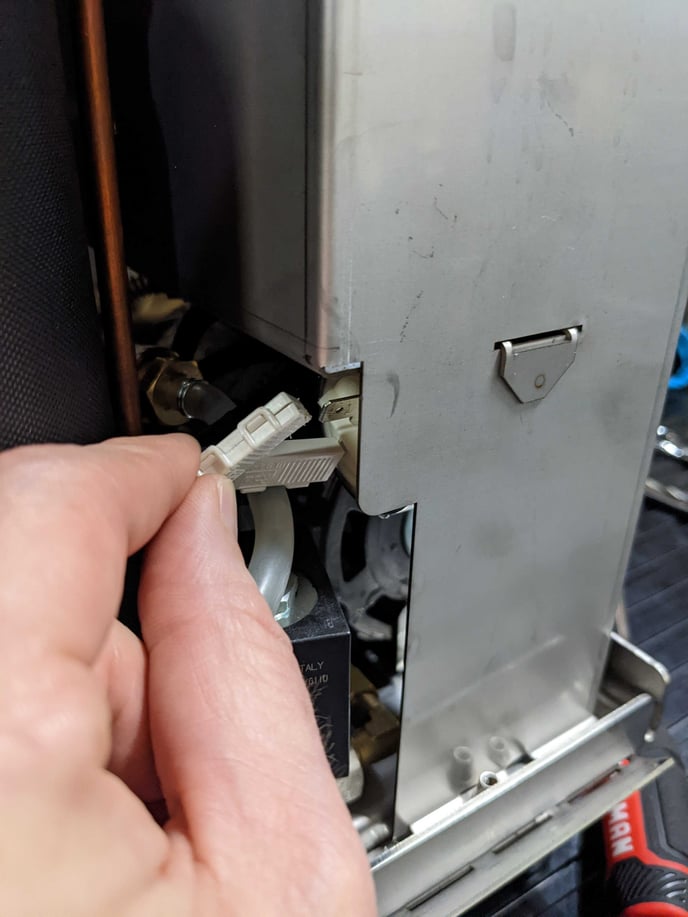
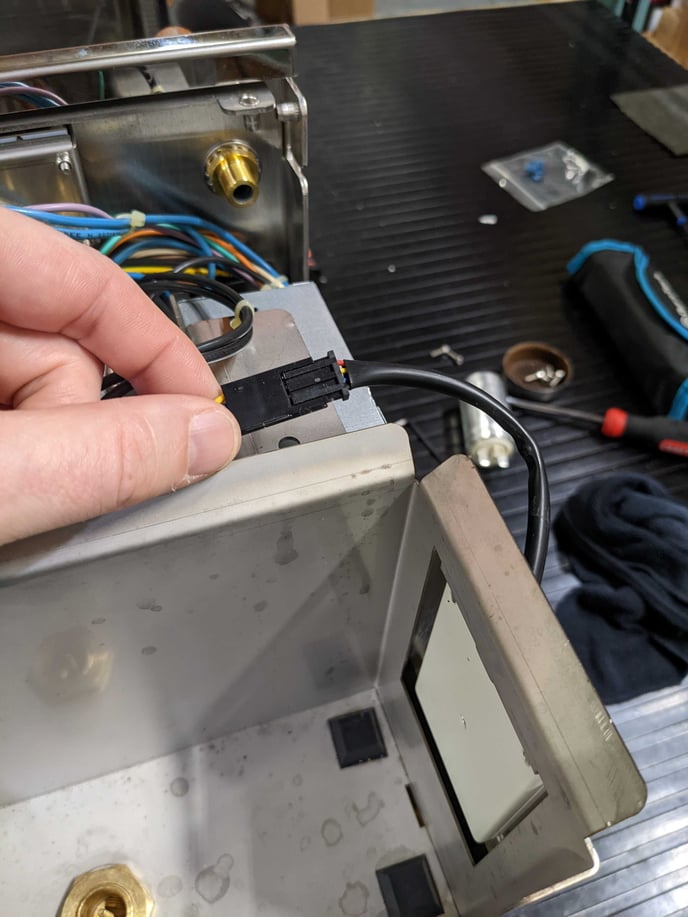
6. Disconnect the water sensor wiring harness, lift the left side of the water tank chassis up, then push slightly to the right and pull up to remove the chassis. Set aside.
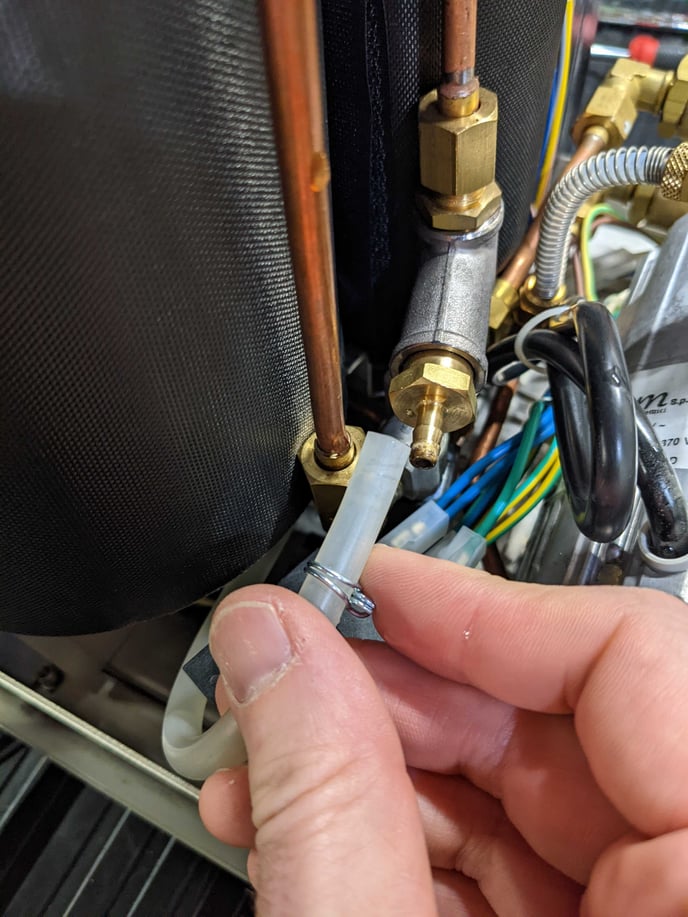
7. Locate the expansion valve. Using needlenose pliers, move the compression collar back, then remove the silicone tube from the expansion valve. Place shop towels below the fitting to catch any water that may be present.

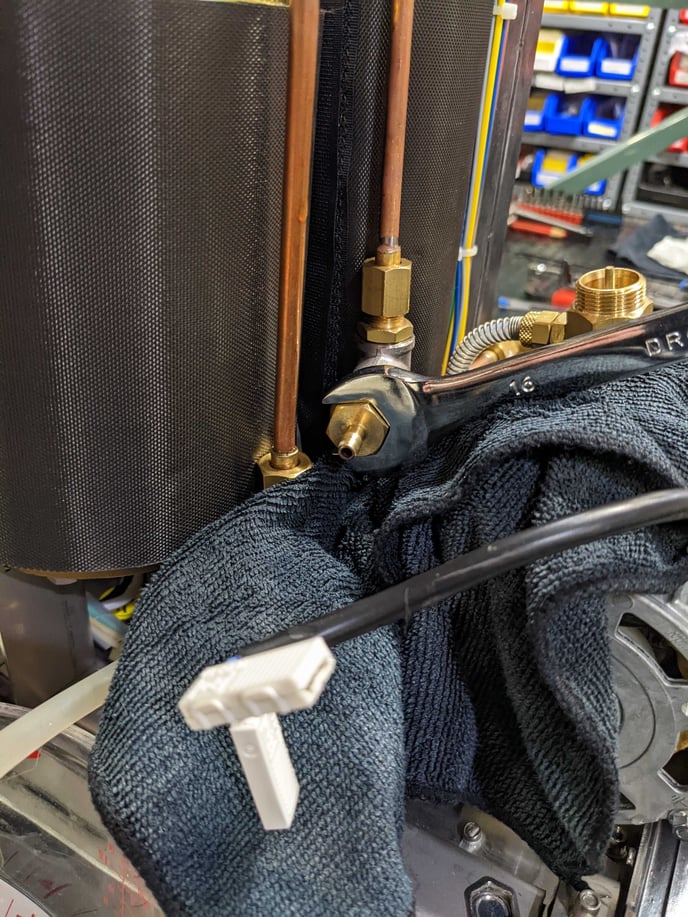
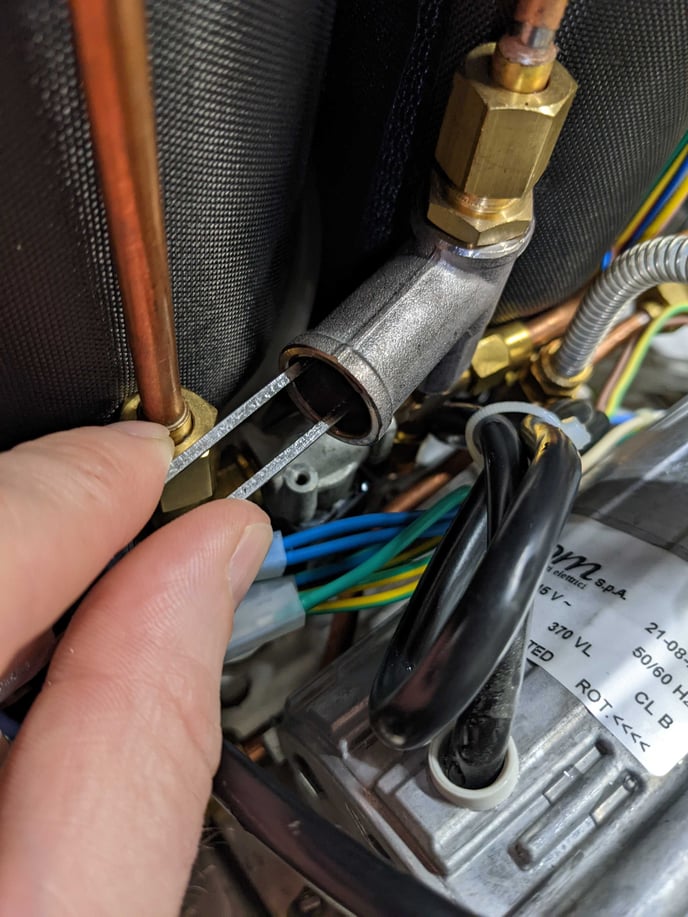
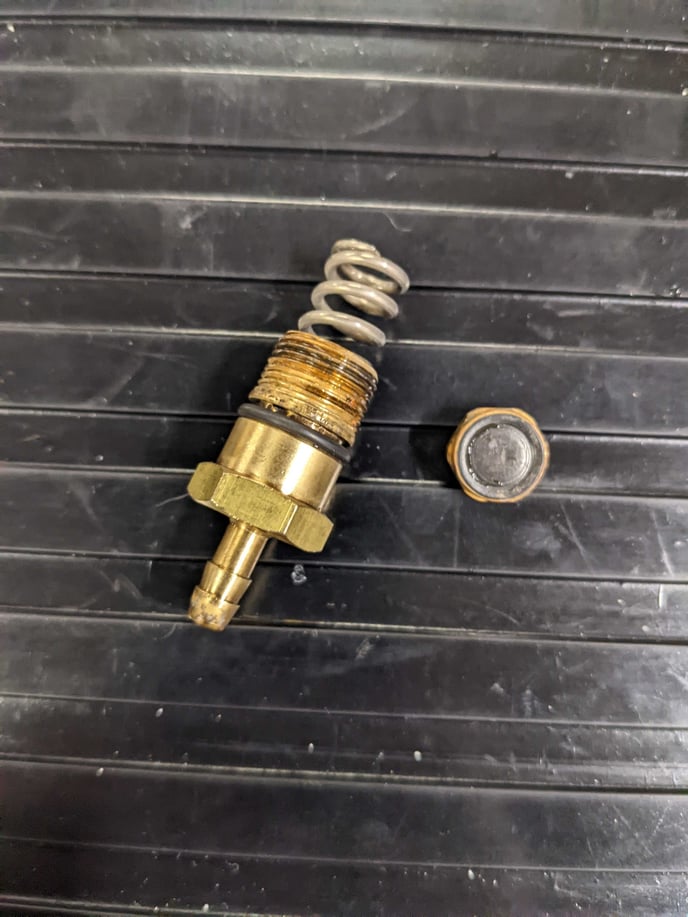
8. Using a 16mm or adjustable wrench unthread and remove the expansion valve and spring.
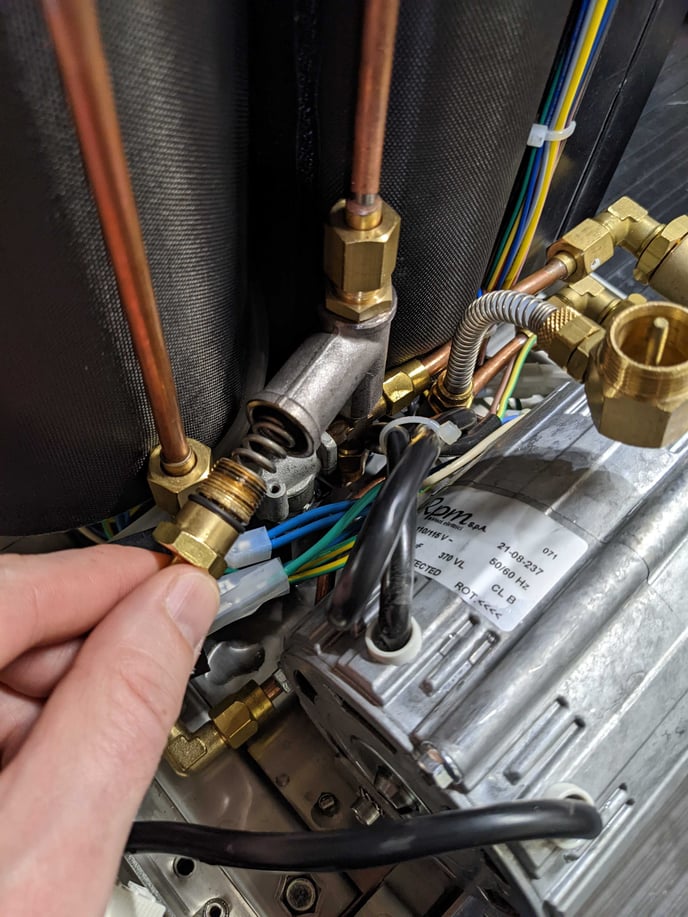
8. Using needlenose pliers or long tweezers, remove the expansion valve seat, if it did not come out with the expansion valve and spring.
9. Inspect the expansion valve and seat for debris or damage. Replace if necessary. Inspect the fitting body and clean out any debris.
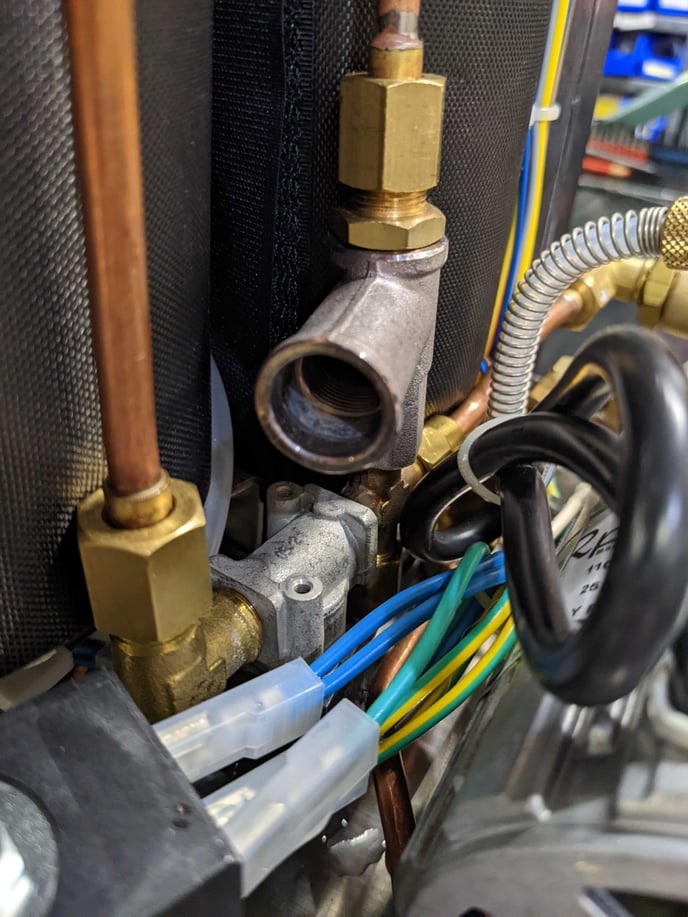
10. Reinstall the seat and expansion valve into the valve assembly body. Note: the valve does not have to be threaded completely into the assembly. It can be left backed out by approximately .25in.
11. Reconnect and reinstall components in reverse order of the above instructions.
12. Pat yourself on the back for a job well done.