- Help Center
- ECM Mechanika V Slim
- Boiler and Group Head Maintenance
-
Getting Started
-
Espresso 101
-
Warranty, Ordering & Returns
-
Bezzera BZ10
-
Bezzera Duo DE
-
Bezzera Duo MN
-
LUCCA A53 (Direct Plumb & Mini) by La Spaziale
-
LUCCA M58 by Quick Mill
-
LUCCA S58 by Profitec
-
LUCCA X58 by Quick Mill
-
La Marzocco Linea Mini
-
La Marzocco GS3
-
Lelit Bianca
-
Lelit Elizabeth
-
Lelit Victoria
-
ECM Synchronika
-
ECM Special Edition Classika PID
-
ECM Mechanika V Slim
-
ECM Casa V
-
ECM Puristika
-
Profitec Pro 300
-
Profitec Pro 400
-
Profitec Pro 500
-
Profitec Pro 600
-
Profitec Pro 700
-
Profitec Pro 800
-
Rocket Appartamento
-
Rocket R58 / Cinquantotto
-
Rocket Giotto
-
Rocket R Nine One
-
La Spaziale S2 EK
-
Rancilio Silvia
-
Rancilio Silvia Pro
-
Rancilio Silvia Pro X
-
Izzo Alex Duetto
-
Quick Mill
-
Breville Oracle
-
Dalla Corte Mina
-
Slayer
-
Lucca Grinders
-
Baratza Grinders
-
LUCCA Atom 75
-
Eureka Grinders
-
ECM Grinders
-
Compak Grinders
-
Fellow ODE Grinder
-
Mahlkonig Grinders
-
Profitec Grinders
-
Breville Grinders
-
Dalla Corte Grinders
-
Macap Grinders
-
Fiorenzato Grinders
-
General Troubleshooting
-
Like New & Trade-In Program
-
Eureka Mignon Libra
-
Eureka Mignon Libra User Manual
-
Rocket Boxer Setup Guide
-
Rocket Boxer Timer User Manual
-
Baratza Encore ESP Setup Guide
-
Baratza Encore ESP User Manual
-
Fellow Opus User Manual
-
Fellow Opus Setup Guide
ECM Mechanika V Slim: Vacuum Breaker Service or Replacement
A continuous hissing sound, weak or absent steam/hot water, intermittent pressure-relief sounds that continue long after the machine has reached full temperature — these are all signs that your Mechanika V Slim's vacuum breaker may need attention.
Tools needed:
- 2.5 mm Allen key
- 17mm crescent wrench or deep socket
- Pliers
Parts needed:
Vacuum Breaker Rebuild Kit or Complete Vacuum Breaker
1. Turn the machine off
2. Remove the top cup warming tray and water reservoir from the machine.
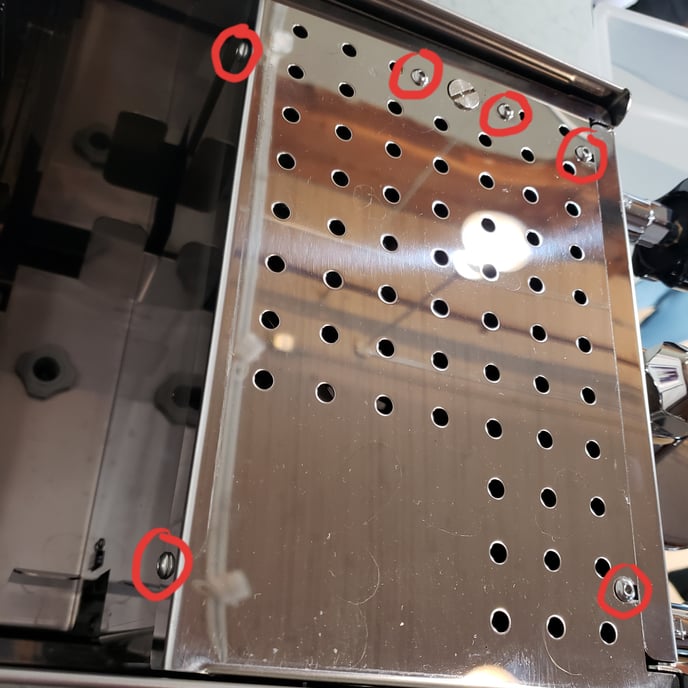
3. Remove the six 2.5mm allen screws from the top panel so it can be lifted off.

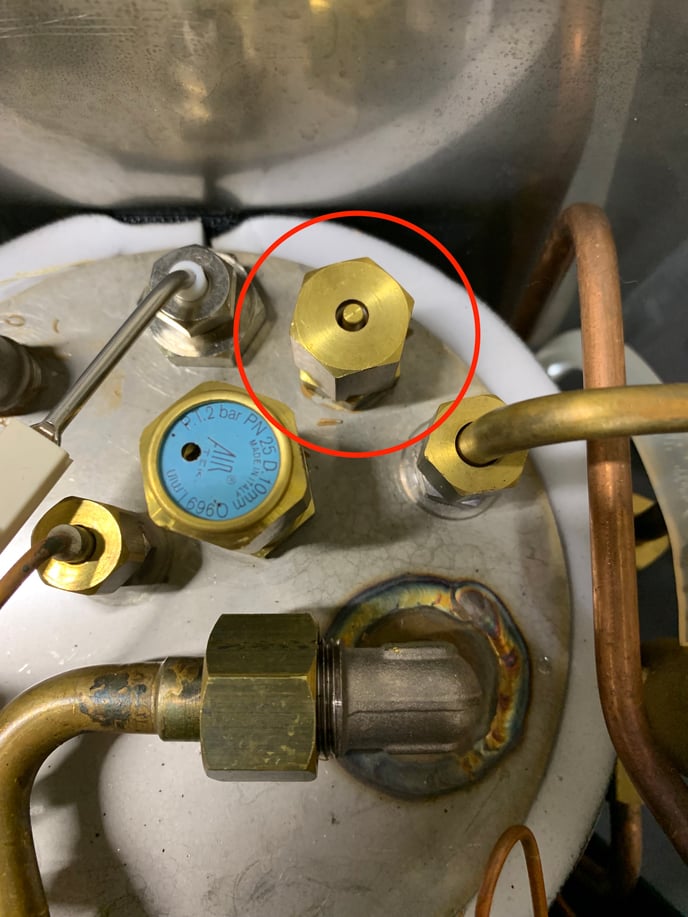
To swap the internal mechanism using the Vacuum Breaker Rebuild Kit, Use your 17mm wrench or socket to loosen up the top nut fitting of the vacuum breaker.
Gently remove the inner components with a pair of pliers.
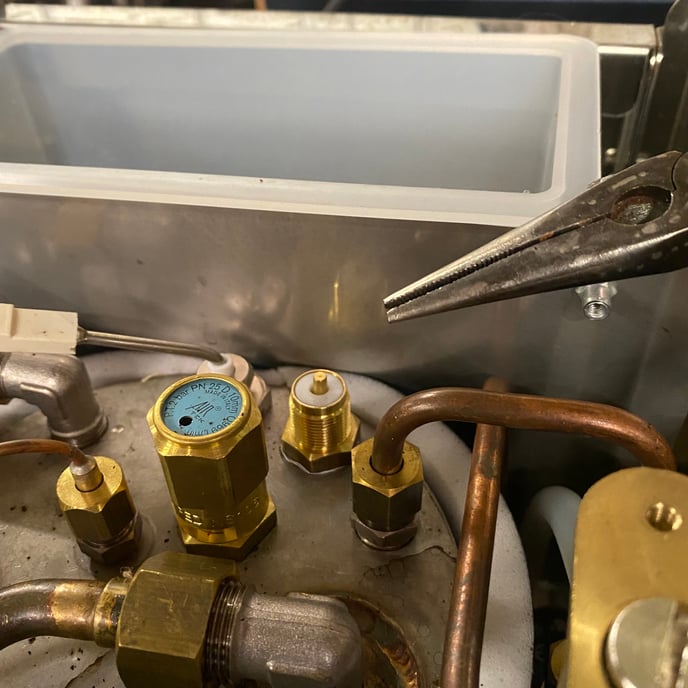
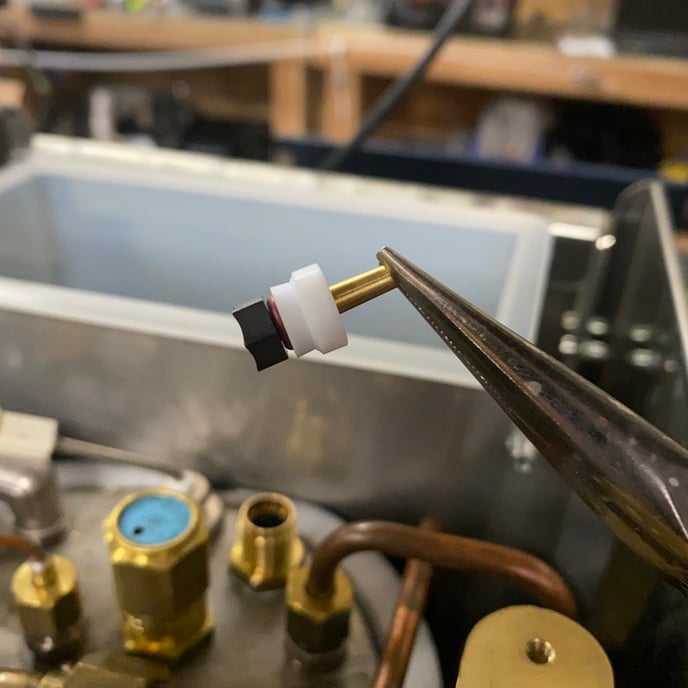
Take note of the order and orientation of the teflon seat, o-ring gasket, and piston. Clean off any scale build inside the valve housing, then swap the new parts into the valve housing. Replace the top nut fitting, and tighten it to seal.
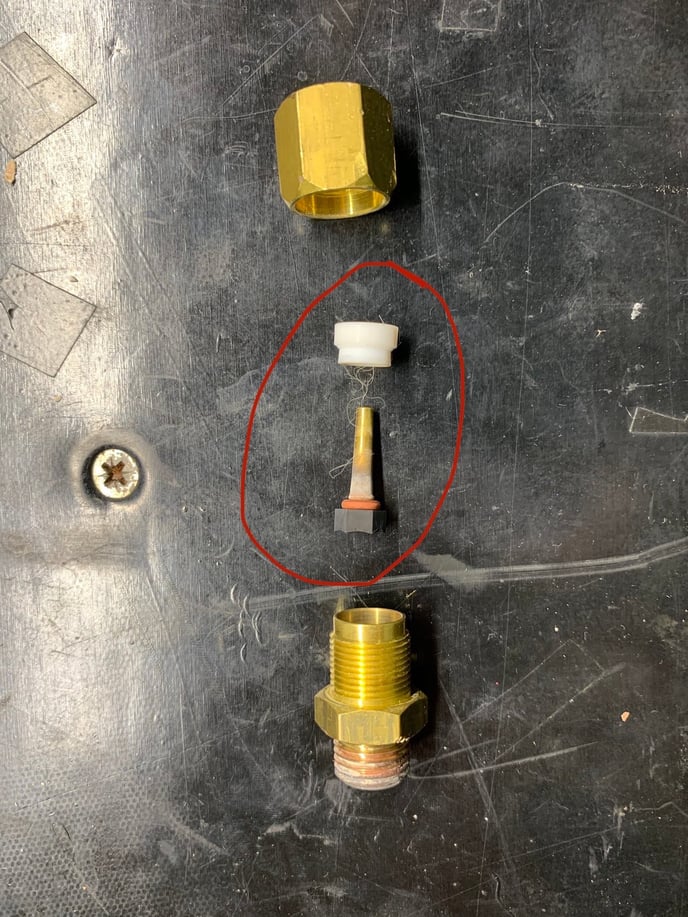
(To replace the vacuum breaker using the Complete Vacuum Breaker, use a 17mm wrench or socket to loosen and remove the entire housing from the top of the boiler. Replace with the new part. Tighten to seal, but be careful not to over tighten.)