Tools Needed:
- 3mm Allen key or Hex driver
- Replacement Control Light
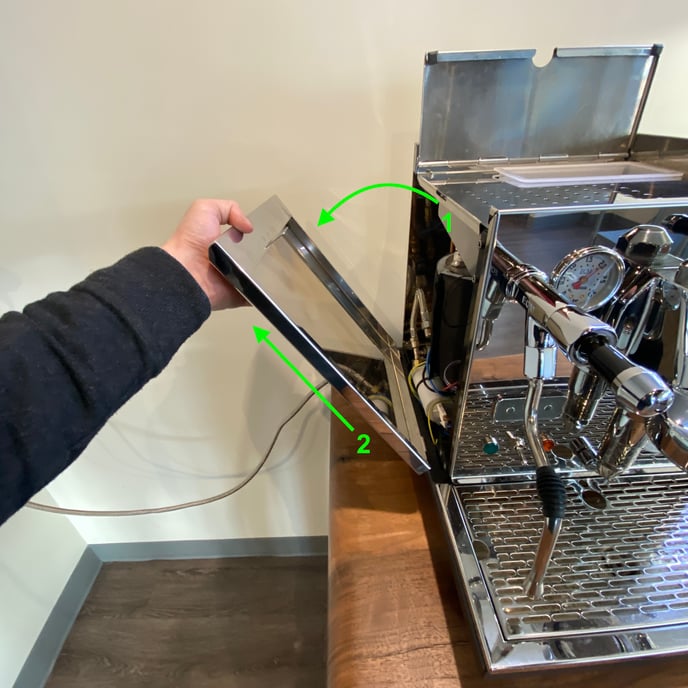
1. Remove the left-side panel from the machine by unscrewing the indicated Allen screw. Then pull the panel out and away from the machine; set aside.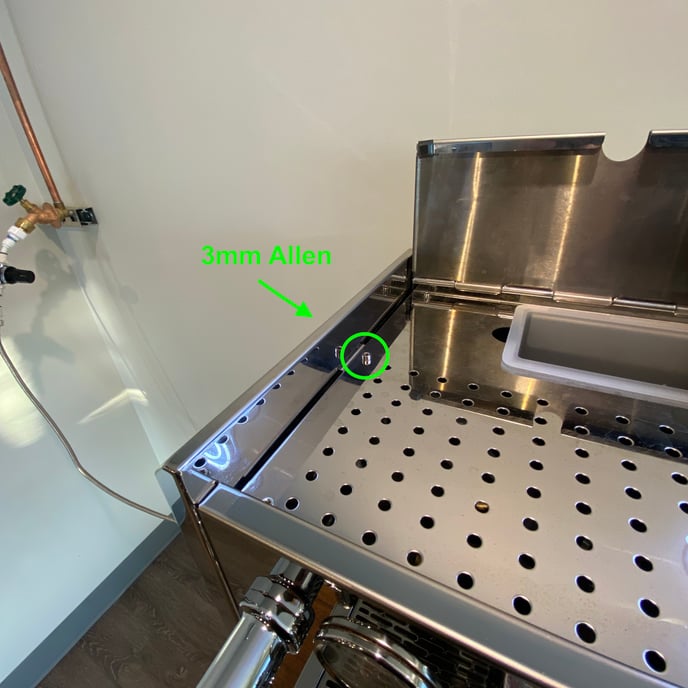
2. Identify the rear of the green control light inside the machine. If the LED is not illuminating, make sure that both the brown electrical lead and the blue electrical lead are securely attached.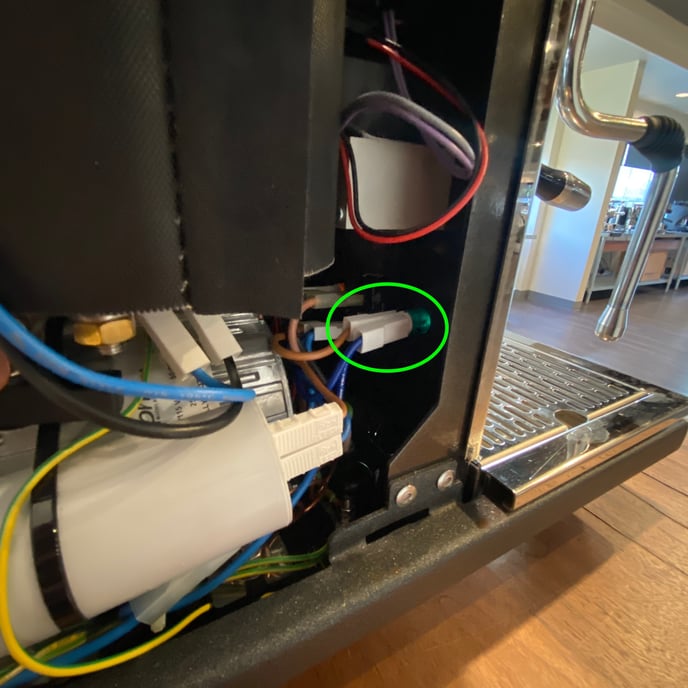
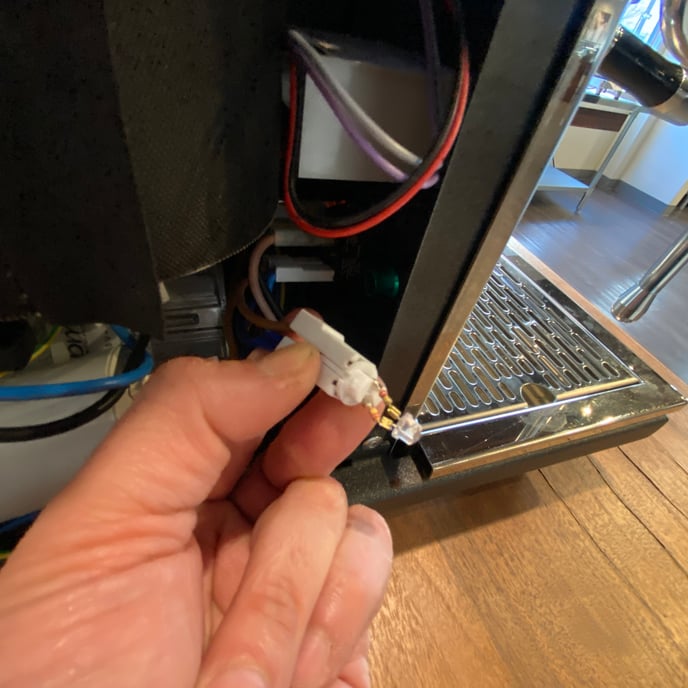
3. Firmly pinch the white plastic connectors on the back of the LED base and gently pull straight back to remove the LED from the green housing.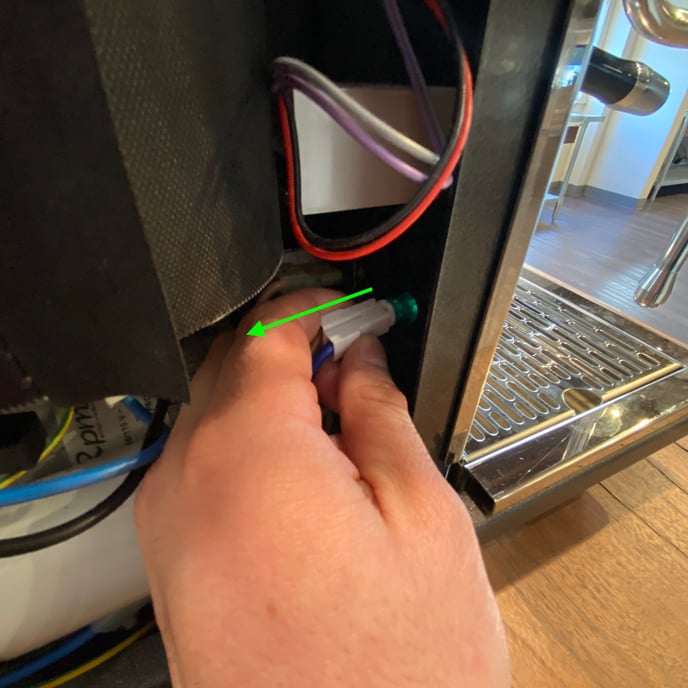
4. You can now detach the blue and brown electrical leads from the white plastic base and replace the LED with a new one.