- Help Center
- Eureka Grinders
- Eureka Mignons (Silenzio, Perfetto, Specialita, Oro XL)
-
Getting Started
-
Espresso 101
-
Warranty, Ordering & Returns
-
Bezzera BZ10
-
Bezzera Duo DE
-
Bezzera Duo MN
-
LUCCA A53 (Direct Plumb & Mini) by La Spaziale
-
LUCCA M58 by Quick Mill
-
LUCCA S58 by Profitec
-
LUCCA X58 by Quick Mill
-
La Marzocco Linea Mini
-
La Marzocco GS3
-
Lelit Mara X
-
Lelit Bianca
-
Lelit Elizabeth
-
Lelit Victoria
-
ECM Synchronika
-
ECM Special Edition Classika PID
-
ECM Mechanika V Slim
-
ECM Mechanika VI Slim
-
ECM Casa V
-
ECM Puristika
-
Profitec Pro 300
-
Profitec Pro 400
-
Profitec Pro 500
-
Profitec Pro 600
-
Profitec Pro 700
-
Profitec Pro 800
-
Profitec GO
-
Rocket Appartamento
-
Rocket R58 / Cinquantotto
-
Rocket Giotto
-
Rocket R Nine One
-
Rocket Boxer
-
La Spaziale S2 EK
-
Rancilio Silvia
-
Rancilio Silvia Pro
-
Rancilio Silvia Pro X
-
Sanremo YOU
-
Izzo Alex Duetto
-
Quick Mill
-
Breville Oracle
-
Dalla Corte Mina
-
Slayer
-
LUCCA Grinders
-
Baratza Grinders
-
Eureka Grinders
-
ECM Grinders
-
Compak Grinders
-
Fellow Grinders
-
Mahlkonig Grinders
-
Profitec Grinders
-
Breville Grinders
-
Dalla Corte Grinders
-
Macap Grinders
-
Fiorenzato Grinders
-
LUCCA E61 Flow Control
-
General Troubleshooting
-
Like New & Trade-In Program
-
Breville Barista Pro
-
Breville Oracle Touch
-
Fellow Tally Precision Scale
-
DF64
-
LUCCA DF64
Eureka Mignon: Mainboard Connections
It's rare, but occasionally a mis-wired Specialita or Silenzio slips through quality control. Use these instructions to inspect your grinders main board connections or replace the main board entirely.
Tools Needed:
- Eyes
- #1 Phillips screwdriver
- Flat blade screwdriver
1. Remove the hopper and empty the grind chamber as best as possible, you can turn the grinder upside down or use a vacuum. Run the motor and observe which direction the lower burrs spin — a properly wired grinder will spin clockwise. If your grinder spins counter-clockwise or exhibits other unusual behavior, proceed to the next step.
2. Unplug the grinder, then lay it on its back or side to remove the four Phillips head screws holding the base to the grinder body.
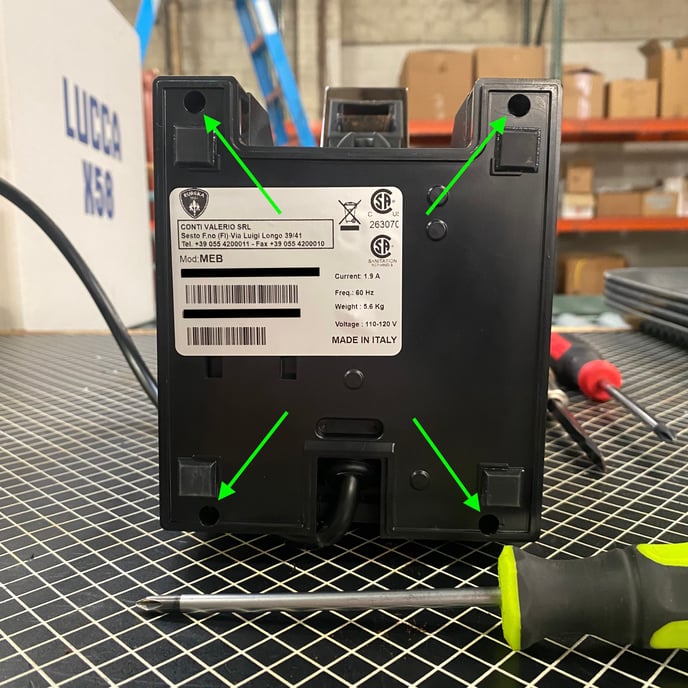
For Oro XL grinders:
Start by peeling off the two rubber feet at the back of the grinder.
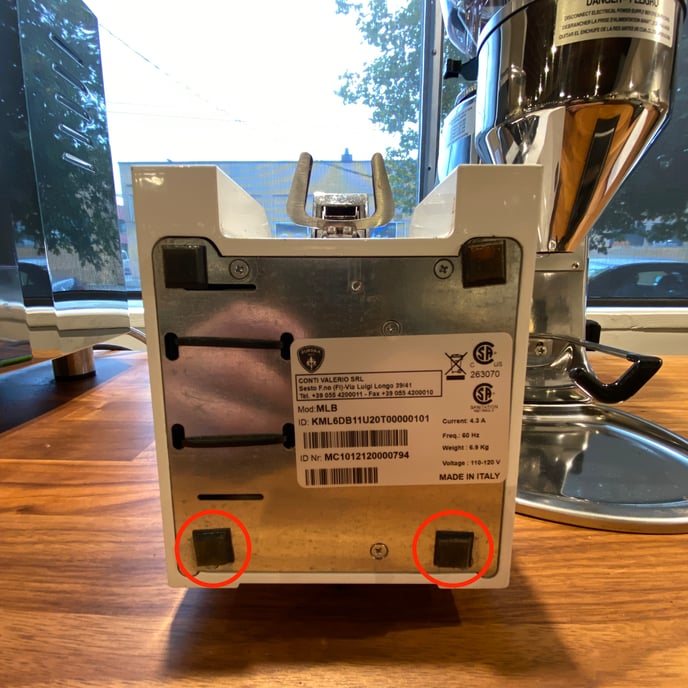
Then remove the four screws as indicated.
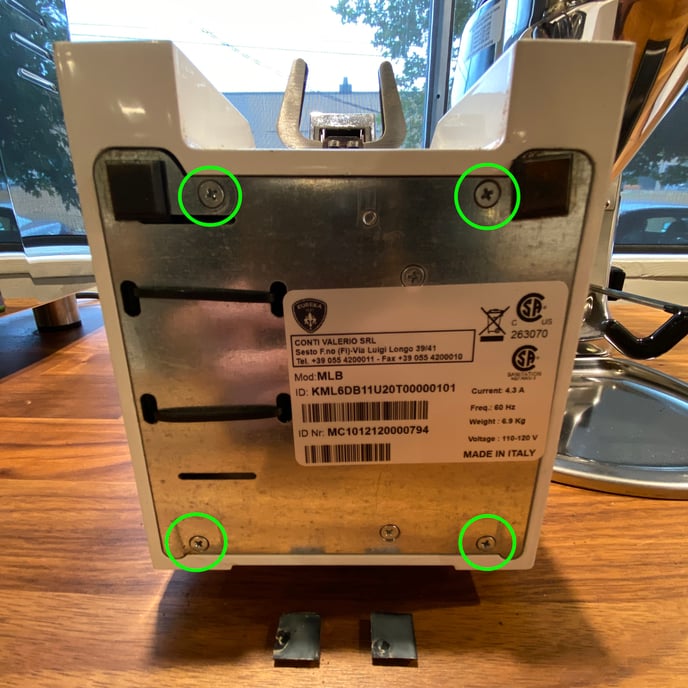
3. Make sure that all the power leads connect to the control board and motor capacitor as shown:
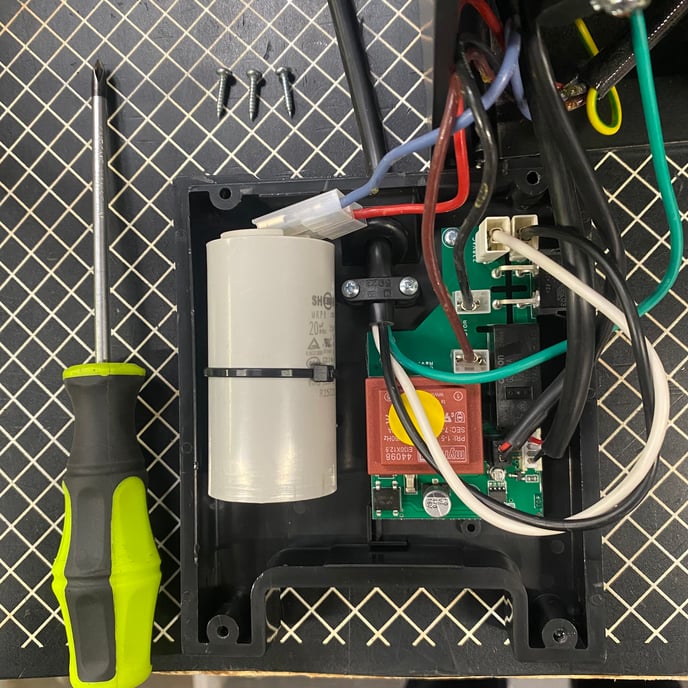
You can use a flat bladed screwdriver to gently pry stubborn electrical connectors loose.
If you need to replace the main board on your grinder, simply disconnect all of the connections from the old board and move them over to the new board. Use the photo above to make sure everything is in the correct place when you move the connections from the old board to the new board.
4. Reassemble the grinder and verify that the bottom burr now spins clockwise.