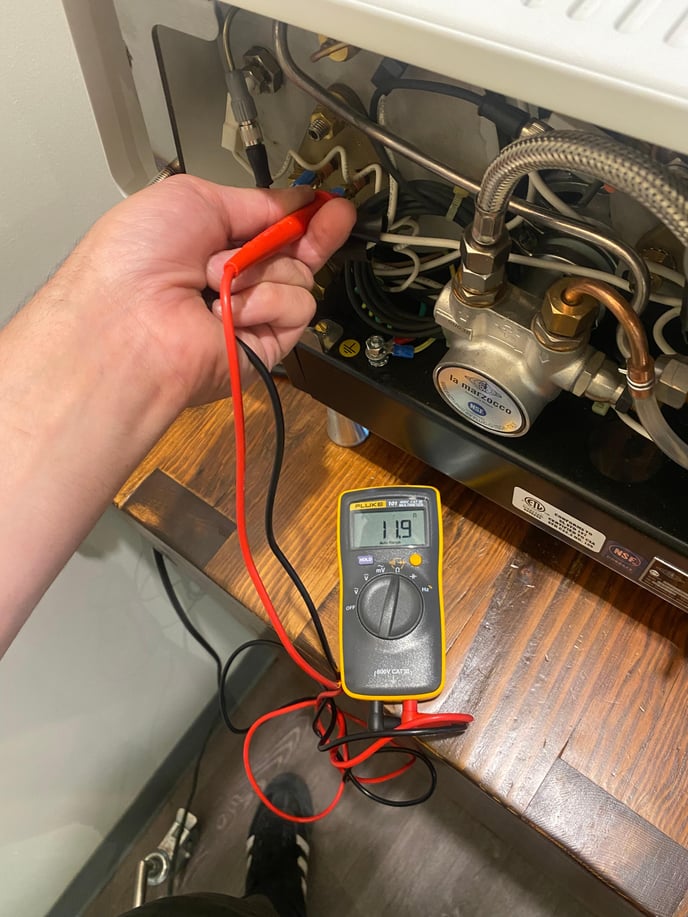
- Help Center
- La Marzocco GS3
-
Getting Started
-
Espresso 101
-
Warranty, Ordering & Returns
-
Bezzera BZ10
-
Bezzera Duo DE
-
Bezzera Duo MN
-
LUCCA A53 (Direct Plumb & Mini) by La Spaziale
-
LUCCA M58 by Quick Mill
-
LUCCA S58 by Profitec
-
LUCCA X58 by Quick Mill
-
La Marzocco Linea Mini
-
La Marzocco GS3
-
Lelit Bianca
-
Lelit Elizabeth
-
Lelit Victoria
-
ECM Synchronika
-
ECM Special Edition Classika PID
-
ECM Mechanika V Slim
-
ECM Casa V
-
ECM Puristika
-
Profitec Pro 300
-
Profitec Pro 400
-
Profitec Pro 500
-
Profitec Pro 600
-
Profitec Pro 700
-
Profitec Pro 800
-
Rocket Appartamento
-
Rocket R58 / Cinquantotto
-
Rocket Giotto
-
Rocket R Nine One
-
La Spaziale S2 EK
-
Rancilio Silvia
-
Rancilio Silvia Pro
-
Rancilio Silvia Pro X
-
Izzo Alex Duetto
-
Quick Mill
-
Breville Oracle
-
Dalla Corte Mina
-
Slayer
-
Lucca Grinders
-
Baratza Grinders
-
LUCCA Atom 75
-
Eureka Grinders
-
ECM Grinders
-
Compak Grinders
-
Fellow ODE Grinder
-
Mahlkonig Grinders
-
Profitec Grinders
-
Breville Grinders
-
Dalla Corte Grinders
-
Macap Grinders
-
Fiorenzato Grinders
-
General Troubleshooting
-
Like New & Trade-In Program
-
Eureka Mignon Libra
-
Eureka Mignon Libra User Manual
-
Rocket Boxer Setup Guide
-
Rocket Boxer Timer User Manual
-
Baratza Encore ESP Setup Guide
-
Baratza Encore ESP User Manual
-
Fellow Opus User Manual
-
Fellow Opus Setup Guide
La Marzocco GS3: Steam Boiler Electrical and Heating Element Test
Below are photo instructions for checking the electrical connections for the steam boiler on your La Marzocco GS3 espresso machine. This is useful if your GS/3's steam boiler stops heat and doesn't read an error code. (Difficulty ☕☕☕)
Tools needed:
- Multimeter
- 13mm socket
- 7mm socket (optional)
Before doing this you will need to remove the left side panel.
1. Verify that the connections shown below are securely attached and in good shape.

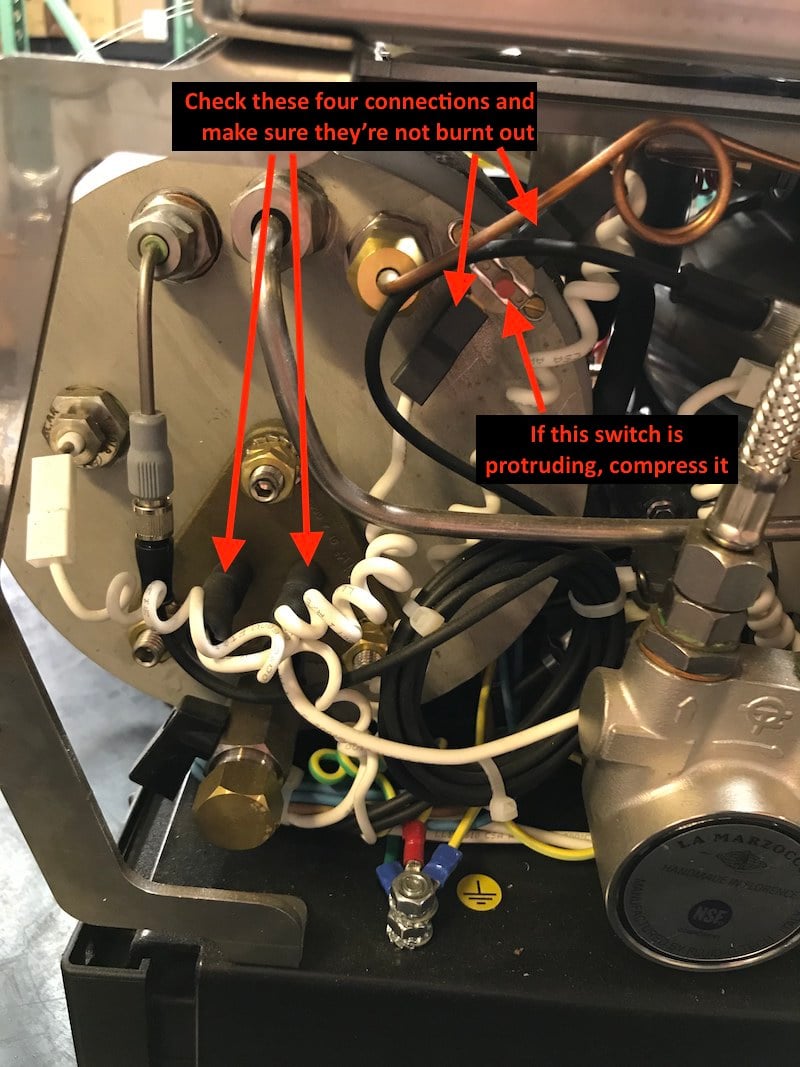
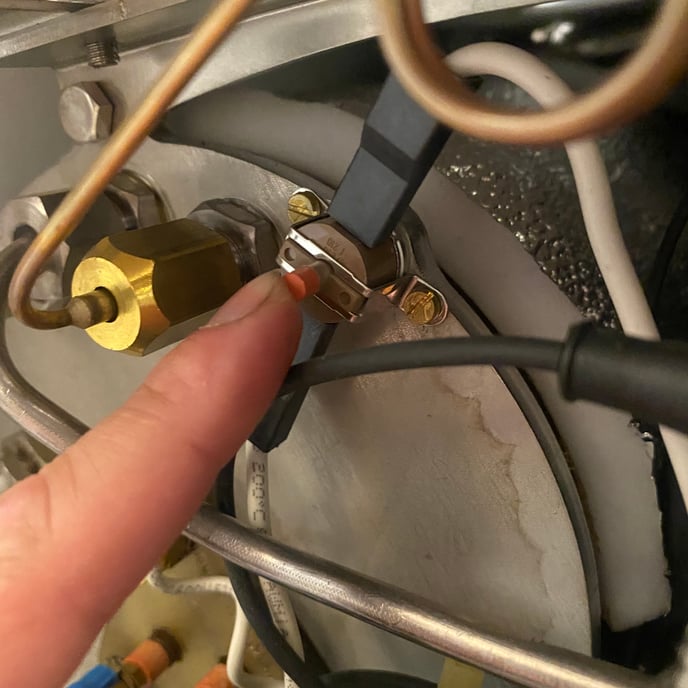
2. Verify that the machine's steam boiler safety thermostat is not tripped by depressing the central button with your finger. A protruding central button that clicks down softly when pressed indicates a tripped switch.

3. Pull the black rubber protective covering back from the heating element legs.
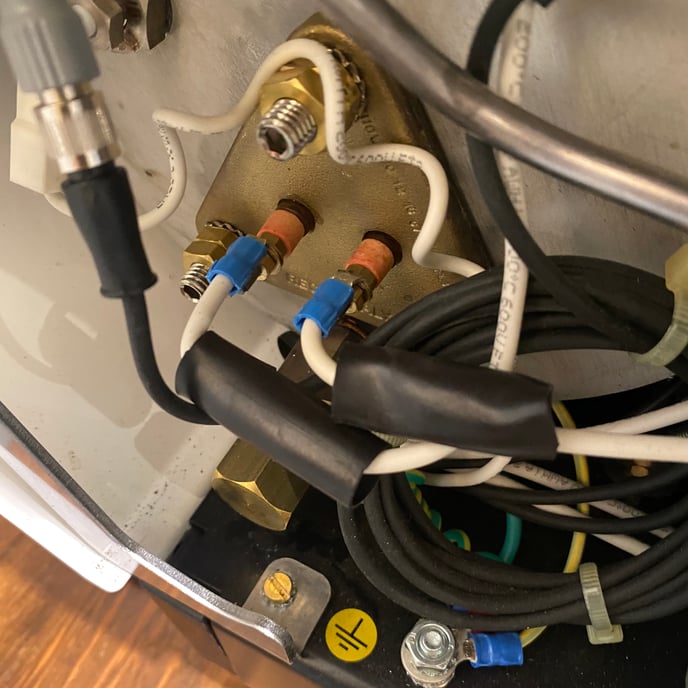
4. Set your multimeter to the lowest resistance range and probe the element legs. (You may need to unscrew the electrical connections to get an accurate reading.)
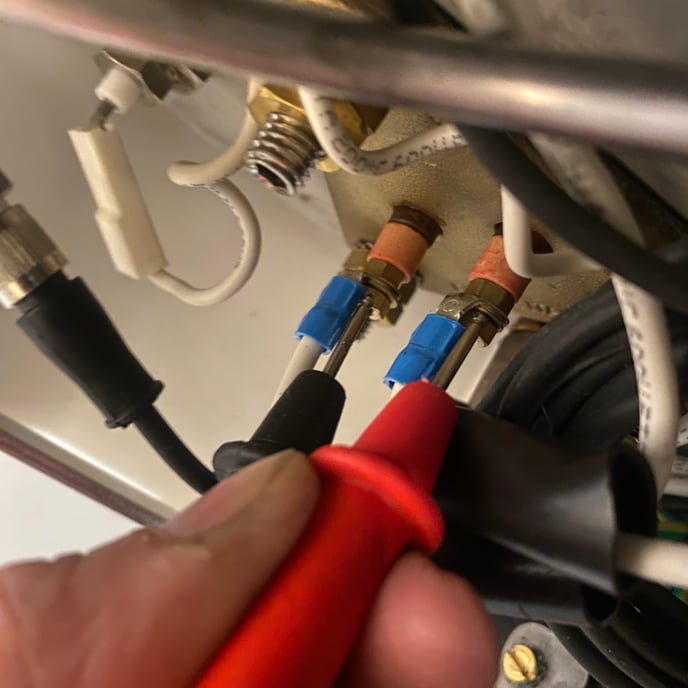
5. You should see a resistance reading close to 12Ω (+/- 10%). If you see a resistance value much higher than 12Ω or the "O.L" message indicating discontinuity, that's a sure sign that the heating element is compromised and will need to be replaced.