- Help Center
- LUCCA A53 (Direct Plumb & Mini) by La Spaziale
- Troubleshooting
-
Getting Started
-
Espresso 101
-
Warranty, Ordering & Returns
-
Bezzera BZ10
-
Bezzera Duo DE
-
Bezzera Duo MN
-
LUCCA A53 (Direct Plumb & Mini) by La Spaziale
-
LUCCA M58 by Quick Mill
-
LUCCA S58 by Profitec
-
LUCCA X58 by Quick Mill
-
La Marzocco Linea Mini
-
La Marzocco GS3
-
Lelit Bianca
-
Lelit Elizabeth
-
Lelit Victoria
-
ECM Synchronika
-
ECM Special Edition Classika PID
-
ECM Mechanika V Slim
-
ECM Casa V
-
ECM Puristika
-
Profitec Pro 300
-
Profitec Pro 400
-
Profitec Pro 500
-
Profitec Pro 600
-
Profitec Pro 700
-
Profitec Pro 800
-
Rocket Appartamento
-
Rocket R58 / Cinquantotto
-
Rocket Giotto
-
Rocket R Nine One
-
La Spaziale S2 EK
-
Rancilio Silvia
-
Rancilio Silvia Pro
-
Rancilio Silvia Pro X
-
Izzo Alex Duetto
-
Quick Mill
-
Breville Oracle
-
Dalla Corte Mina
-
Slayer
-
Lucca Grinders
-
Baratza Grinders
-
LUCCA Atom 75
-
Eureka Grinders
-
ECM Grinders
-
Compak Grinders
-
Fellow ODE Grinder
-
Mahlkonig Grinders
-
Profitec Grinders
-
Breville Grinders
-
Dalla Corte Grinders
-
Macap Grinders
-
Fiorenzato Grinders
-
General Troubleshooting
-
Like New & Trade-In Program
LUCCA A53 / Vivaldi: Flow Meter Error
When attempting to make an espresso with your La Spaziale LUCCA A53 or Vivaldi espresso machine, if you see no water/coffee come from the group head, you may have something obstructing your flow meter.
When attempting to make espresso, if you see no water/coffee come from the group head and the display flashes "91 92 93" (1cup) or "94 95 96: (2cup) ("85 90 95" (1cup) or "100 105 110" (2cup) on older models) you may have something obstructing your flow meter. It will need to be cleared using the following steps.
Tools Needed:
- #3 (or #2) Phillips Screwdriver
- Wrenches: 8mm, 13mm, 16mm, 17mm
- Clipper (for zip tie)
- Allen Wrench 3mm
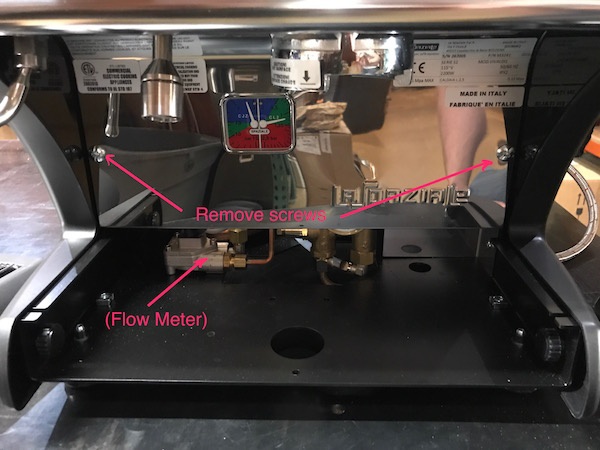
Begin by removing the two screws from the front panel, at which point the panel will slide out.

On Mini versions of the Lucca A53 or Vivaldi II, you'll need to begin by removing the panels to access the flow meter through the back of the machine. Them proceed to the following instructions.
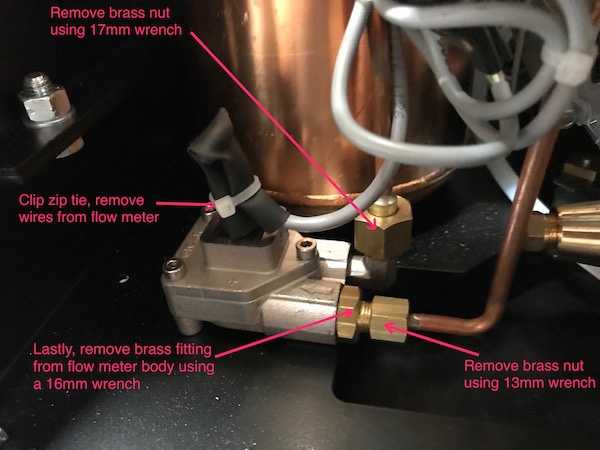
Clip zip-tie and remove wires from flow meter taking note of their order. Loosen brass nuts attaching water lines to the flow meter, as well remove the brass fitting from the meter housing.

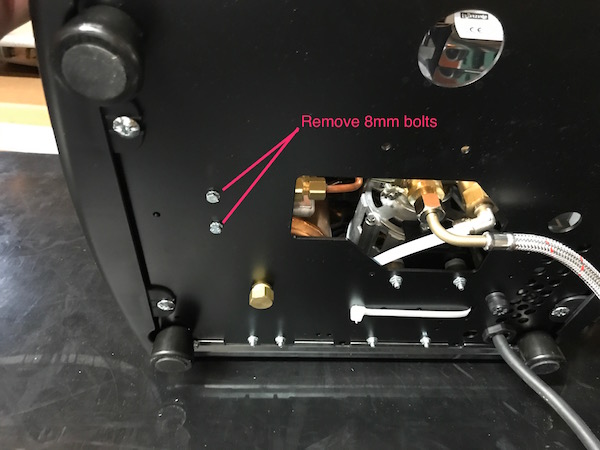
Tilt machine up and remove the two bolts holding the flow meter in place. Flow meter will be loose at this point.

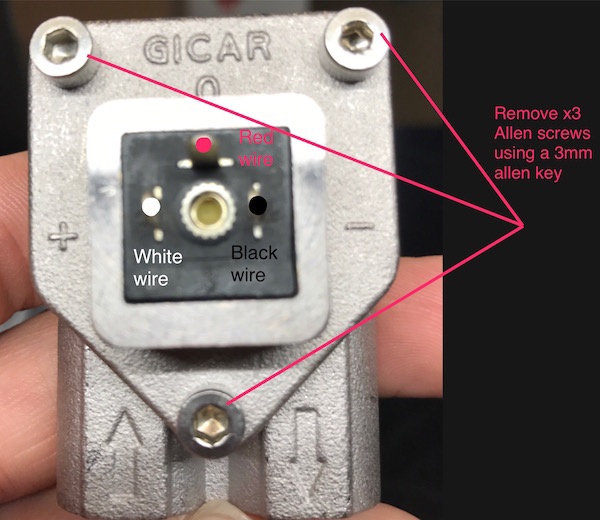
Remove x3 allen screws from flow meter cap, wire color placement has been noted for your reference.

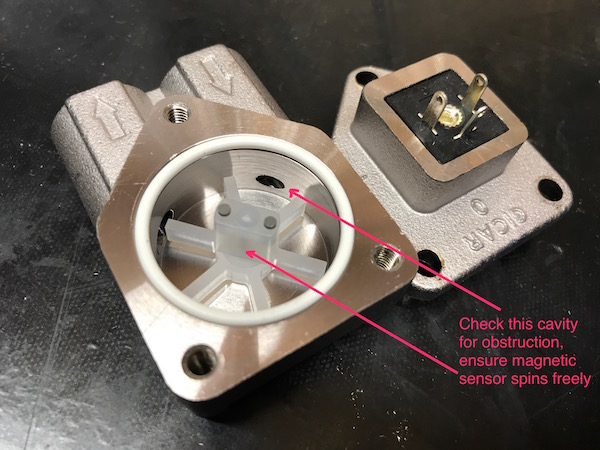
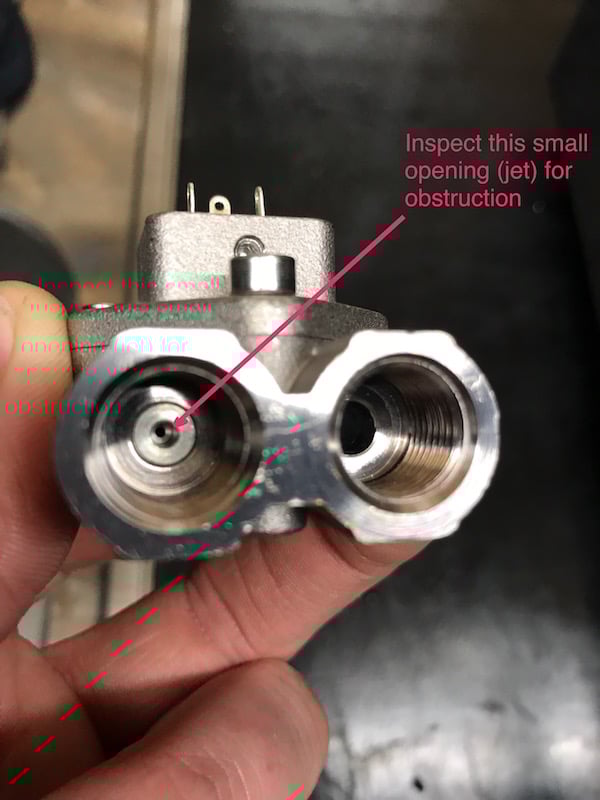
Inspect 'flow in' cavity, there is a tiny hole or "jet" that can get clogged. Using a piece of wire or a small gauge paper clip you can clear the opening.

Check the inside cavity (back side of jet) for any mineral buildup/obstruction. Ensure magnetic sensor 'wheel' is able to spin freely, also make sure white gasket is in place before re-assembling the flow meter.
