- Help Center
- Warranty, Ordering & Returns
- Repackaging Instructions
-
Getting Started
-
Espresso 101
-
Warranty, Ordering & Returns
-
Bezzera BZ10
-
Bezzera Duo DE
-
Bezzera Duo MN
-
LUCCA A53 (Direct Plumb & Mini) by La Spaziale
-
LUCCA M58 by Quick Mill
-
LUCCA S58 by Profitec
-
LUCCA X58 by Quick Mill
-
La Marzocco Linea Mini
-
La Marzocco GS3
-
Lelit Bianca
-
Lelit Elizabeth
-
Lelit Victoria
-
ECM Synchronika
-
ECM Special Edition Classika PID
-
ECM Mechanika V Slim
-
ECM Casa V
-
ECM Puristika
-
Profitec Pro 300
-
Profitec Pro 400
-
Profitec Pro 500
-
Profitec Pro 600
-
Profitec Pro 700
-
Profitec Pro 800
-
Rocket Appartamento
-
Rocket R58 / Cinquantotto
-
Rocket Giotto
-
Rocket R Nine One
-
La Spaziale S2 EK
-
Rancilio Silvia
-
Rancilio Silvia Pro
-
Rancilio Silvia Pro X
-
Izzo Alex Duetto
-
Quick Mill
-
Breville Oracle
-
Dalla Corte Mina
-
Slayer
-
Lucca Grinders
-
Baratza Grinders
-
LUCCA Atom 75
-
Eureka Grinders
-
ECM Grinders
-
Compak Grinders
-
Fellow ODE Grinder
-
Mahlkonig Grinders
-
Profitec Grinders
-
Breville Grinders
-
Dalla Corte Grinders
-
Macap Grinders
-
Fiorenzato Grinders
-
General Troubleshooting
-
Like New & Trade-In Program
-
Eureka Mignon Libra
-
Eureka Mignon Libra User Manual
-
Rocket Boxer Setup Guide
-
Rocket Boxer Timer User Manual
-
Baratza Encore ESP Setup Guide
-
Baratza Encore ESP User Manual
-
Fellow Opus User Manual
-
Fellow Opus Setup Guide
Repackaging the Lelit Elizabeth
Here are the step-by-step instructions for repackaging the Lelit Elizabeth Espresso Machine for shipping.
Before repackaging: Drain the boilers - while we work on a video specific to the Elizabeth, the Pro 300 article linked reflects the same draining process.
1. The power cord and small drip tray riser will go in their small plastic bags and be placed in the drip tray of the machine. The drip tray grate will then go over them.
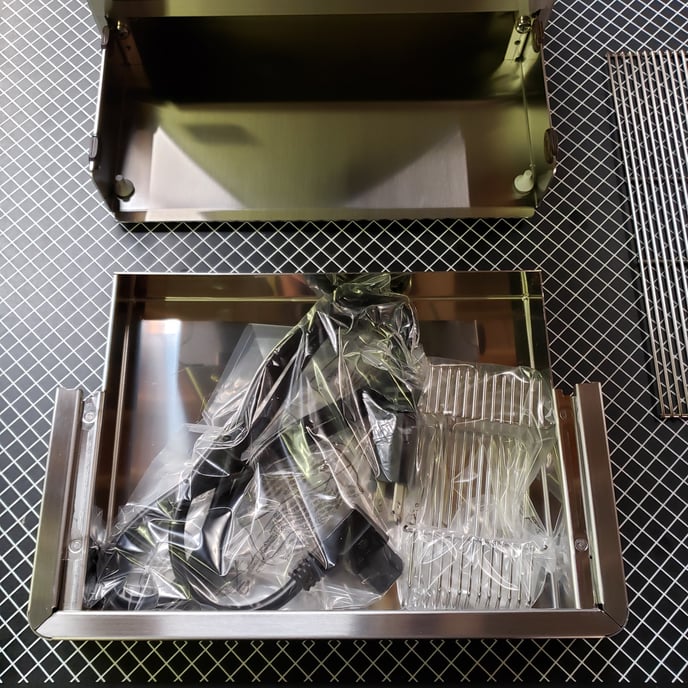
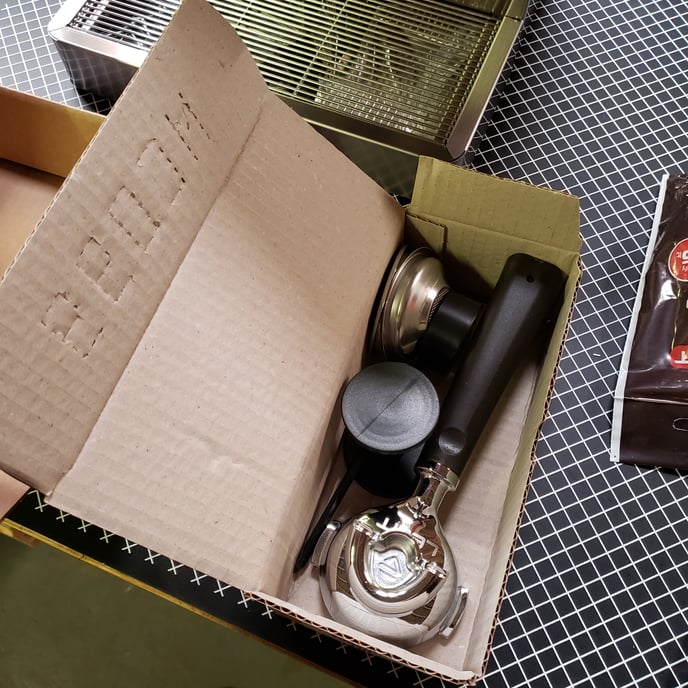
2. The portafilter, tamper, baskets, and the coffee scoop will go into the accessory box.
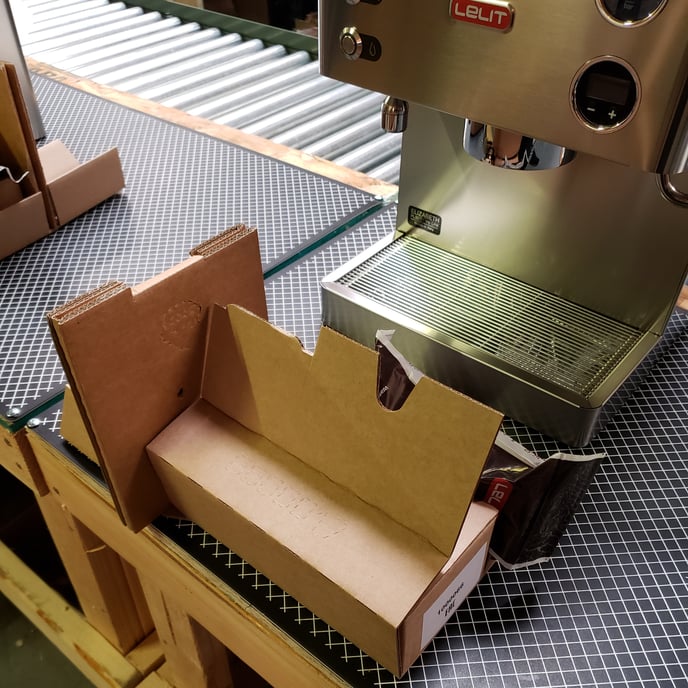
3. Close up the accessory box and place the water softening pouch behind the flap so everything fits snug under the grouphead, on top of the drip tray.
4. Place the accessory box onto the machine, put the plastic bag over the entire machine.
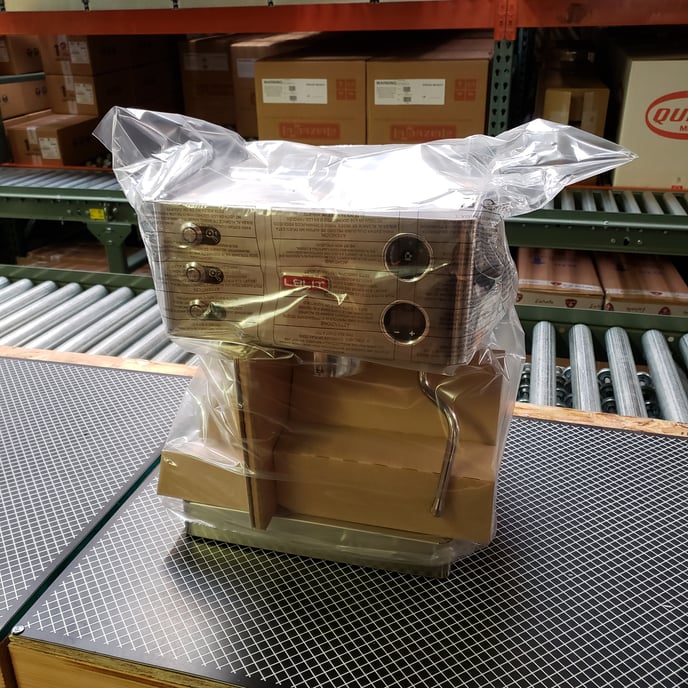
5. Place the machine in the box. The cardboard supports go along the sides of the machine (not the front and back) as specified in the photo.
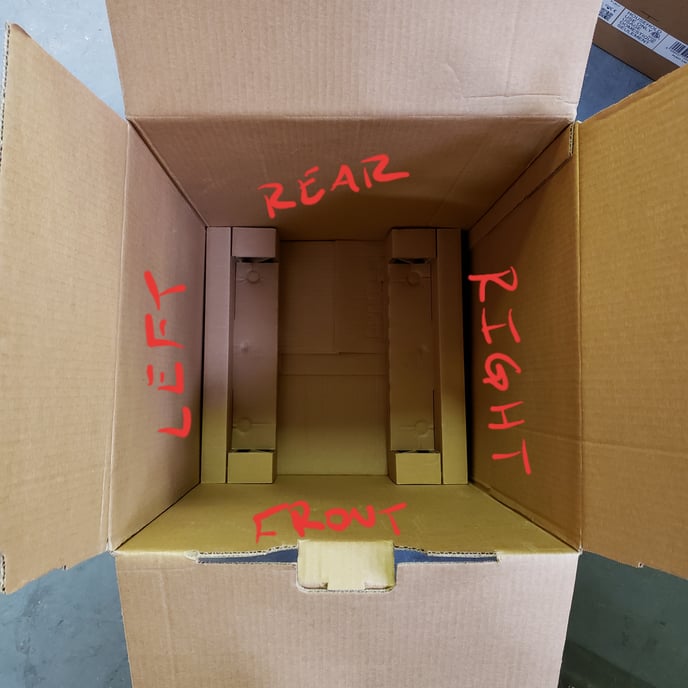
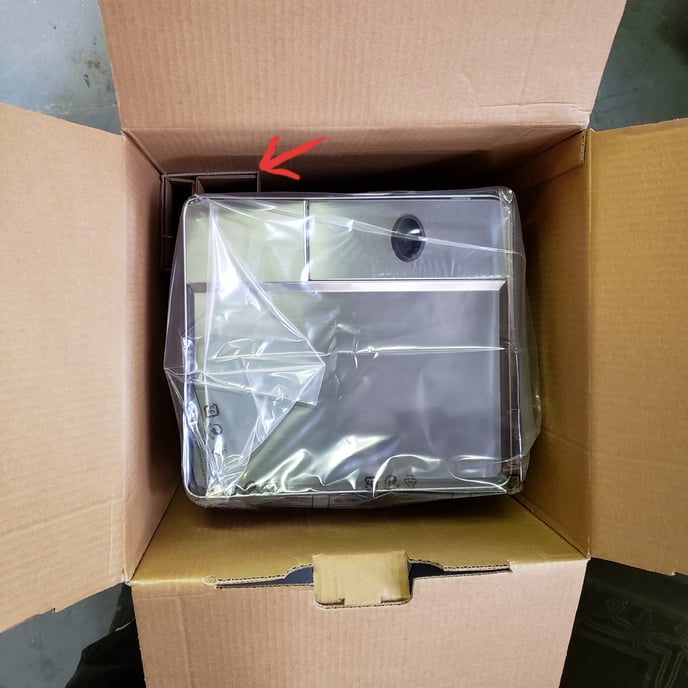
6. The cardboard corner will fit down the back left side of the machine - do not place this on a front corner of the machine.
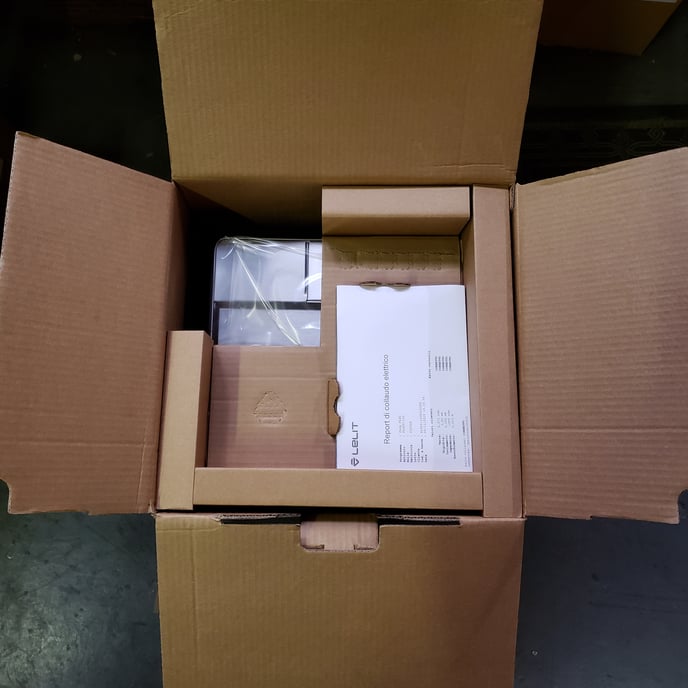
7. Place the upper cardboard piece in with the machine's manual in its slot. The open corner of this tray goes to the back left of the machine (where the cardboard edge was placed in the last step). This is important to put this in correctly so that the machine is supported on all corners.
8. Tape the box up securely and place into an additional outer box with padding on all sides, top and bottom. When these are shipped from Clive, we use a 16" x 16" x 24" outer box for reference.