If you are finding that the pump is activating too early, you will want to adjust the brew switch back. If you are finding the pump not being activated or seemingly too far back, you will want to adjust the brew switch forward.
Tools Needed:
- 12mm Wrench
- 14mm Wrench
- Phillips screwdriver (for removing the panels)
- Washers (only if adjusting switch backwards)
1. Remove the panels from the machine.
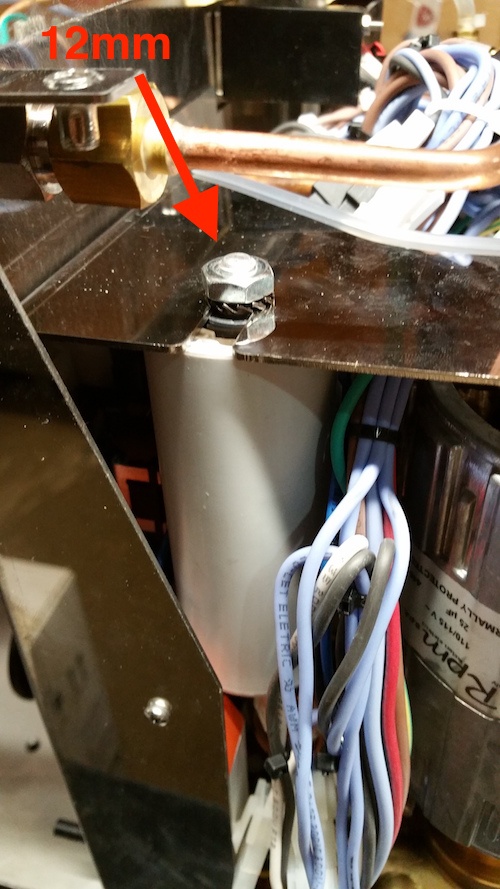
2. Remove the capacitor (white cylindrical part) from the machine by loosening the 12mm nut on top and sliding the piece out and to the side. This can hang down and out of the way.
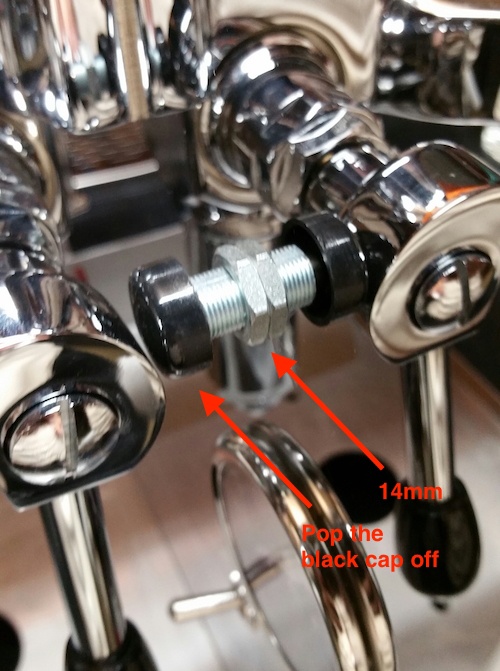
3. Begin removing the front 14mm nut from the machine - be careful not to scratch the front of your machine. As you loosen this 14mm nut, you will be able to pop the black cap off of the switch.
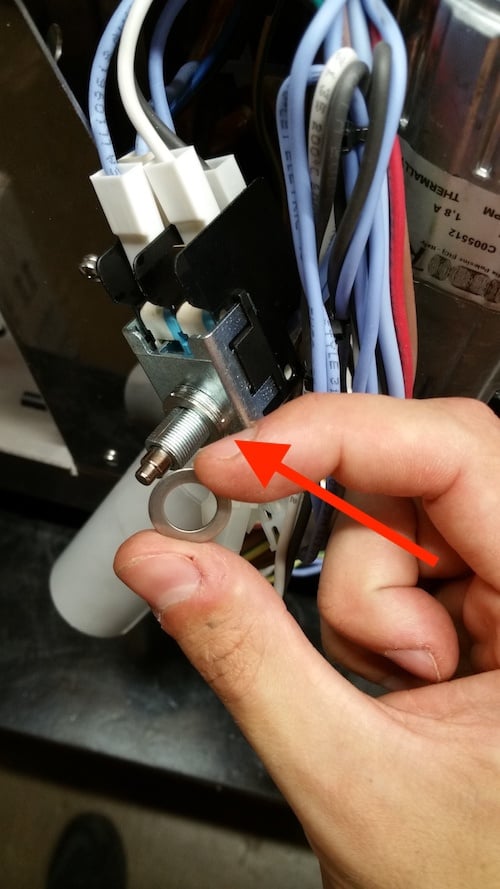
4. Once the black cap and 14mm nut are fully removed, you can pull the switch out from the inside of the machine. Be careful that none of the washers fall off of the switch (they can be tricky to find in the bottom of the machine). At this point, if you need the switch to sit farther forward you will remove a washer. If you need the switch to sit farther back you will add a washer (any type will do, a local hardware store is a great resource if you bring in one of the washers from the machine to find a matching or similar washer).
5. If you are replacing the brew switch with a new one, take note of how the wires attach to the old switch and move the connection to the new switch in the same order.
6. Reinstall brew switch and test machine function with panels still off so that if additional adjustments need to be made you don't need to remove the panels a second time.