Tools required:
- 2x adjustable wrench
- 12mm crescent wrench
- 15mm crescent wrench
- 17mm crescent wrench
- Diagonal cutters (or scissors)
First, remove the panels.
V2 Lucca M58 (scroll down for V1 M58):
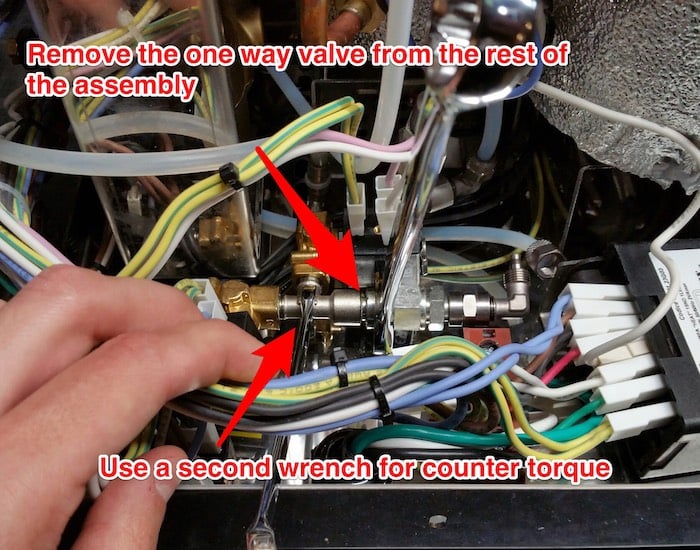
1. Remove the water reservoir tray to access the check valve and OPV assembly. Identify the check valve.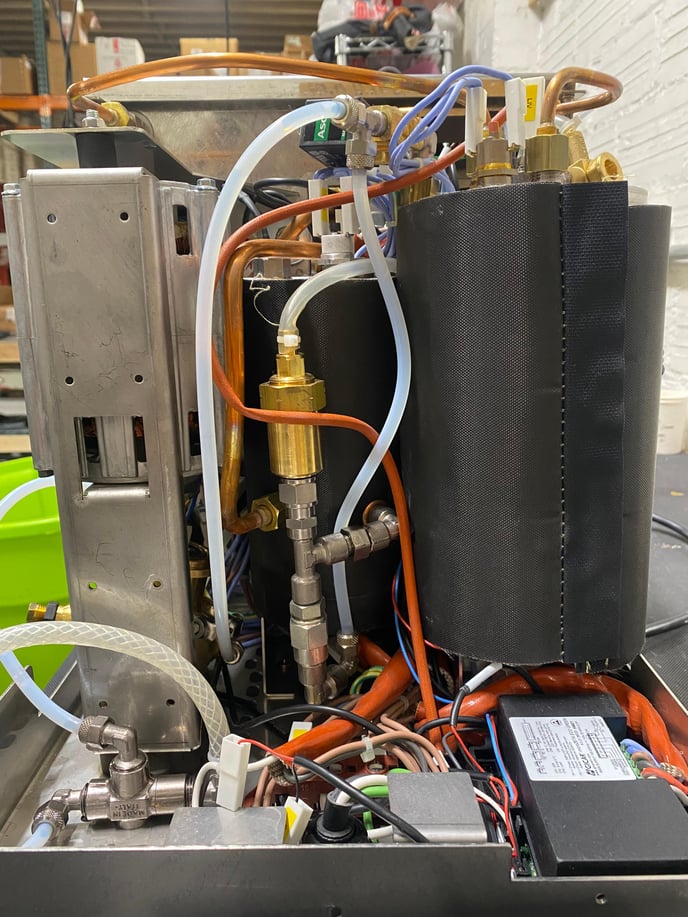
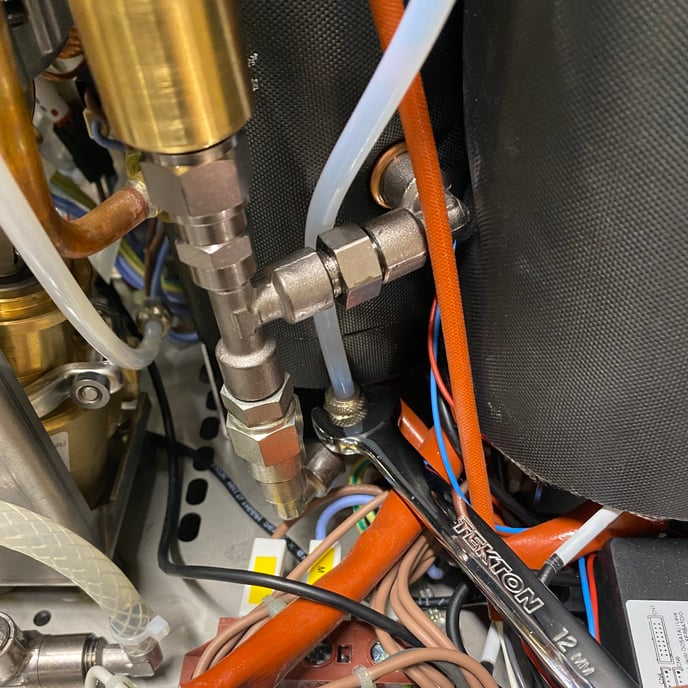
2. Remove the steam boiler line compression fitting.
3. Remove the brew boiler fitting connection.
4. Remove the flexible tube from the top of the OPV.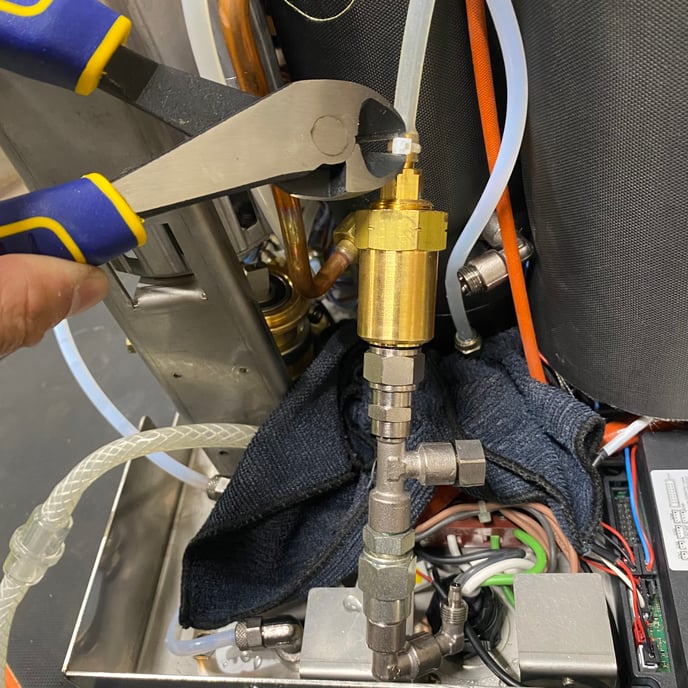
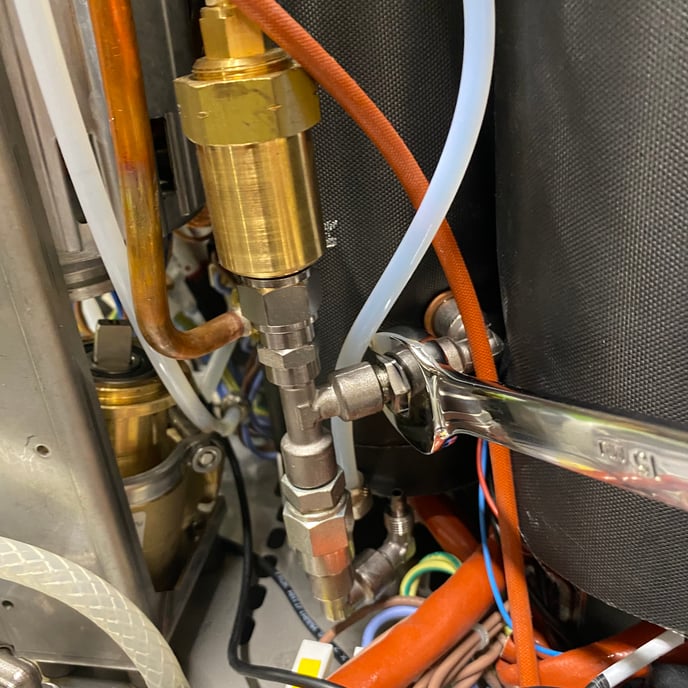
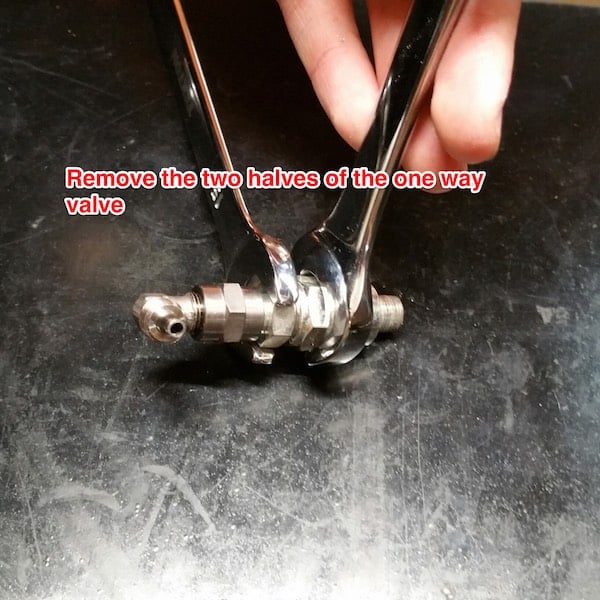
5. Use two wrenches to unscrew the check valve.
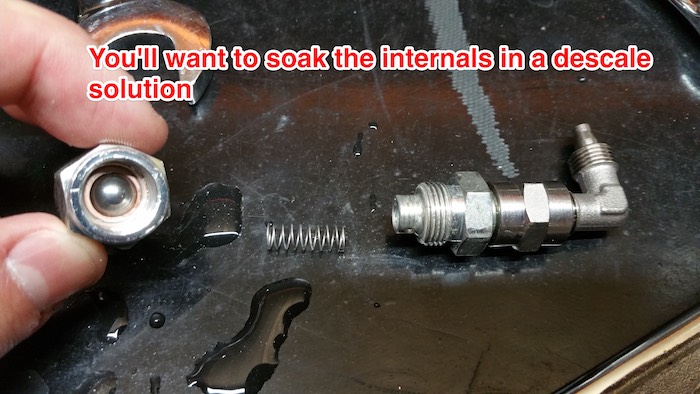
6. Remove the internal check valve components and soak in a descaling solution to clean.
7. Reassemble the check valve and reinstall in the machine. It may be helpful to reconnect the fittings in the same order they were removed, i.e. steam boiler fitting first, brew boiler fitting next, then flexible tube.
NOTE: You will need to re-seal the threads of the check valve on reassembly to prevent leaks. The threads are sealed from the factory with liquid thread sealant, but here at Clive we recommend using PTFE tape (aka Teflon plumbers tape). PTFE tape is drinking-water safe and heat stable.
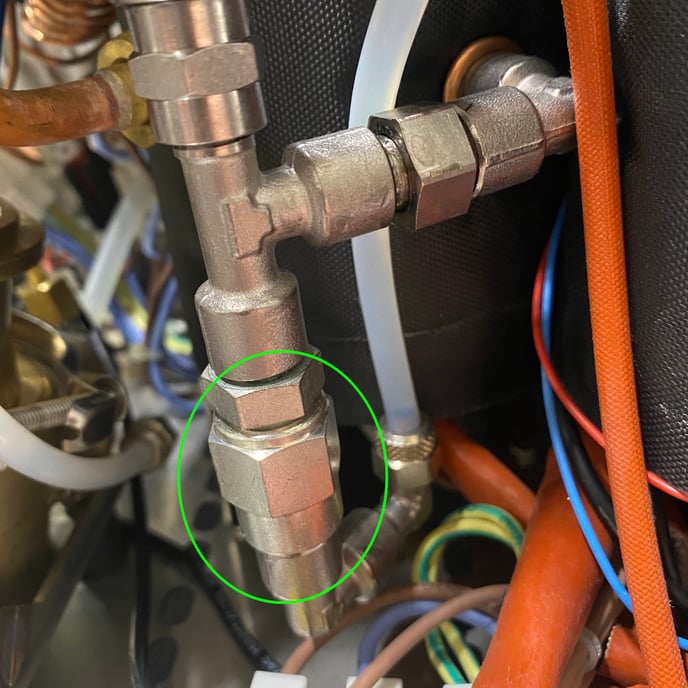
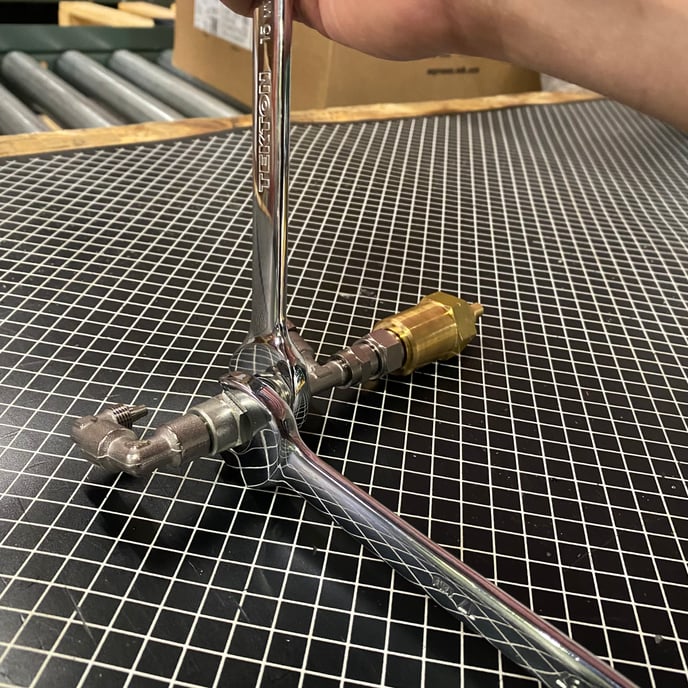
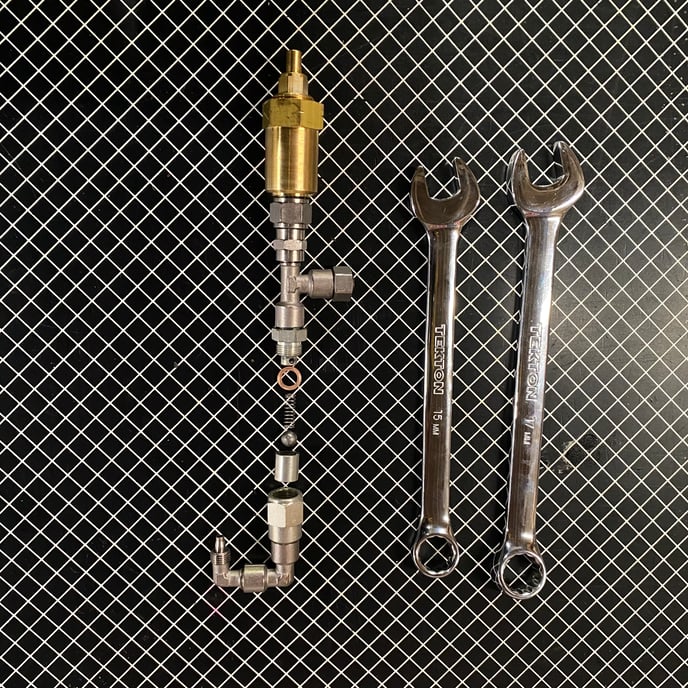
8. In some cases it's best to simply replace the whole check valve. To do that instead, follow the above instructions through Step 4, then unscrew the fittings from either side of the check valve as shown. You can then screw those fittings directly onto the replacement check valve. NOTE: Don't forget to wrap the check valve threads with Teflon tape and make sure that the check valve is in the correct orientation.
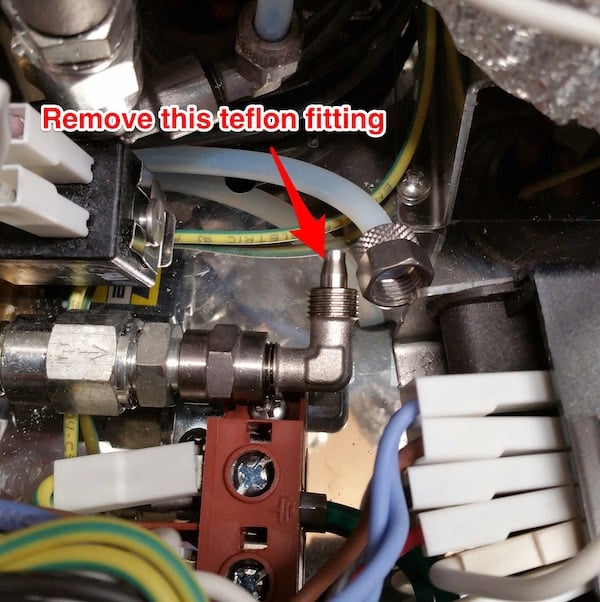
V1 Lucca M58:
Rebuild and test.