- Help Center
- LUCCA M58 by Quick Mill
- General Maintenance
-
Getting Started
-
Espresso 101
-
Warranty, Ordering & Returns
-
Bezzera BZ10
-
Bezzera Duo DE
-
Bezzera Duo MN
-
LUCCA A53 (Direct Plumb & Mini) by La Spaziale
-
LUCCA M58 by Quick Mill
-
LUCCA S58 by Profitec
-
LUCCA X58 by Quick Mill
-
La Marzocco Linea Mini
-
La Marzocco GS3
-
Lelit Bianca
-
Lelit Elizabeth
-
Lelit Victoria
-
ECM Synchronika
-
ECM Special Edition Classika PID
-
ECM Mechanika V Slim
-
ECM Casa V
-
ECM Puristika
-
Profitec Pro 300
-
Profitec Pro 400
-
Profitec Pro 500
-
Profitec Pro 600
-
Profitec Pro 700
-
Profitec Pro 800
-
Rocket Appartamento
-
Rocket R58 / Cinquantotto
-
Rocket Giotto
-
Rocket R Nine One
-
La Spaziale S2 EK
-
Rancilio Silvia
-
Rancilio Silvia Pro
-
Rancilio Silvia Pro X
-
Izzo Alex Duetto
-
Quick Mill
-
Breville Oracle
-
Dalla Corte Mina
-
Slayer
-
Lucca Grinders
-
Baratza Grinders
-
LUCCA Atom 75
-
Eureka Grinders
-
ECM Grinders
-
Compak Grinders
-
Fellow ODE Grinder
-
Mahlkonig Grinders
-
Profitec Grinders
-
Breville Grinders
-
Dalla Corte Grinders
-
Macap Grinders
-
Fiorenzato Grinders
-
General Troubleshooting
-
Like New & Trade-In Program
-
Eureka Mignon Libra
-
Eureka Mignon Libra User Manual
-
Rocket Boxer Setup Guide
-
Rocket Boxer Timer User Manual
-
Baratza Encore ESP Setup Guide
-
Baratza Encore ESP User Manual
-
Fellow Opus User Manual
-
Fellow Opus Setup Guide
LUCCA M58: PID Replacement
Below is a video and instructions for replacing the PID on your Quick Mill LUCCA M58 espresso machine. (Difficulty ☕☕☕)
Before doing this unplug your machine and let it fully cool off. In order to access the PID you will first need to remove the panels from the machine. The M58 PID is available for purchase here on our website.
Tools required:
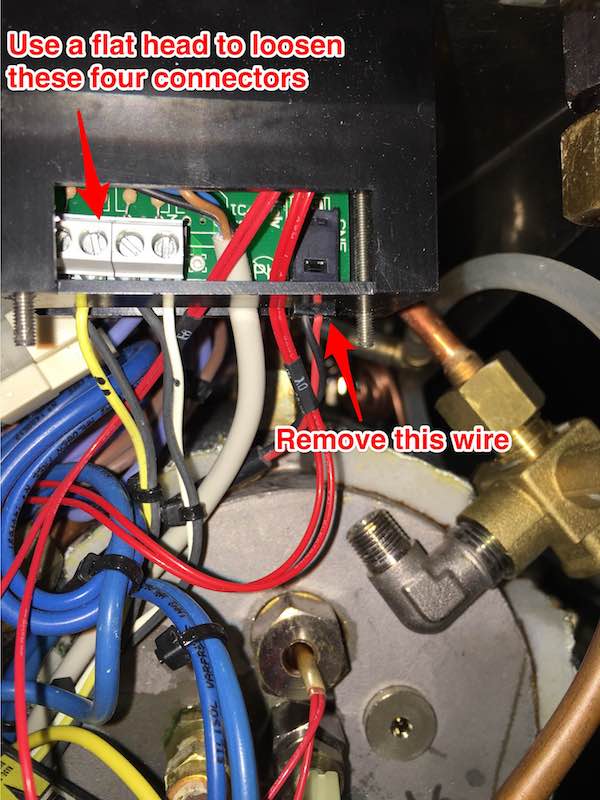
- Small flathead screwdriver
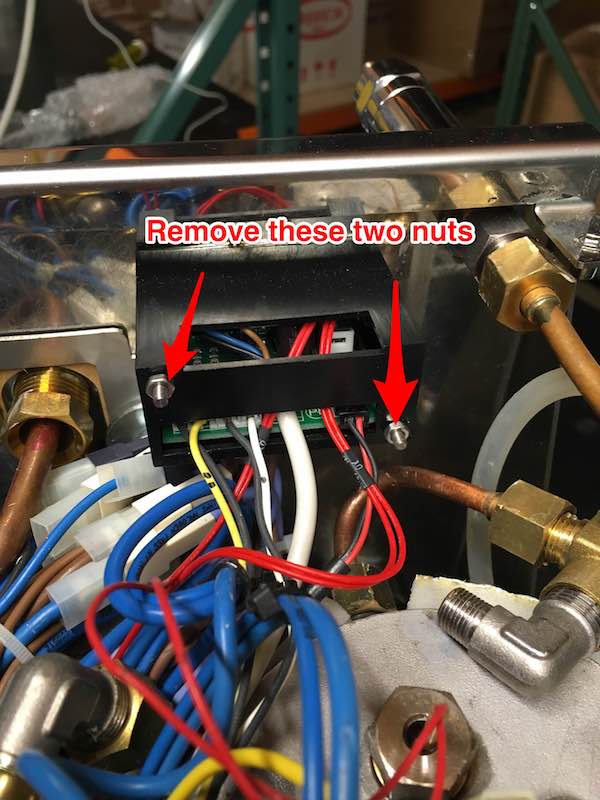
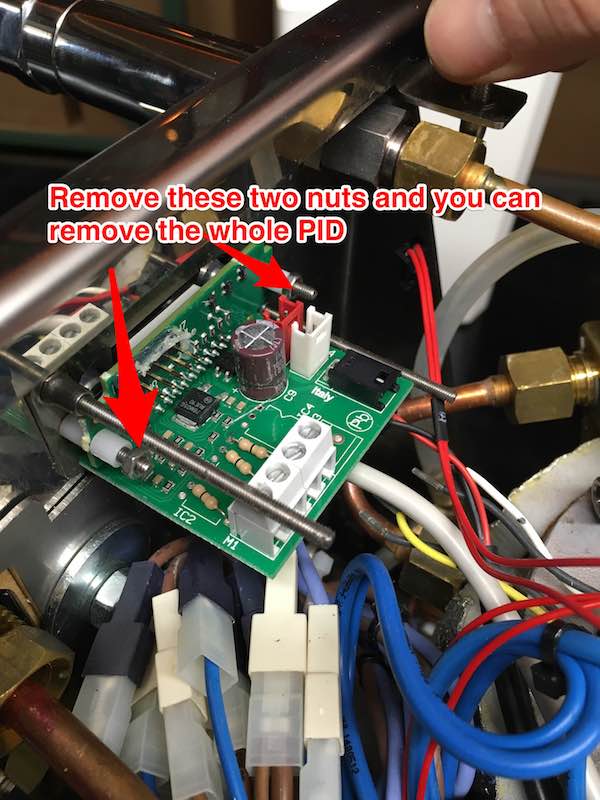
- Adjustable wrench


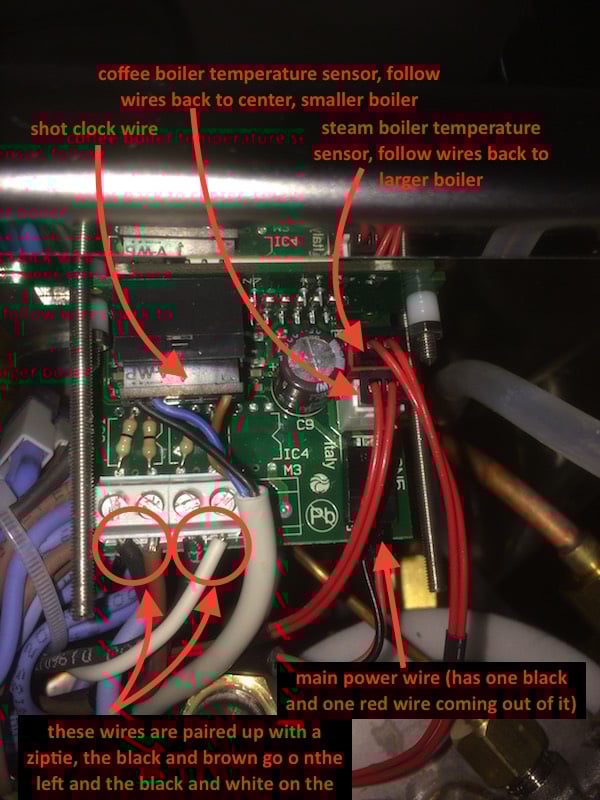
When reinstalling PID it is crucial to connect the right wires to the right seats, the photo below describes which wires seat in the correct spots. Note: On some models the machine uses a yellow wire(see photos above) and others a brown wire(in the photo below).

When installing a new PID it can be helpful to glue in the plug that seats to the vertical part of the board, though not necessary.
Finally, program the settings on your new PID: M58 PID settings