- Help Center
- Rancilio Silvia Pro
- Panel Removal
-
Getting Started
-
Espresso 101
-
Warranty, Ordering & Returns
-
Like New & Trade-In Program
-
General Troubleshooting
-
LUCCA A53 Mini/Mini Vivaldi
-
LUCCA A53 Direct Plumb
-
LUCCA Accessories
-
LUCCA M58 by Quick Mill
-
LUCCA Solo
-
LUCCA Tempo
-
LUCCA X58 by Quick Mill
-
LUCCA S58 by Profitec
-
La Marzocco Linea Mini
-
La Marzocco GS3
-
Lelit Mara X
-
Lelit Bianca
-
Lelit Elizabeth
-
Lelit Victoria
-
ECM Synchronika & Synchronika II
-
ECM Special Edition Classika PID
-
ECM Mechanika V Slim
-
ECM Mechanika VI Slim
-
ECM Casa V
-
ECM Puristika
-
Profitec MOVE
-
Profitec RIDE
-
Profitec JUMP
-
Profitec GO
-
Profitec Drive
-
Profitec Pro 300
-
Profitec Pro 400
-
Profitec Pro 500
-
Profitec Pro 600
-
Profitec Pro 700
-
Profitec Pro 800
-
Rocket Appartamento
-
Rocket R58 / Cinquantotto
-
Rocket Giotto
-
Rocket R Nine One
-
Rocket Boxer
-
La Spaziale S2 EK
-
Rancilio Silvia
-
Rancilio Silvia Pro
-
Rancilio Silvia Pro X
-
Sanremo YOU
-
Ascaso Steel DUO
-
Breville Barista Pro
-
Breville Oracle Touch
-
Flair Classic Espresso Maker
-
Flair 58 Pro 2
-
Flair 58 Plus Espresso Maker
-
LUCCA Grinders
-
WEBER WORKSHOPS Grinders
-
Baratza Grinders
-
Eureka Grinders
-
Eureka Mignon Zero
-
ECM Grinders
-
Fellow Grinders
-
Fellow Tally Precision Scale
-
Mahlkönig Grinders
-
DF64 Grinder
-
Quick Mill
-
Izzo Alex Duetto
-
Bezzera BZ10
-
Bezzera Duo DE
-
Bezzera Duo MN
-
Dalla Corte Mina
-
Compak Grinders
-
Dalla Corte Grinders
-
Profitec Grinders
-
Breville Grinders
-
Macap Grinders
-
Fiorenzato Grinders
-
Slayer
Rancilio Silvia Pro or Pro X: Panel Removal
See our step-by-step instructions on how to remove the panels from your Silvia Pro.
Tools needed:
- #1 Phillips head screwdriver
- #2 Phillips head screwdriver (long-reach driver recommended if available)
OR
- 7mm hex driver / 7mm socket (with long-reach extension)
1. Start by removing the drip tray and water reservoir.
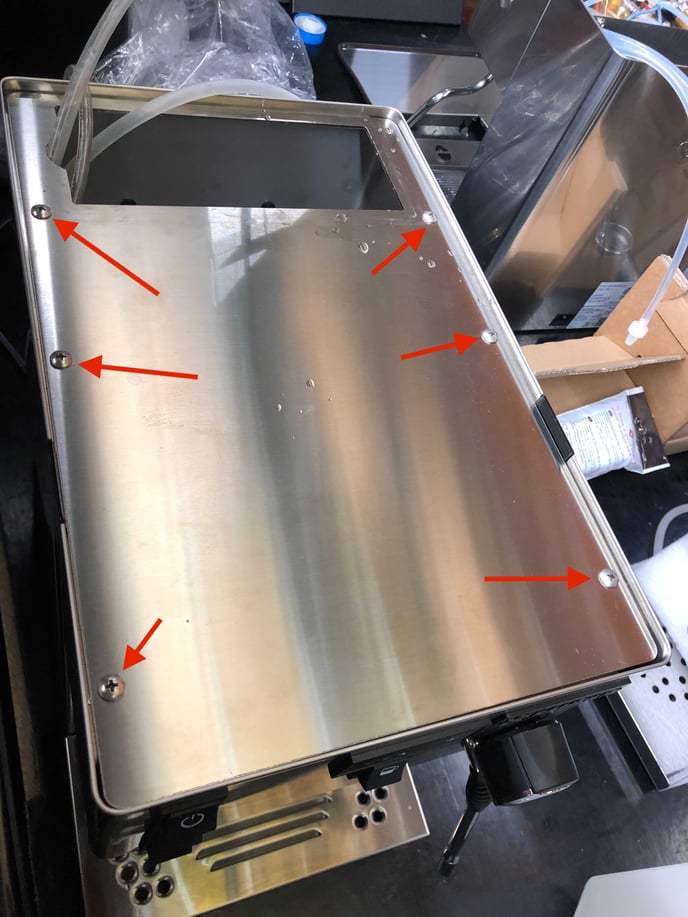
2. Remove the six panel screws that attach the top panel to the machine using a #2 Phillips head screwdriver.
If you just need to remove the top panel from the machine, you can stop here and reinstall the water reservoir.
3. Remove the two screws that hold the lower front panel in place.
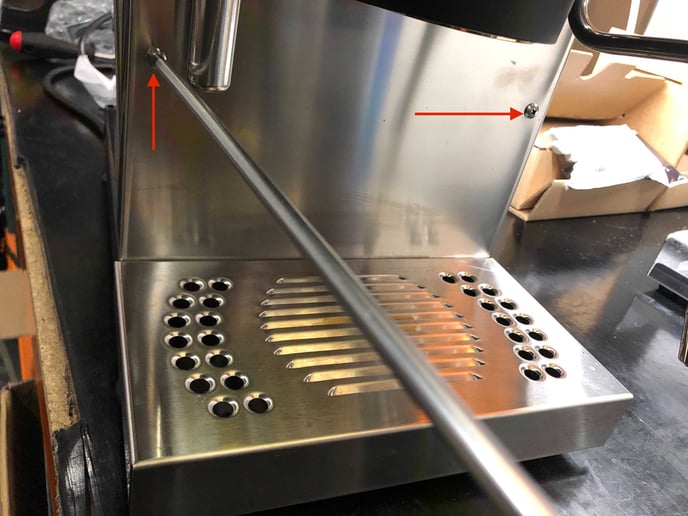
NOTE: You will need to remove the drip tray grate, drip tray, and the two drip tray side rails to be able to work the lower front panel free of the machine.
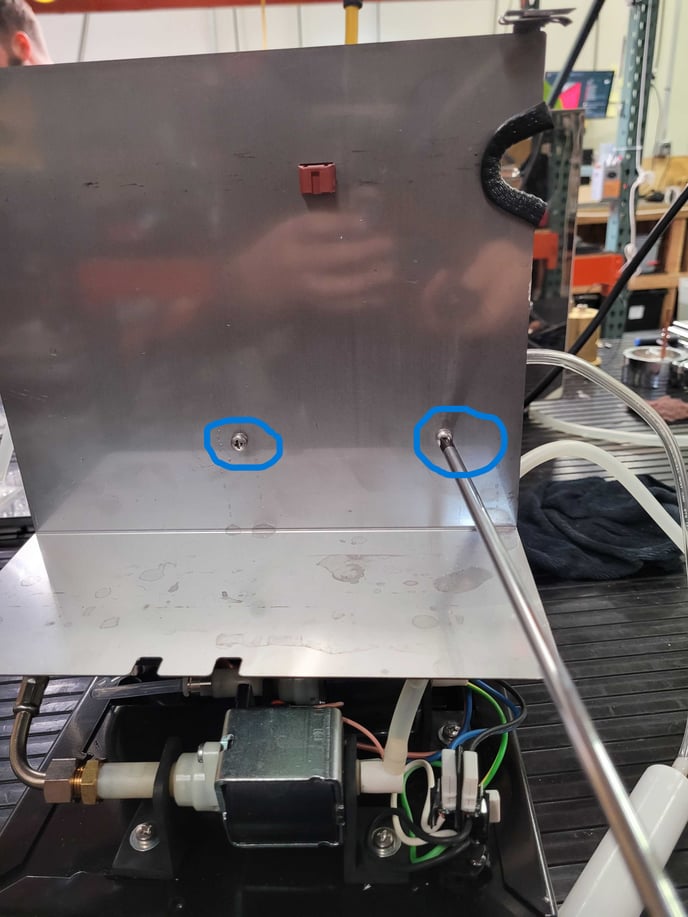
4. Using a #1 Phillips head screwdriver, remove the two small screws indicated.
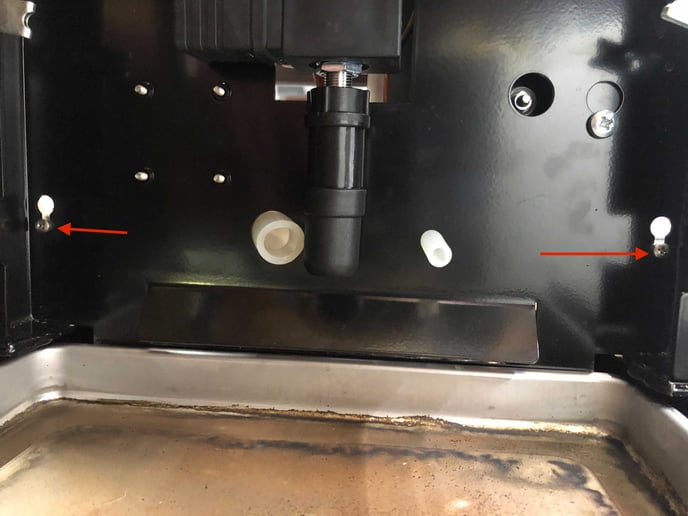
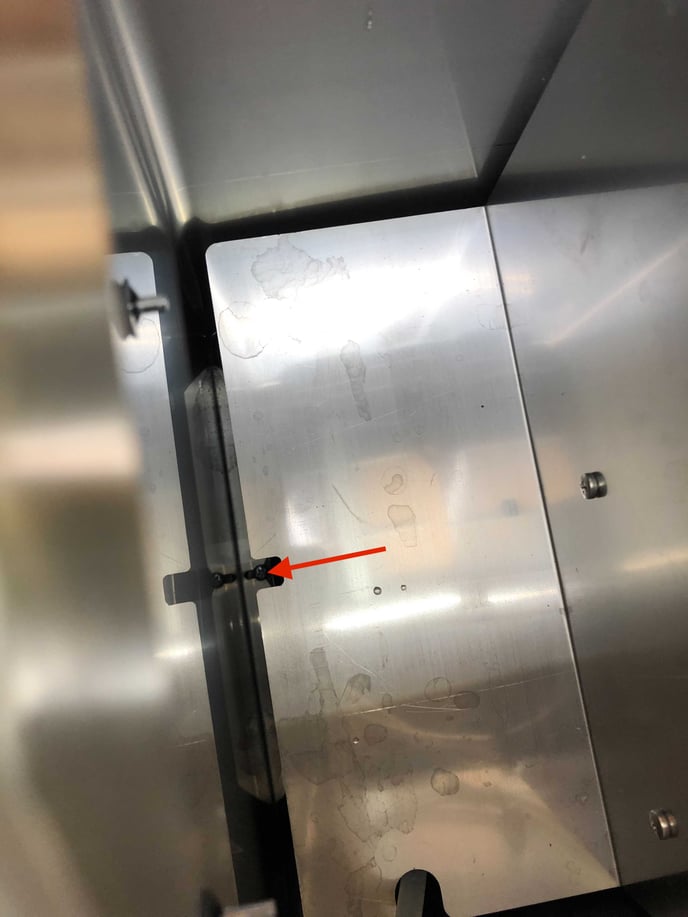
5. Remove the two small Phillips head screws attaching the wrap-around panel to the frame.
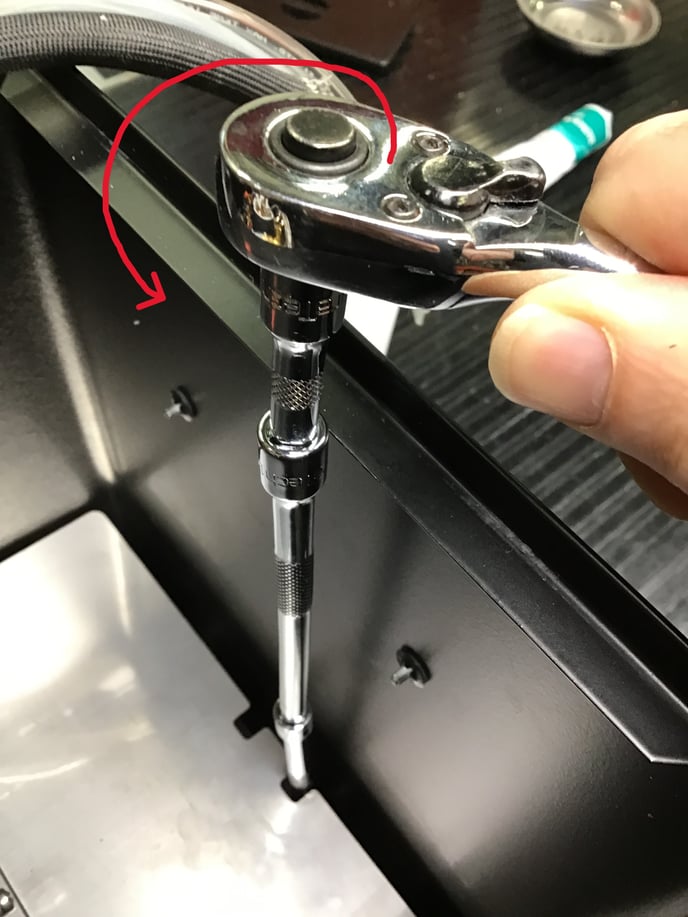
6. Remove the final Phillips head screw that attaches the panel to the frame. This screw will be beneath the reservoir cavity and may require a long-handled screwdriver to reach.
NOTE: On newer Pro X models, this screw may be a 7mm hex head screw. On these models, a 7mm socket with extension and ratchet or a long-reach 7mm hex driver will be needed to remove the screw.
The panel should be able to be removed now simply by lifting gently and pulling the panel off the back of the machine.
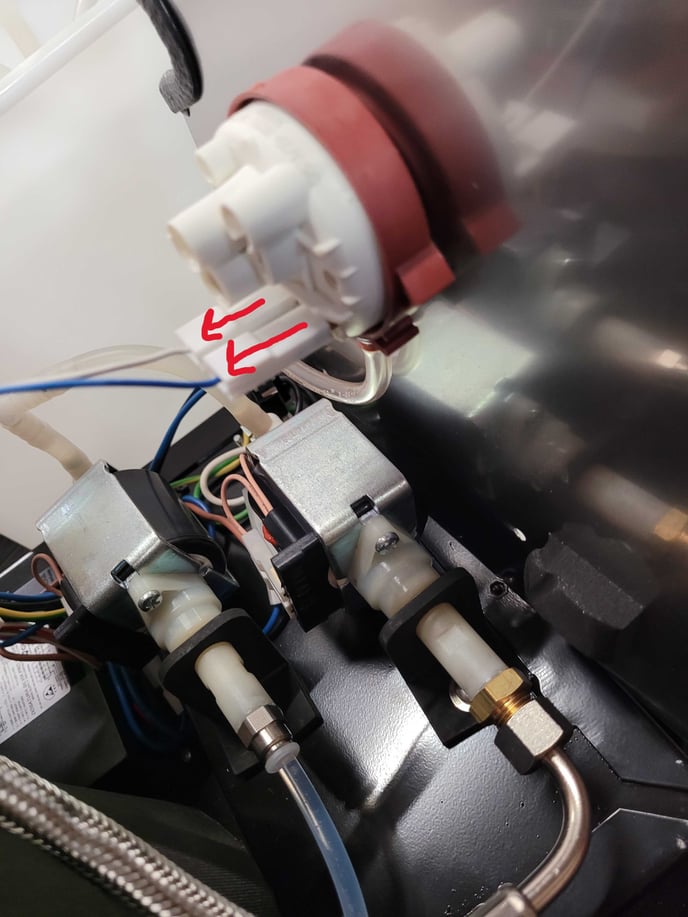
If you need more access to the internal components, you can also remove the reservoir holder by removing these two screws and unplugging these two electrical leads.