- Help Center
- Eureka Grinders
- Eureka Zenith 65E
-
Getting Started
-
Espresso 101
-
Warranty, Ordering & Returns
-
Bezzera BZ10
-
Bezzera Duo DE
-
Bezzera Duo MN
-
LUCCA A53 (Direct Plumb & Mini) by La Spaziale
-
LUCCA M58 by Quick Mill
-
LUCCA S58 by Profitec
-
LUCCA X58 by Quick Mill
-
La Marzocco Linea Mini
-
La Marzocco GS3
-
Lelit Bianca
-
Lelit Elizabeth
-
Lelit Victoria
-
ECM Synchronika
-
ECM Special Edition Classika PID
-
ECM Mechanika V Slim
-
ECM Casa V
-
ECM Puristika
-
Profitec Pro 300
-
Profitec Pro 400
-
Profitec Pro 500
-
Profitec Pro 600
-
Profitec Pro 700
-
Profitec Pro 800
-
Rocket Appartamento
-
Rocket R58 / Cinquantotto
-
Rocket Giotto
-
Rocket R Nine One
-
La Spaziale S2 EK
-
Rancilio Silvia
-
Rancilio Silvia Pro
-
Rancilio Silvia Pro X
-
Izzo Alex Duetto
-
Quick Mill
-
Breville Oracle
-
Dalla Corte Mina
-
Slayer
-
Lucca Grinders
-
Baratza Grinders
-
LUCCA Atom 75
-
Eureka Grinders
-
ECM Grinders
-
Compak Grinders
-
Fellow ODE Grinder
-
Mahlkonig Grinders
-
Profitec Grinders
-
Breville Grinders
-
Dalla Corte Grinders
-
Macap Grinders
-
Fiorenzato Grinders
-
General Troubleshooting
-
Like New & Trade-In Program
-
Eureka Mignon Libra
-
Eureka Mignon Libra User Manual
-
Rocket Boxer Setup Guide
-
Rocket Boxer Timer User Manual
-
Baratza Encore ESP Setup Guide
-
Baratza Encore ESP User Manual
-
Fellow Opus User Manual
-
Fellow Opus Setup Guide
Eureka Zenith 65E Espresso Grinder: Accessing Chute
Here is step by step instructions for accessing the chute on the Eureka Zenith 65E espresso grinder. This is useful for deep cleaning or replacing the clump crusher screen.
Tools needed:
- Large phillips screwdriver
- Small phillips screwdriver
- Brush (for cleaning)
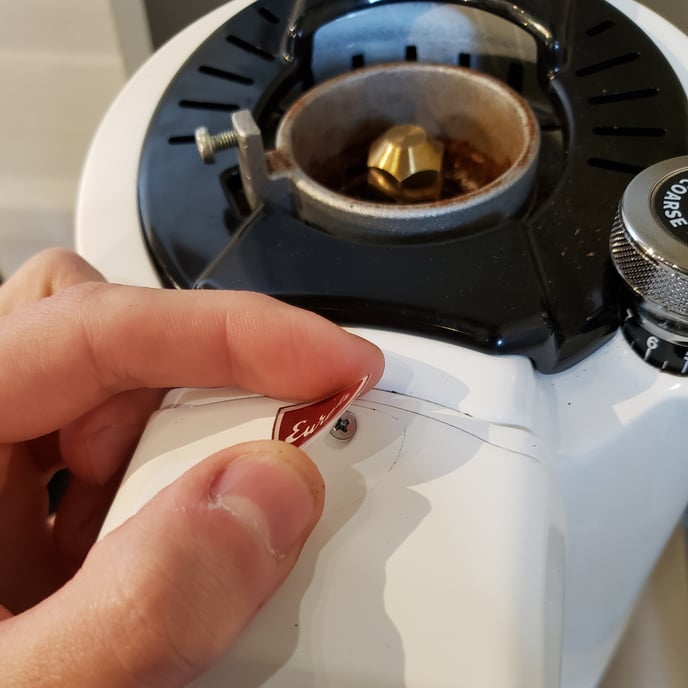
1. Carefully peel back the sticker on the top of the grinder to reveal the small screw hidden behind it. Remove the screw and you'll be able to move the panel aside gently.
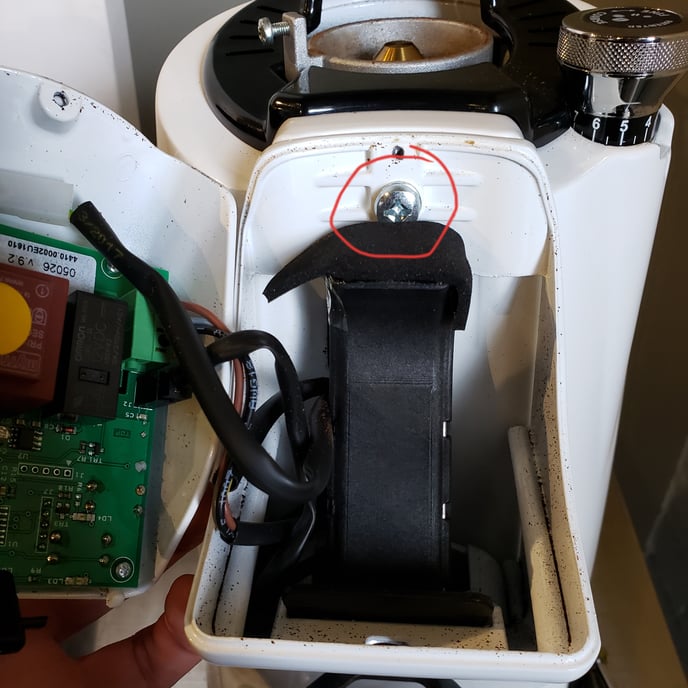
2. Remove the large screw holding the main portion of the front of the grinder on.
3. It will be snug, but you will be able to wiggle the entire front portion of the grinder off.
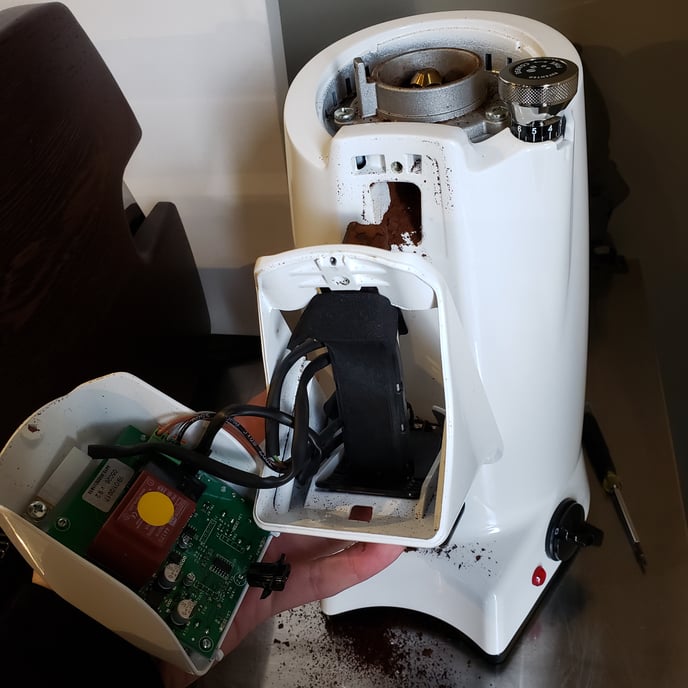
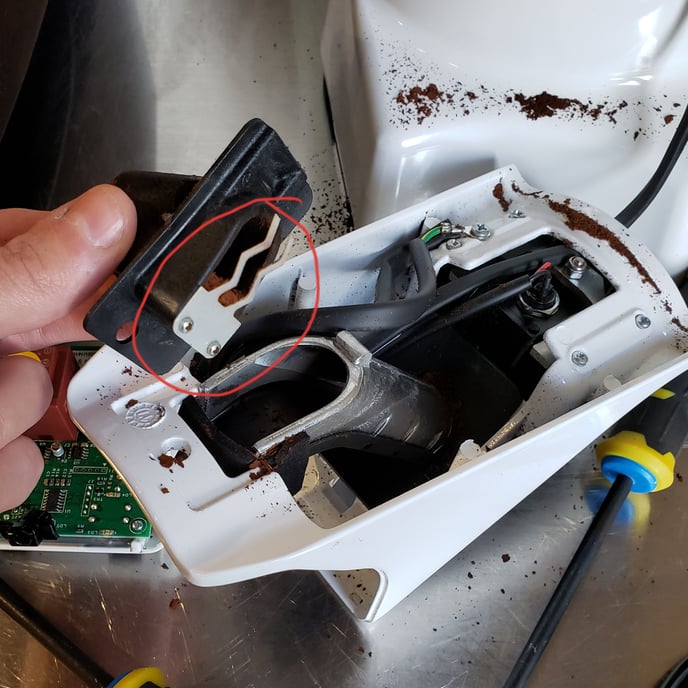
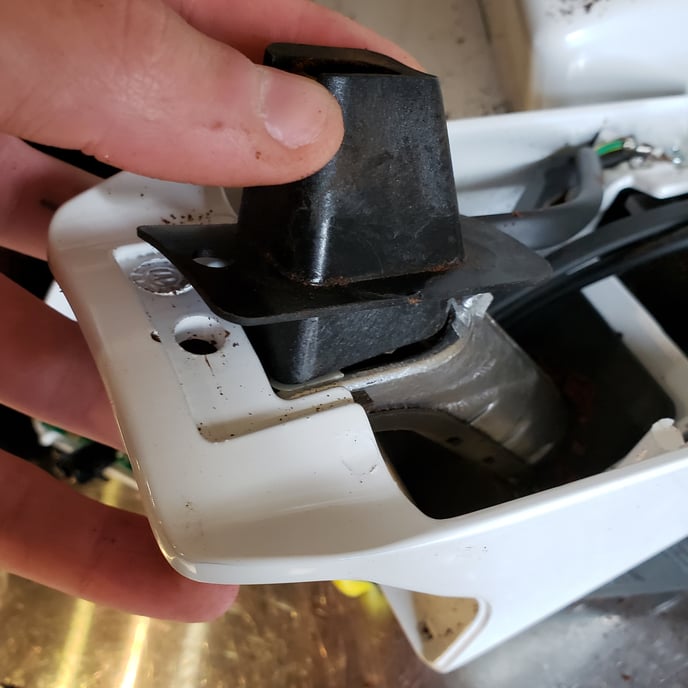
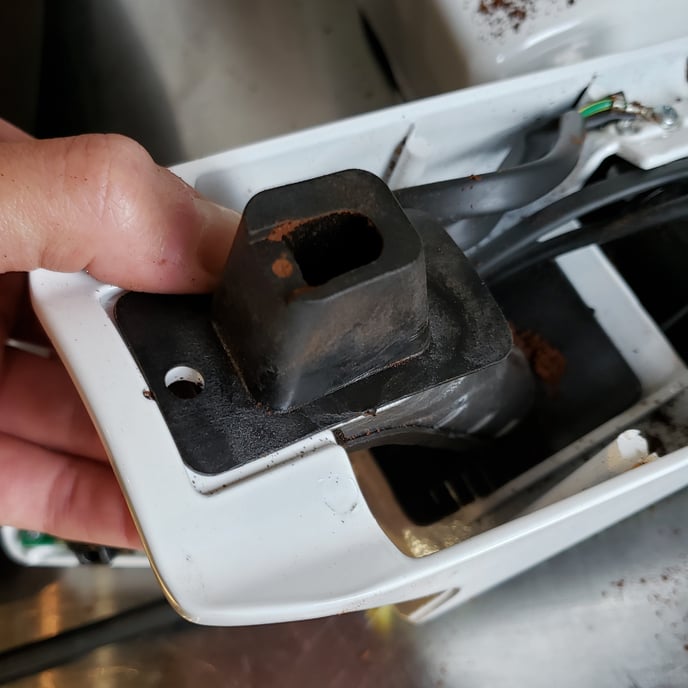
4. With the front of the grinder off, you can easily pop off the top of the chute containing the clump crusher screen. This is now easy to clean or replace if needed.
5. Line the top of the chute back up with the hole.
6. The main portion of the front of the grinder will slide back in place. Note: this step will require some adjustment and patience, as the top and bottom pieces need to line up, and will fit very snug.
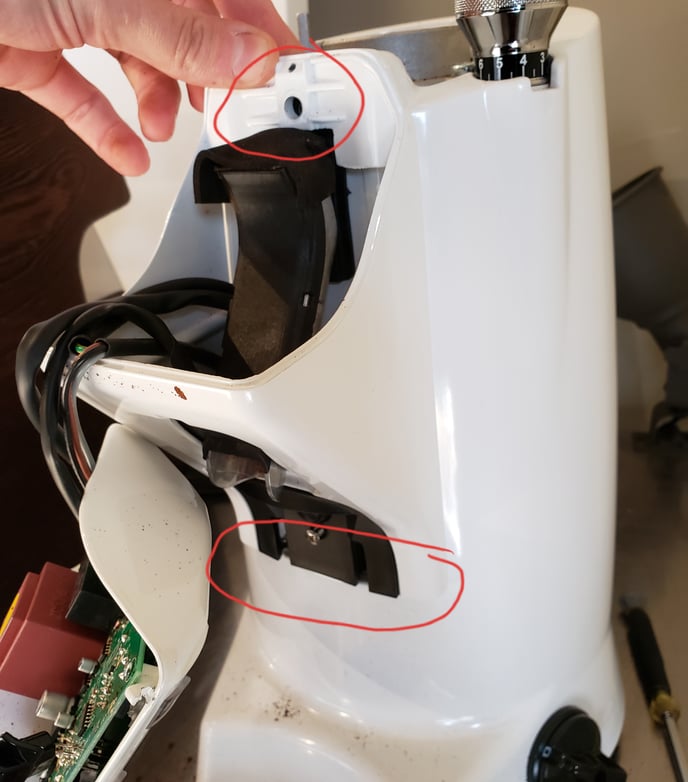
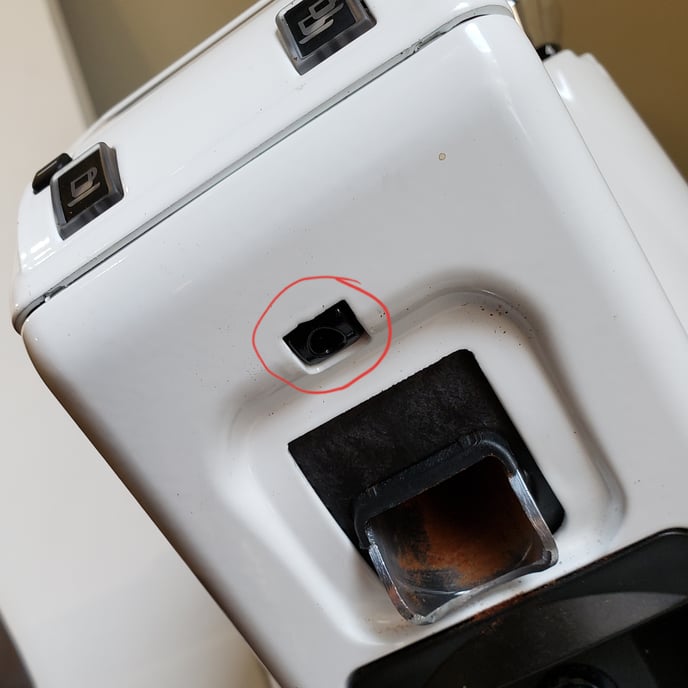
7. Make sure the light is aligned with the opening when reinstalling the top portion of the grinder. You can use a screwdriver to gently pop it over into place if needed.