- Help Center
- Eureka Grinders
- Eureka Zenith 65E
-
Getting Started
-
Espresso 101
-
Warranty, Ordering & Returns
-
Bezzera BZ10
-
Bezzera Duo DE
-
Bezzera Duo MN
-
LUCCA A53 (Direct Plumb & Mini) by La Spaziale
-
LUCCA M58 by Quick Mill
-
LUCCA S58 by Profitec
-
LUCCA X58 by Quick Mill
-
La Marzocco Linea Mini
-
La Marzocco GS3
-
Lelit Mara X
-
Lelit Bianca
-
Lelit Elizabeth
-
Lelit Victoria
-
ECM Synchronika
-
ECM Special Edition Classika PID
-
ECM Mechanika V Slim
-
ECM Mechanika VI Slim
-
ECM Casa V
-
ECM Puristika
-
Profitec Pro 300
-
Profitec Pro 400
-
Profitec Pro 500
-
Profitec Pro 600
-
Profitec Pro 700
-
Profitec Pro 800
-
Profitec GO
-
Rocket Appartamento
-
Rocket R58 / Cinquantotto
-
Rocket Giotto
-
Rocket R Nine One
-
Rocket Boxer
-
La Spaziale S2 EK
-
Rancilio Silvia
-
Rancilio Silvia Pro
-
Rancilio Silvia Pro X
-
Sanremo YOU
-
Izzo Alex Duetto
-
Quick Mill
-
Breville Oracle
-
Dalla Corte Mina
-
Slayer
-
LUCCA Grinders
-
Baratza Grinders
-
Eureka Grinders
-
ECM Grinders
-
Compak Grinders
-
Fellow Grinders
-
Mahlkonig Grinders
-
Profitec Grinders
-
Breville Grinders
-
Dalla Corte Grinders
-
Macap Grinders
-
Fiorenzato Grinders
-
LUCCA E61 Flow Control
-
General Troubleshooting
-
Like New & Trade-In Program
-
Breville Barista Pro
-
Breville Oracle Touch
-
Fellow Tally Precision Scale
-
DF64
-
LUCCA DF64
Eureka Zenith 65E: Checking Wiring Connections
Below you will find instructions on checking the wiring and connections for the Eureka Zenith 65E Espresso Grinder behind the control panel and in the bottom part of the machine.
You will need to clear all the beans from the hopper/grinder and unplug it before doing this.
Tools Needed:
- Small, medium, and large phillips head screwdrivers
Checking the connections to the back of the faceplate.
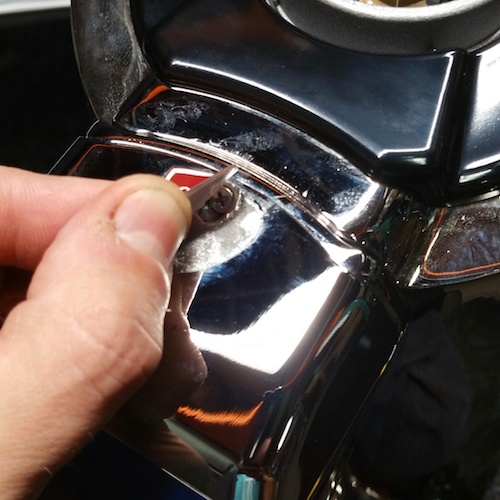
1. Carefully peel back the Eureka sticker on the top of the grinder, which will reveal a single screw. Take this screw out and the front faceplate of the machine will come right off.

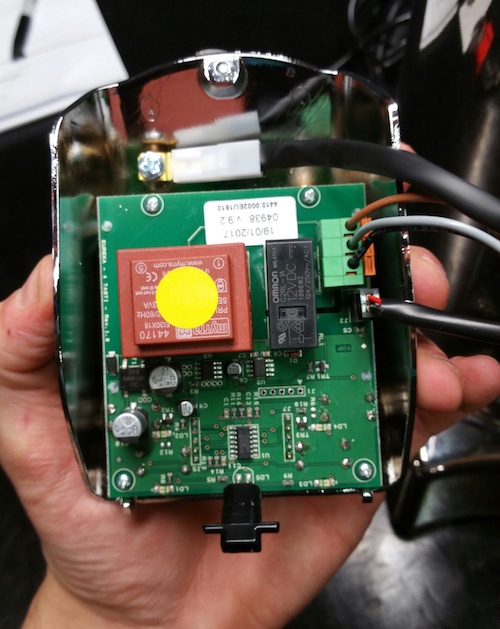
2. Check the connections the back of the control panel, and check through the wires themselves to make sure everything looks tidy and there are no exposed wires.

Checking the bottom of the machine for wiring connections.
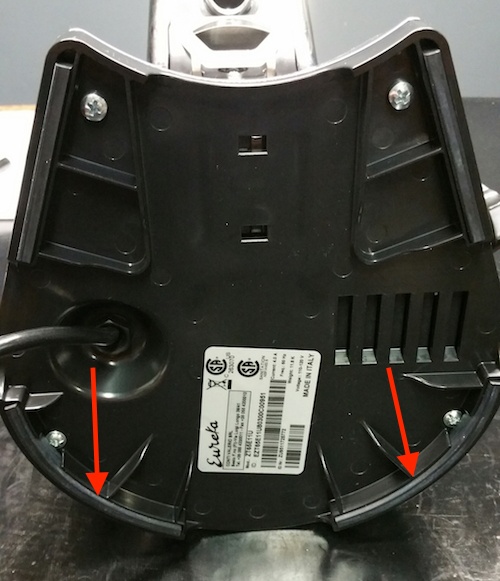
1. Lay the machine carefully on it's back or side. Remove the 2 rubber feet from the bottom and take out the 4 screws holding the bottom plate in place.

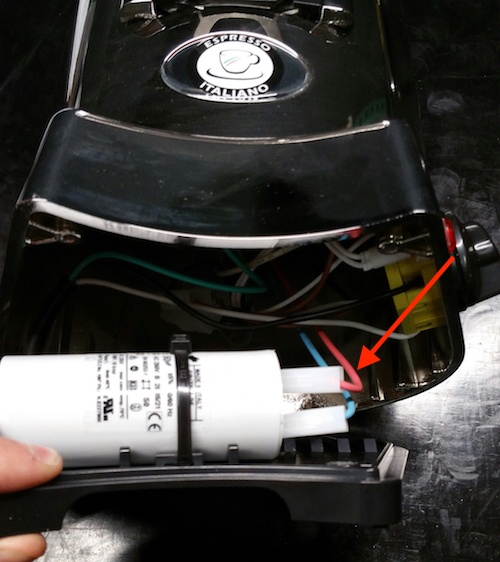
2. Remove the 2 wires connected to the capacitor to allow you to move the bottom plate out of the way.

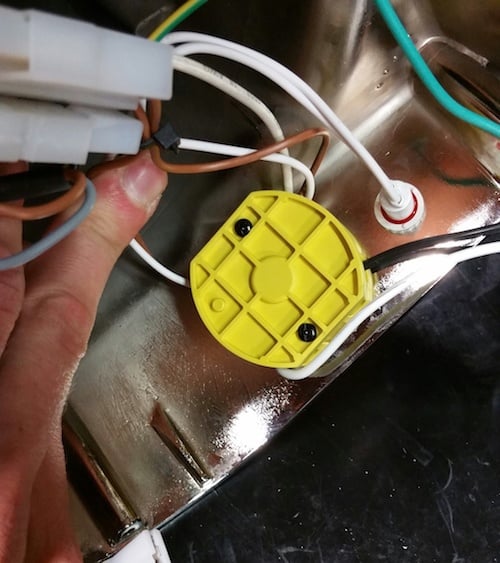
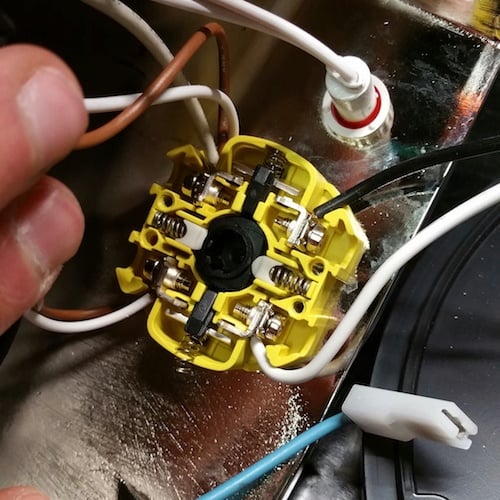
3. Using your smallest screwdriver, take the screws out of the back of the power switch assembly and make sure all wires are firmly in place.


4. While you have the bottom of the machine open, this is a good time to check for any loose wires or bare wires that may have lost their insulation. Before closing the bottom plate back up, be sure to plug the wires back into the transistor.