- Help Center
- La Marzocco Linea Mini
- General Maintenance
-
Getting Started
-
Espresso 101
-
Warranty, Ordering & Returns
-
Like New & Trade-In Program
-
General Troubleshooting
-
LUCCA A53 Mini/Mini Vivaldi
-
LUCCA A53 Direct Plumb
-
LUCCA Accessories
-
LUCCA M58 by Quick Mill
-
LUCCA Solo
-
LUCCA Tempo
-
LUCCA X58 by Quick Mill
-
LUCCA S58 by Profitec
-
La Marzocco Linea Mini
-
La Marzocco GS3
-
Lelit Mara X
-
Lelit Bianca
-
Lelit Elizabeth
-
Lelit Victoria
-
ECM Synchronika & Synchronika II
-
ECM Special Edition Classika PID
-
ECM Mechanika V Slim
-
ECM Mechanika VI Slim
-
ECM Casa V
-
ECM Puristika
-
Profitec MOVE
-
Profitec RIDE
-
Profitec JUMP
-
Profitec GO
-
Profitec Drive
-
Profitec Pro 300
-
Profitec Pro 400
-
Profitec Pro 500
-
Profitec Pro 600
-
Profitec Pro 700
-
Profitec Pro 800
-
Rocket Appartamento
-
Rocket R58 / Cinquantotto
-
Rocket Giotto
-
Rocket R Nine One
-
Rocket Boxer
-
La Spaziale S2 EK
-
Rancilio Silvia
-
Rancilio Silvia Pro
-
Rancilio Silvia Pro X
-
Sanremo YOU
-
Ascaso Steel DUO
-
Breville Barista Pro
-
Breville Oracle Touch
-
Flair Classic Espresso Maker
-
Flair 58 Pro 2
-
Flair 58 Plus Espresso Maker
-
LUCCA Grinders
-
WEBER WORKSHOPS Grinders
-
Baratza Grinders
-
Eureka Grinders
-
Eureka Mignon Zero
-
ECM Grinders
-
Fellow Grinders
-
Fellow Tally Precision Scale
-
Mahlkönig Grinders
-
DF64 Grinder
-
Quick Mill
-
Izzo Alex Duetto
-
Bezzera BZ10
-
Bezzera Duo DE
-
Bezzera Duo MN
-
Dalla Corte Mina
-
Compak Grinders
-
Dalla Corte Grinders
-
Profitec Grinders
-
Breville Grinders
-
Macap Grinders
-
Fiorenzato Grinders
-
Slayer
La Marzocco Linea Mini: Panel Removal Instructions
Below you will find step-by-step instructions for removing the panels from the La Marzocco Linea Mini espresso machine.
You will want to unplug the machine and allow it to fully cool before doing this procedure.
Tools Needed:
- Long phillips screwdriver
- Flathead screwdriver
- 7mm crescent wrench
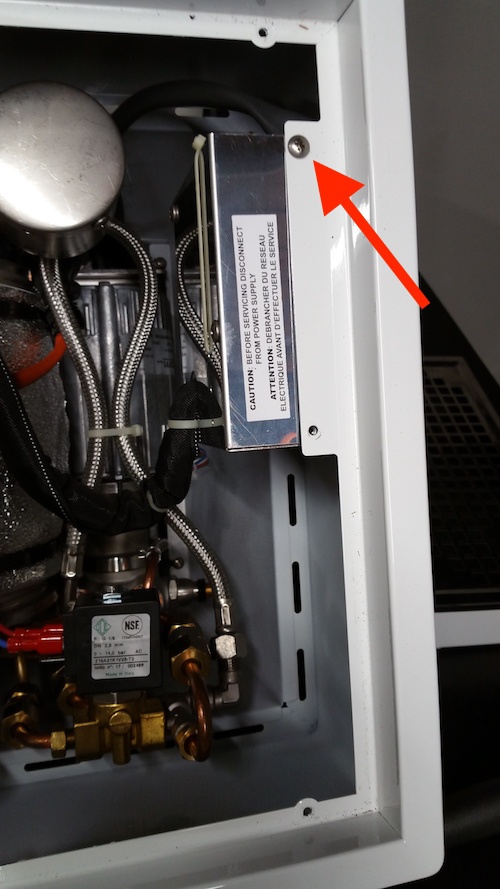
1. Remove the top panel of the machine by taking out all of the screws underneath the cup tray.
* Note: If you are only removing the top panel, the starred screw can be left in.

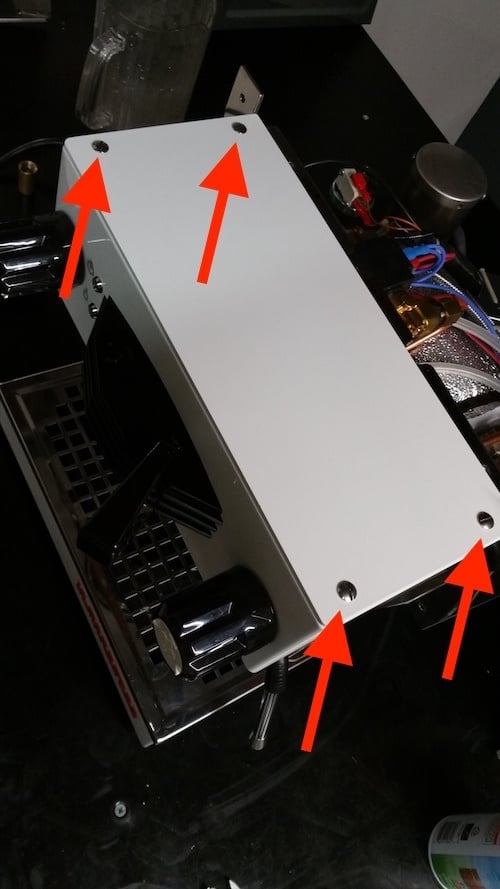
*If you need to access the group head you can remove the top panel from the group head with these 4 screws
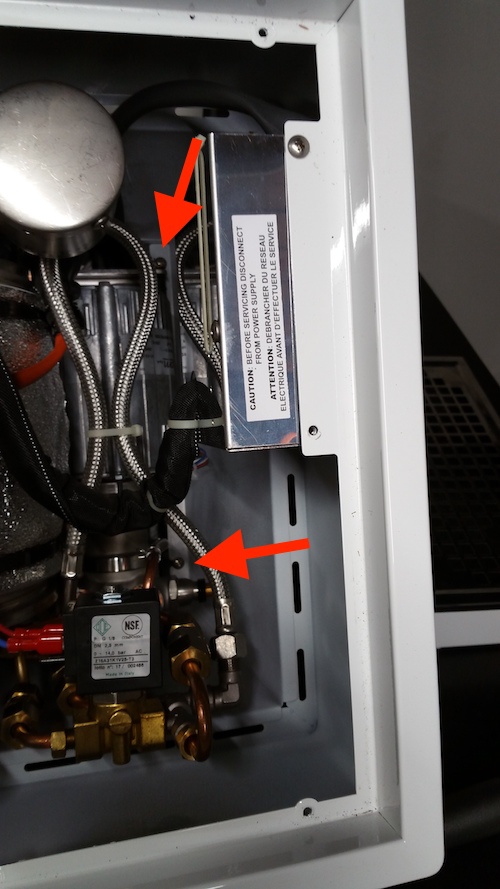
2. There are screws in the bottom of the side panels that need to be loosened, we recommend not removing them fully as they can be difficult to get back in. You can find these two along the back.
3. Remove the 4 screws (2 on each side) from the top front of the machine. Do not remove the lower four screws.
.jpg?width=688&name=Image%20from%20iOS%20(91).jpg)
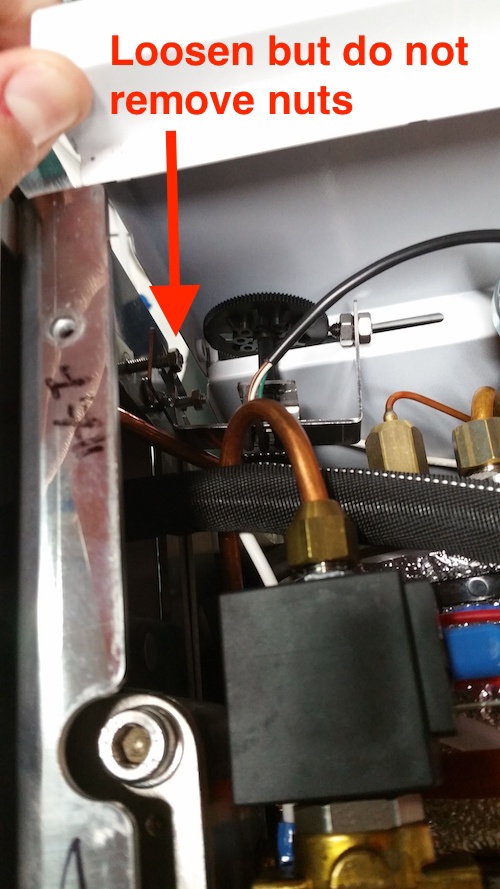
4. Loosen the 7mm nuts holding the temperature adjustment wheel in place. Again, don't remove them as they can be difficult to get back in place. From here, you should be able to maneuver the panels backward off of the machine.
5. When reinstalling the panels, we recommend attaching the board to the side panels before reinstalling the top panel.