LUCCA A53 / Vivaldi: Expansion Valve Adjustment and Service
If your machine's expansion valve is dripping steadily or leaking during brewing/backflushing, it may need to be adjusted or serviced. Follow the steps below.
You will need the machine to be off, cooled down and have the water line shut off.
Tools Needed:
- Phillips screwdriver
- 21mm wrench or adjustable wrench
- Wire bristle brush or scouring pad
- New Expansion Valve Seat
Expansion Valve Adjustment:
1. Turn off the water line, turn the machine off and let it fully cool. This step is only necessary if replacing the expansion valve seat. Adjusting it requires the machine to remain on.
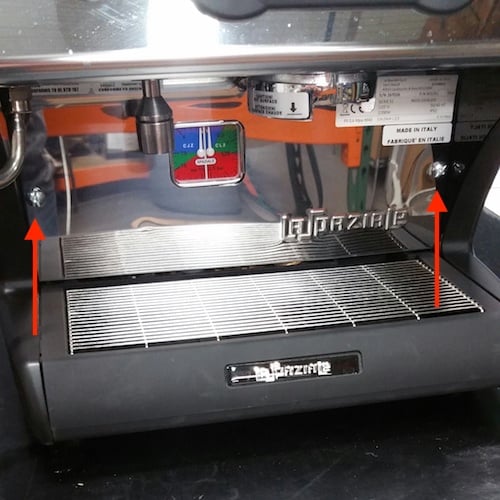
2. Remove the front panel of the machine by removing the 2 screws in the front and pulling it out from the bottom. It will be easier to remove if you take out the drip tray.

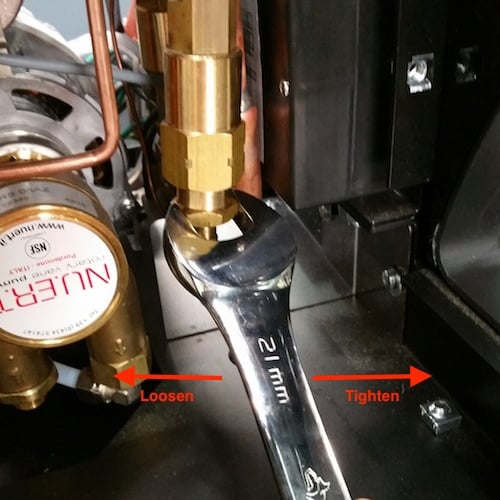
3. Adjust the expansion valve by turning it the way shown in the picture. Left will loosen it, right will tighten it. If you find your expansion valve to be leaking, it may just need to be tightened a half turn or so. You will know the expansion valve is adequately adjusted if it stops leaking during a backflushing cycle.

NOTE: We recommend setting the line pressure going to the machine to 30-45 PSI using a pressure regulator. Line pressure that is too high can cause advanced wear to the expansion valve and damage to the machine.
Expansion Valve Service:
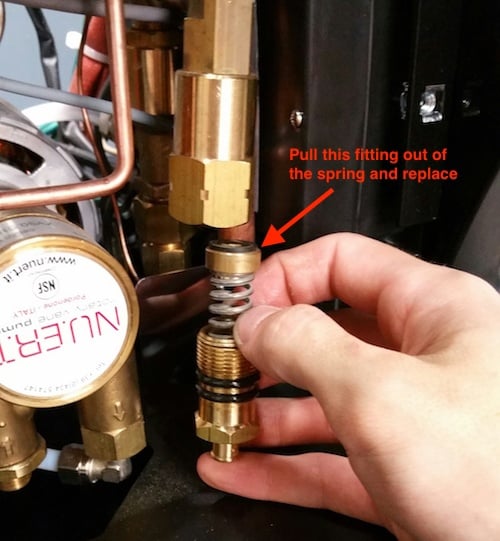
1. If you need to clean or replace the expansion valve seat gasket, fully loosen the expansion valve all the way until comes apart.

2. Examine the expansion valve seat gasket for wear or build-up. Clean or replace as necessary.
La Spaziale Expansion Valve Seat
3. If replacing the seat gasket, use a pick or similar implement to pry the old gasket loose, then press fit the new gasket.

4. Before reassembly, use a wire bristle brush or a scouring pad to clean off any debris or mineral deposition on the inside or outside of the valve.
5. After service, reassemble the valve and re-install in the machine by following these directions in reverse.