- Help Center
- Profitec Pro 500
- General Maintenance
-
Getting Started
-
Espresso 101
-
Warranty, Ordering & Returns
-
Like New & Trade-In Program
-
General Troubleshooting
-
LUCCA A53 Direct Plumb
-
LUCCA A53 Mini/Mini Vivaldi
-
LUCCA M58 by Quick Mill
-
LUCCA X58 by Quick Mill
-
LUCCA Accessories
-
LUCCA S58 by Profitec
-
La Marzocco Linea Mini
-
La Marzocco GS3
-
Lelit Mara X
-
Lelit Bianca
-
Lelit Elizabeth
-
Lelit Victoria
-
ECM Synchronika
-
ECM Special Edition Classika PID
-
ECM Mechanika V Slim
-
ECM Mechanika VI Slim
-
ECM Casa V
-
ECM Puristika
-
Profitec GO
-
Profitec Pro 300
-
Profitec Pro 400
-
Profitec Pro 500
-
Profitec Pro 600
-
Profitec Pro 700
-
Profitec Pro 800
-
Profitec Drive
-
Rocket Appartamento
-
Rocket R58 / Cinquantotto
-
Rocket Giotto
-
Rocket R Nine One
-
Rocket Boxer
-
La Spaziale S2 EK
-
Rancilio Silvia
-
Rancilio Silvia Pro
-
Rancilio Silvia Pro X
-
Sanremo YOU
-
Ascaso Steel DUO
-
Breville Barista Pro
-
Breville Oracle Touch
-
Flair Classic Espresso Maker
-
Flair 58 Pro 2
-
Flair 58 Plus Espresso Maker
-
LUCCA Grinders
-
Baratza Grinders
-
Eureka Grinders
-
ECM Grinders
-
Fellow Grinders
-
Fellow Tally Precision Scale
-
Mahlkönig Grinders
-
DF64 Grinder
-
Quick Mill
-
Izzo Alex Duetto
-
Bezzera BZ10
-
Bezzera Duo DE
-
Bezzera Duo MN
-
Dalla Corte Mina
-
Compak Grinders
-
Dalla Corte Grinders
-
Profitec Grinders
-
Breville Grinders
-
Macap Grinders
-
Fiorenzato Grinders
-
Slayer
-
Eureka Mignon Zero
Profitec Pro 500: Cleaning the Check Valve
Below you will find instructions for cleaning or replacing the check valve on the Profitec Pro 500 Espresso Machine.
Tools Needed:
- 3mm allen key
- 2 Adjustable wrenches
1. Remove the panels of the machine: Pro 500 Panel Removal
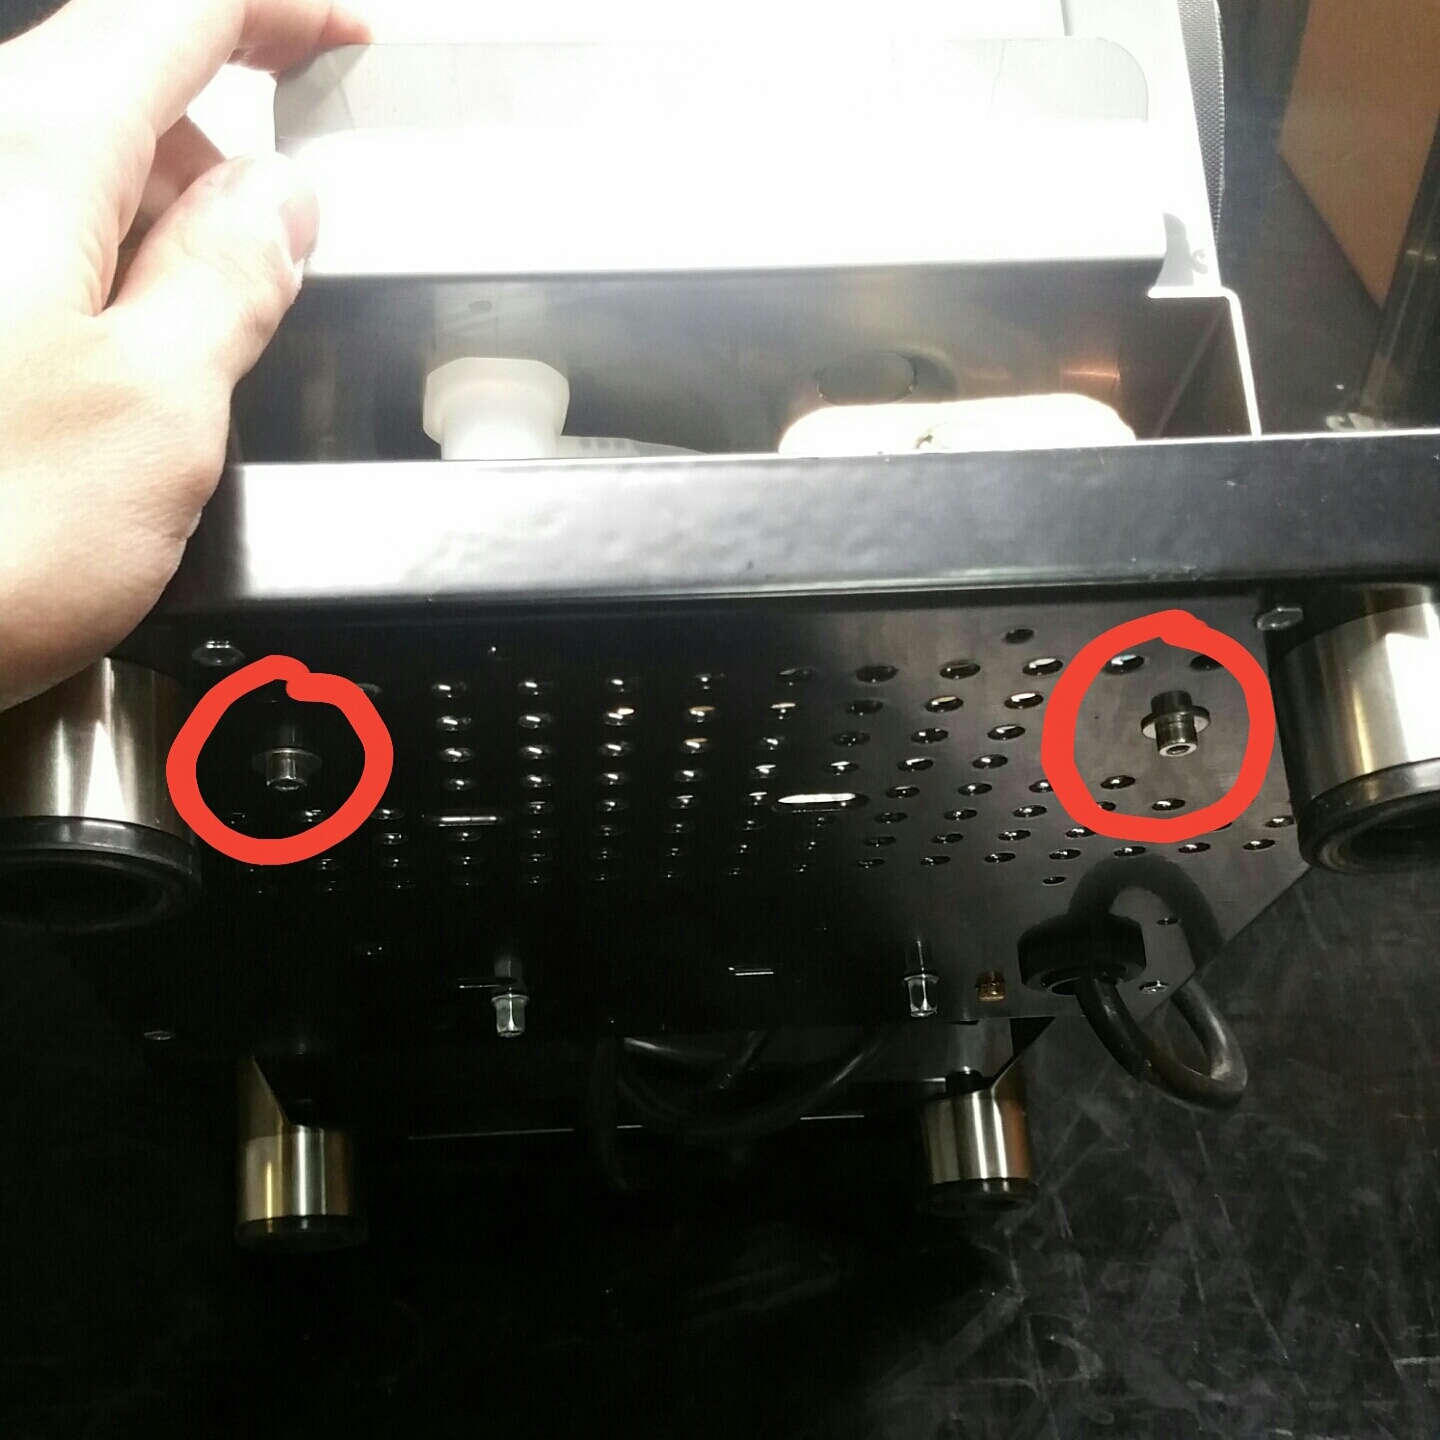
2. Remove the 2 screws holding the water reservoir slot in place and move it to the side.
![](https://support.clivecoffee.com/hubfs/Screenshot_2018-03-27-15-54-02-1.jpg)
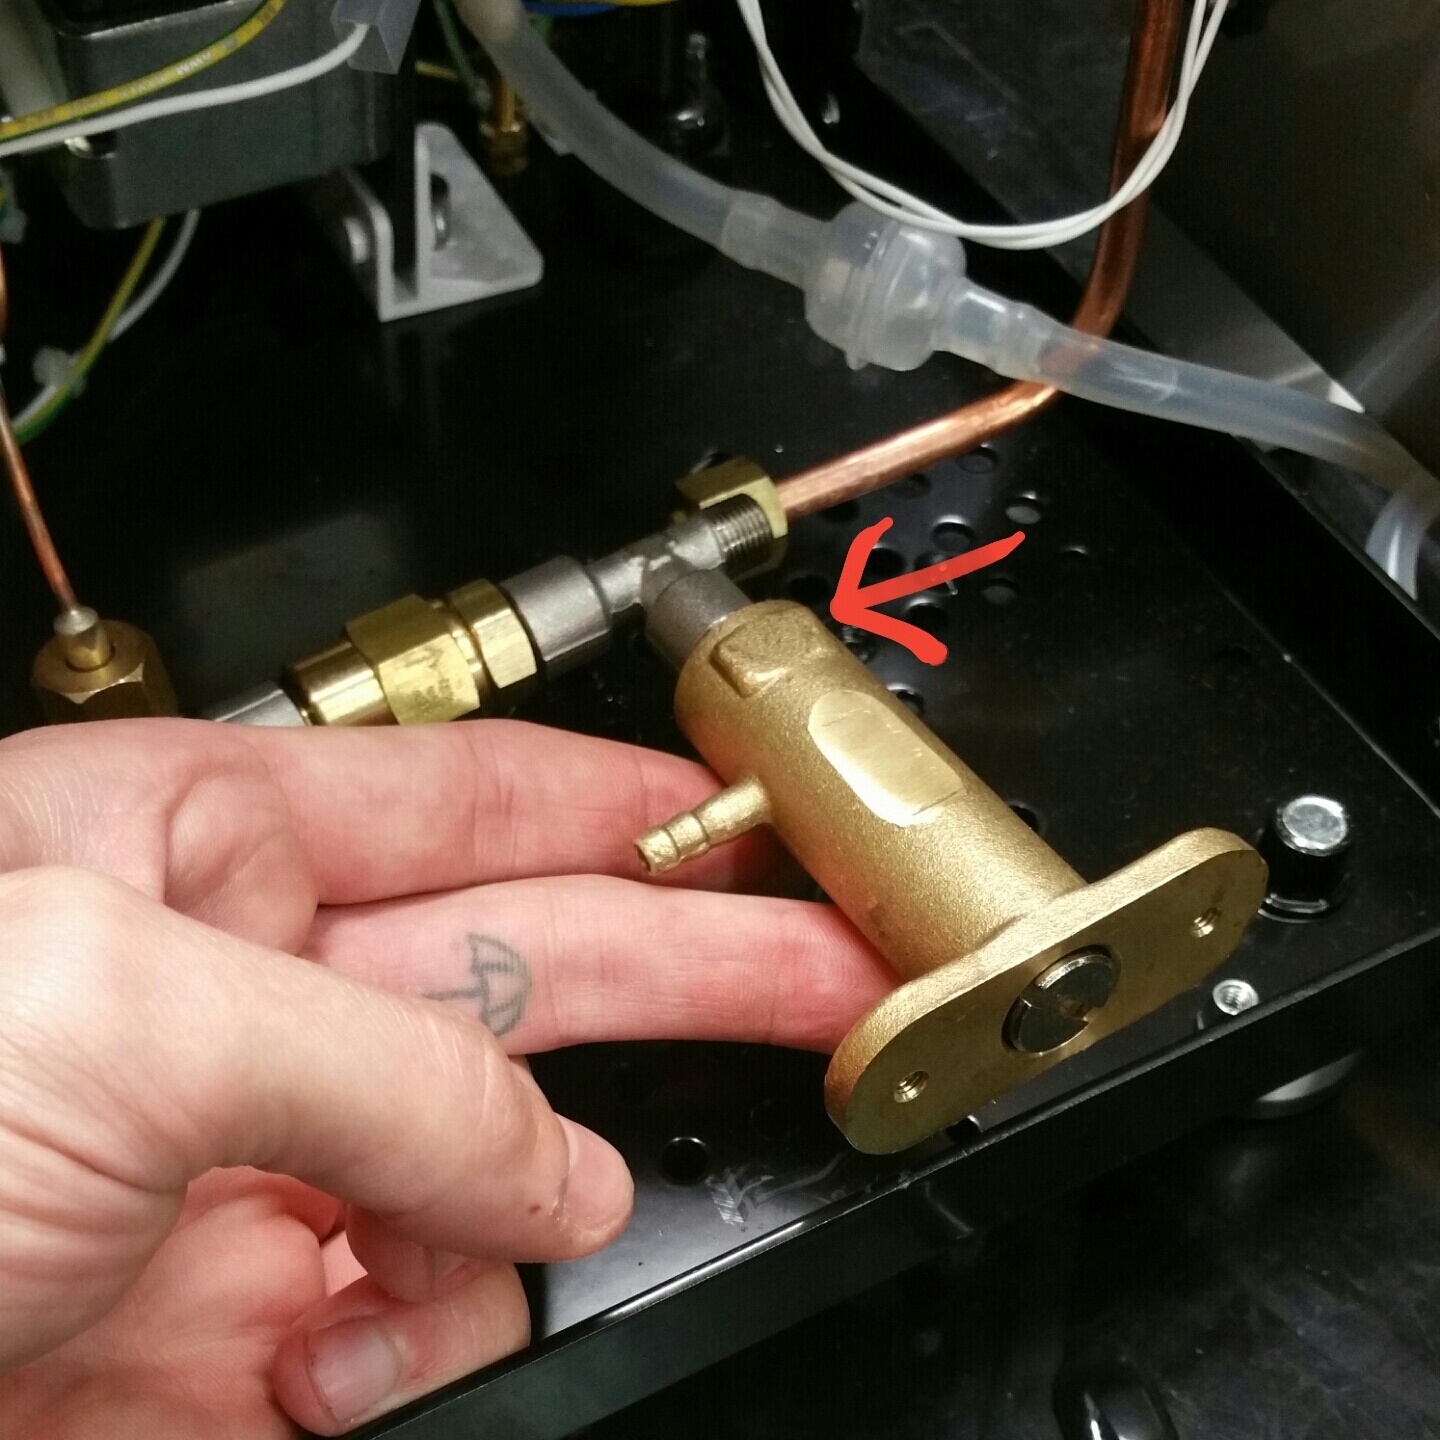
3. Remove the hose from the expansion valve and the copper fitting circled here.
![](https://support.clivecoffee.com/hubfs/Screenshot_2018-03-27-15-54-25-1.jpg)
4. Lift up the expansion valve to allow it to be turned and removed. You can use an adjustable wrench on the flat spot pointed out here.
![](https://support.clivecoffee.com/hubfs/Screenshot_2018-03-27-15-54-55-1.jpg)
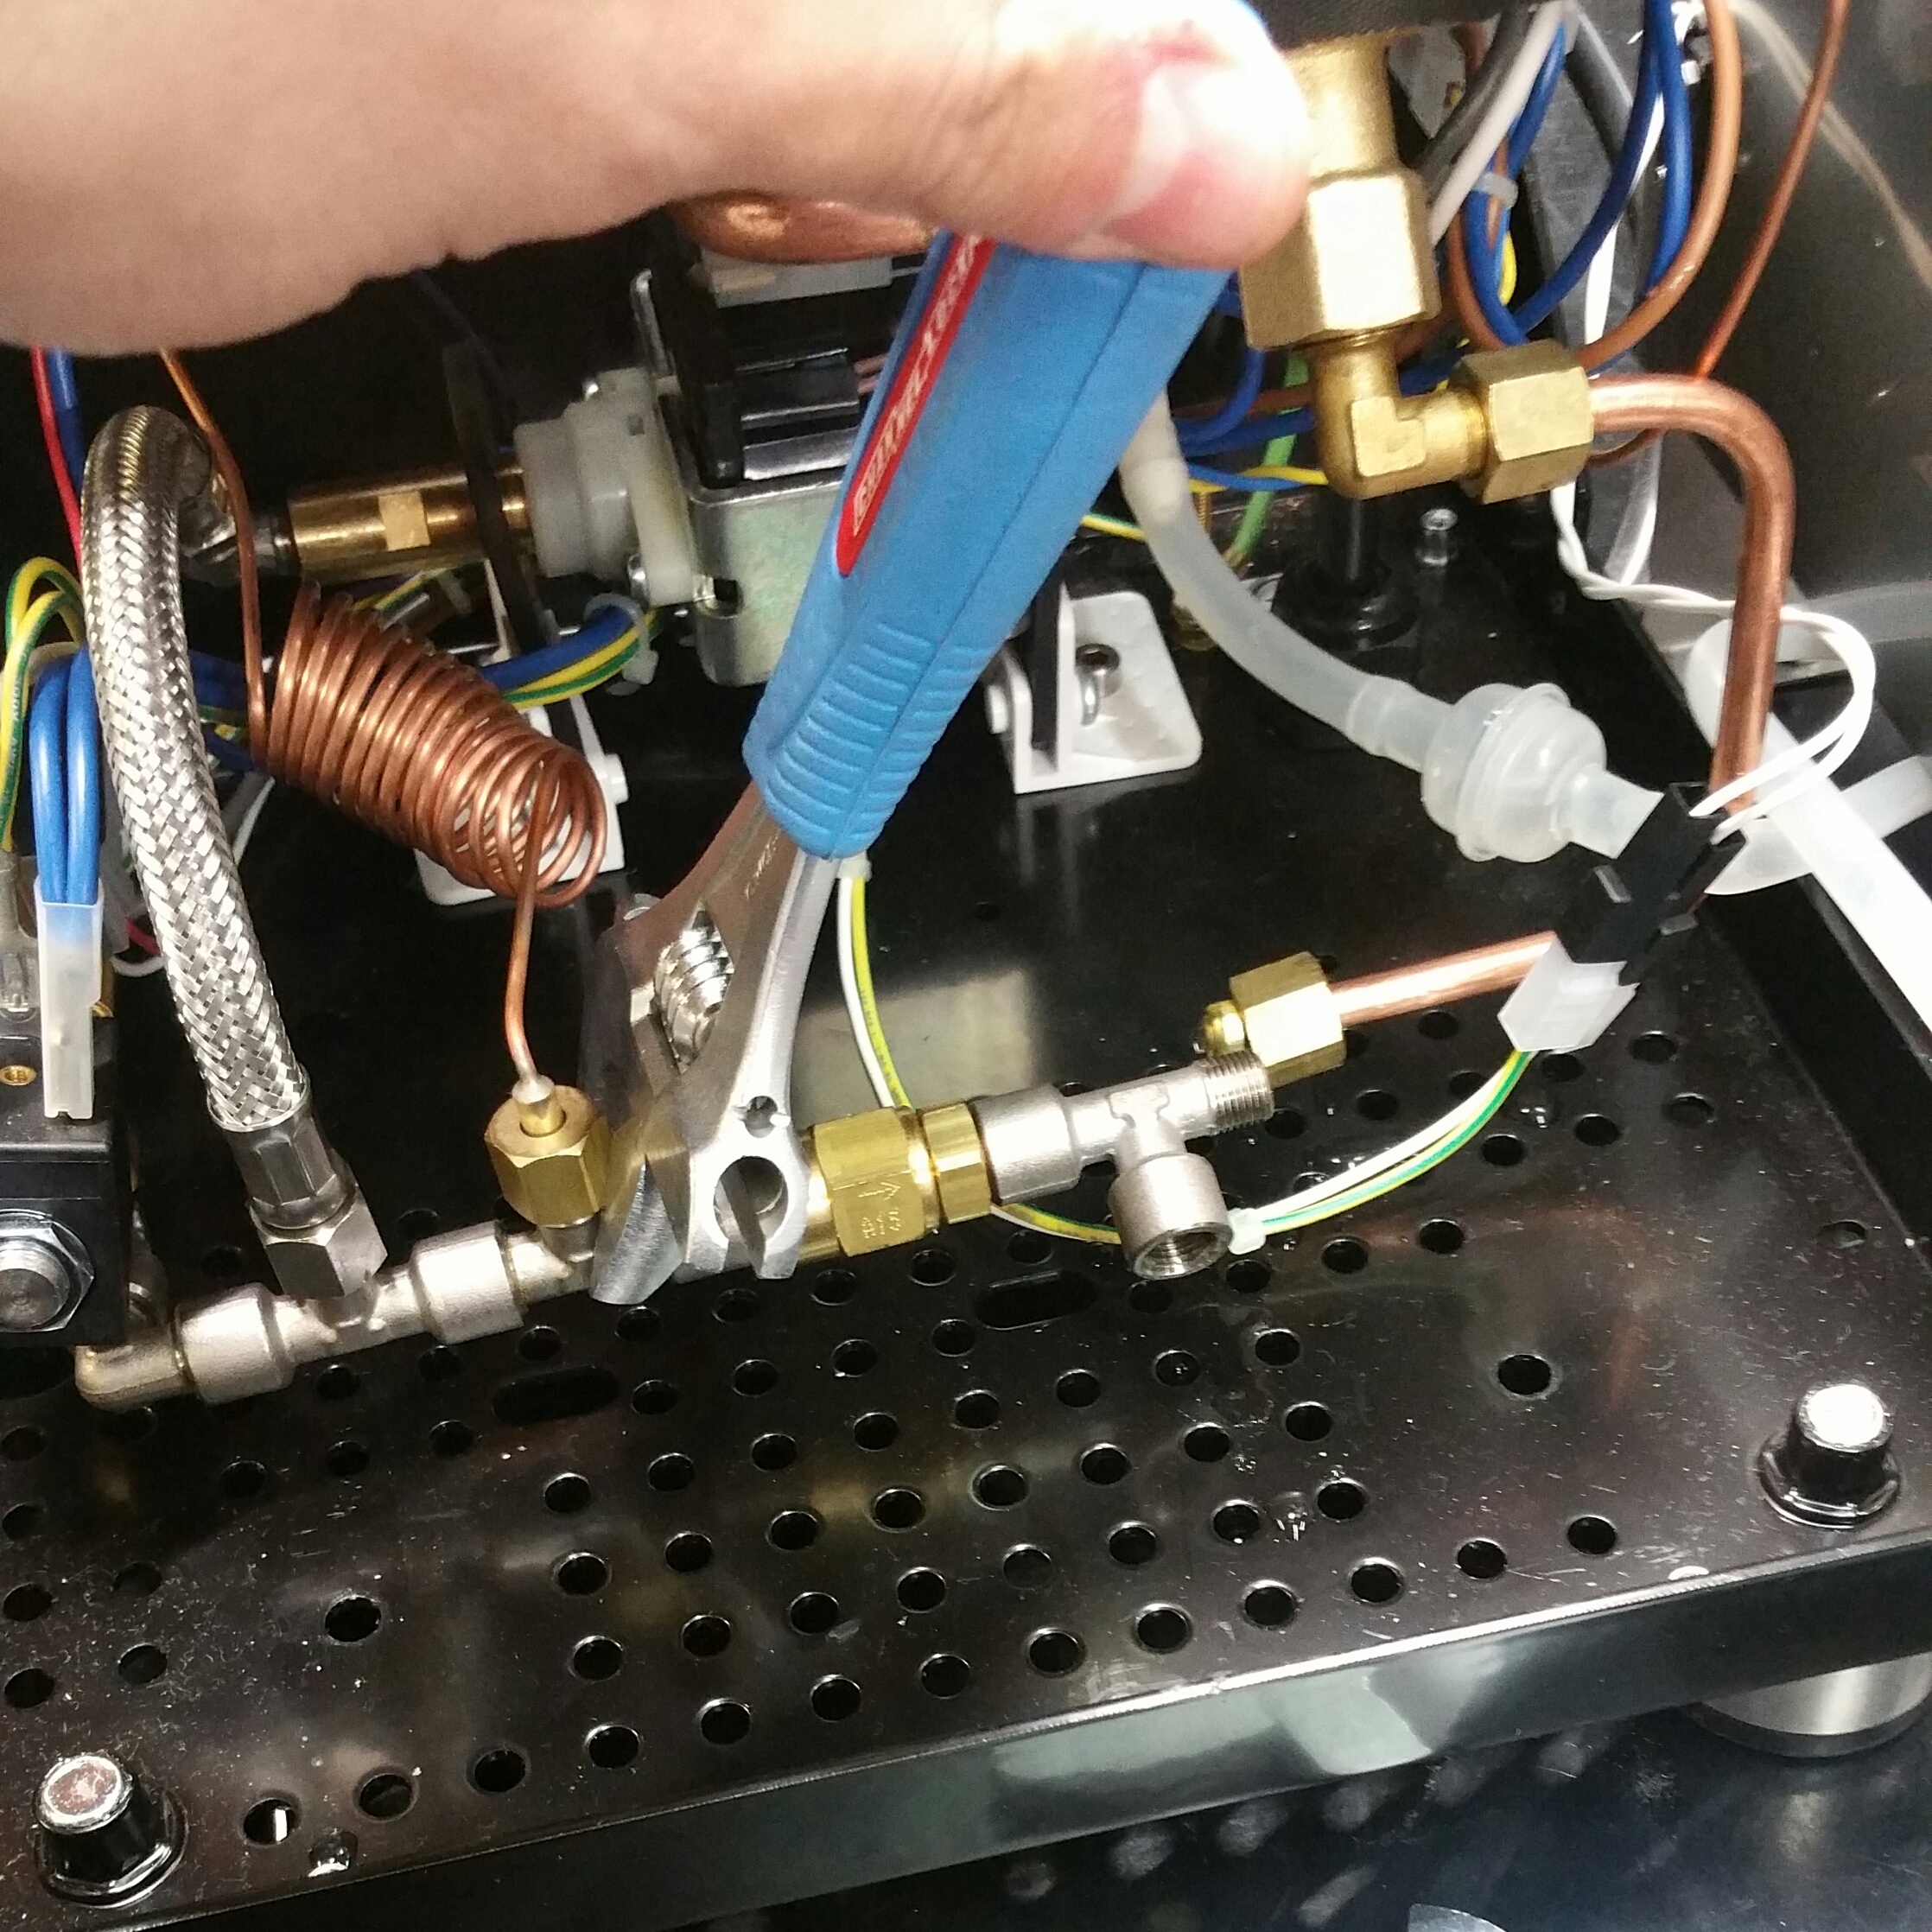
5. Remove the check valve by applying counter torque on the t-valve to the left of it and using a second wrench to remove the check valve.
![](https://support.clivecoffee.com/hubfs/20180327_155034-1.jpg)
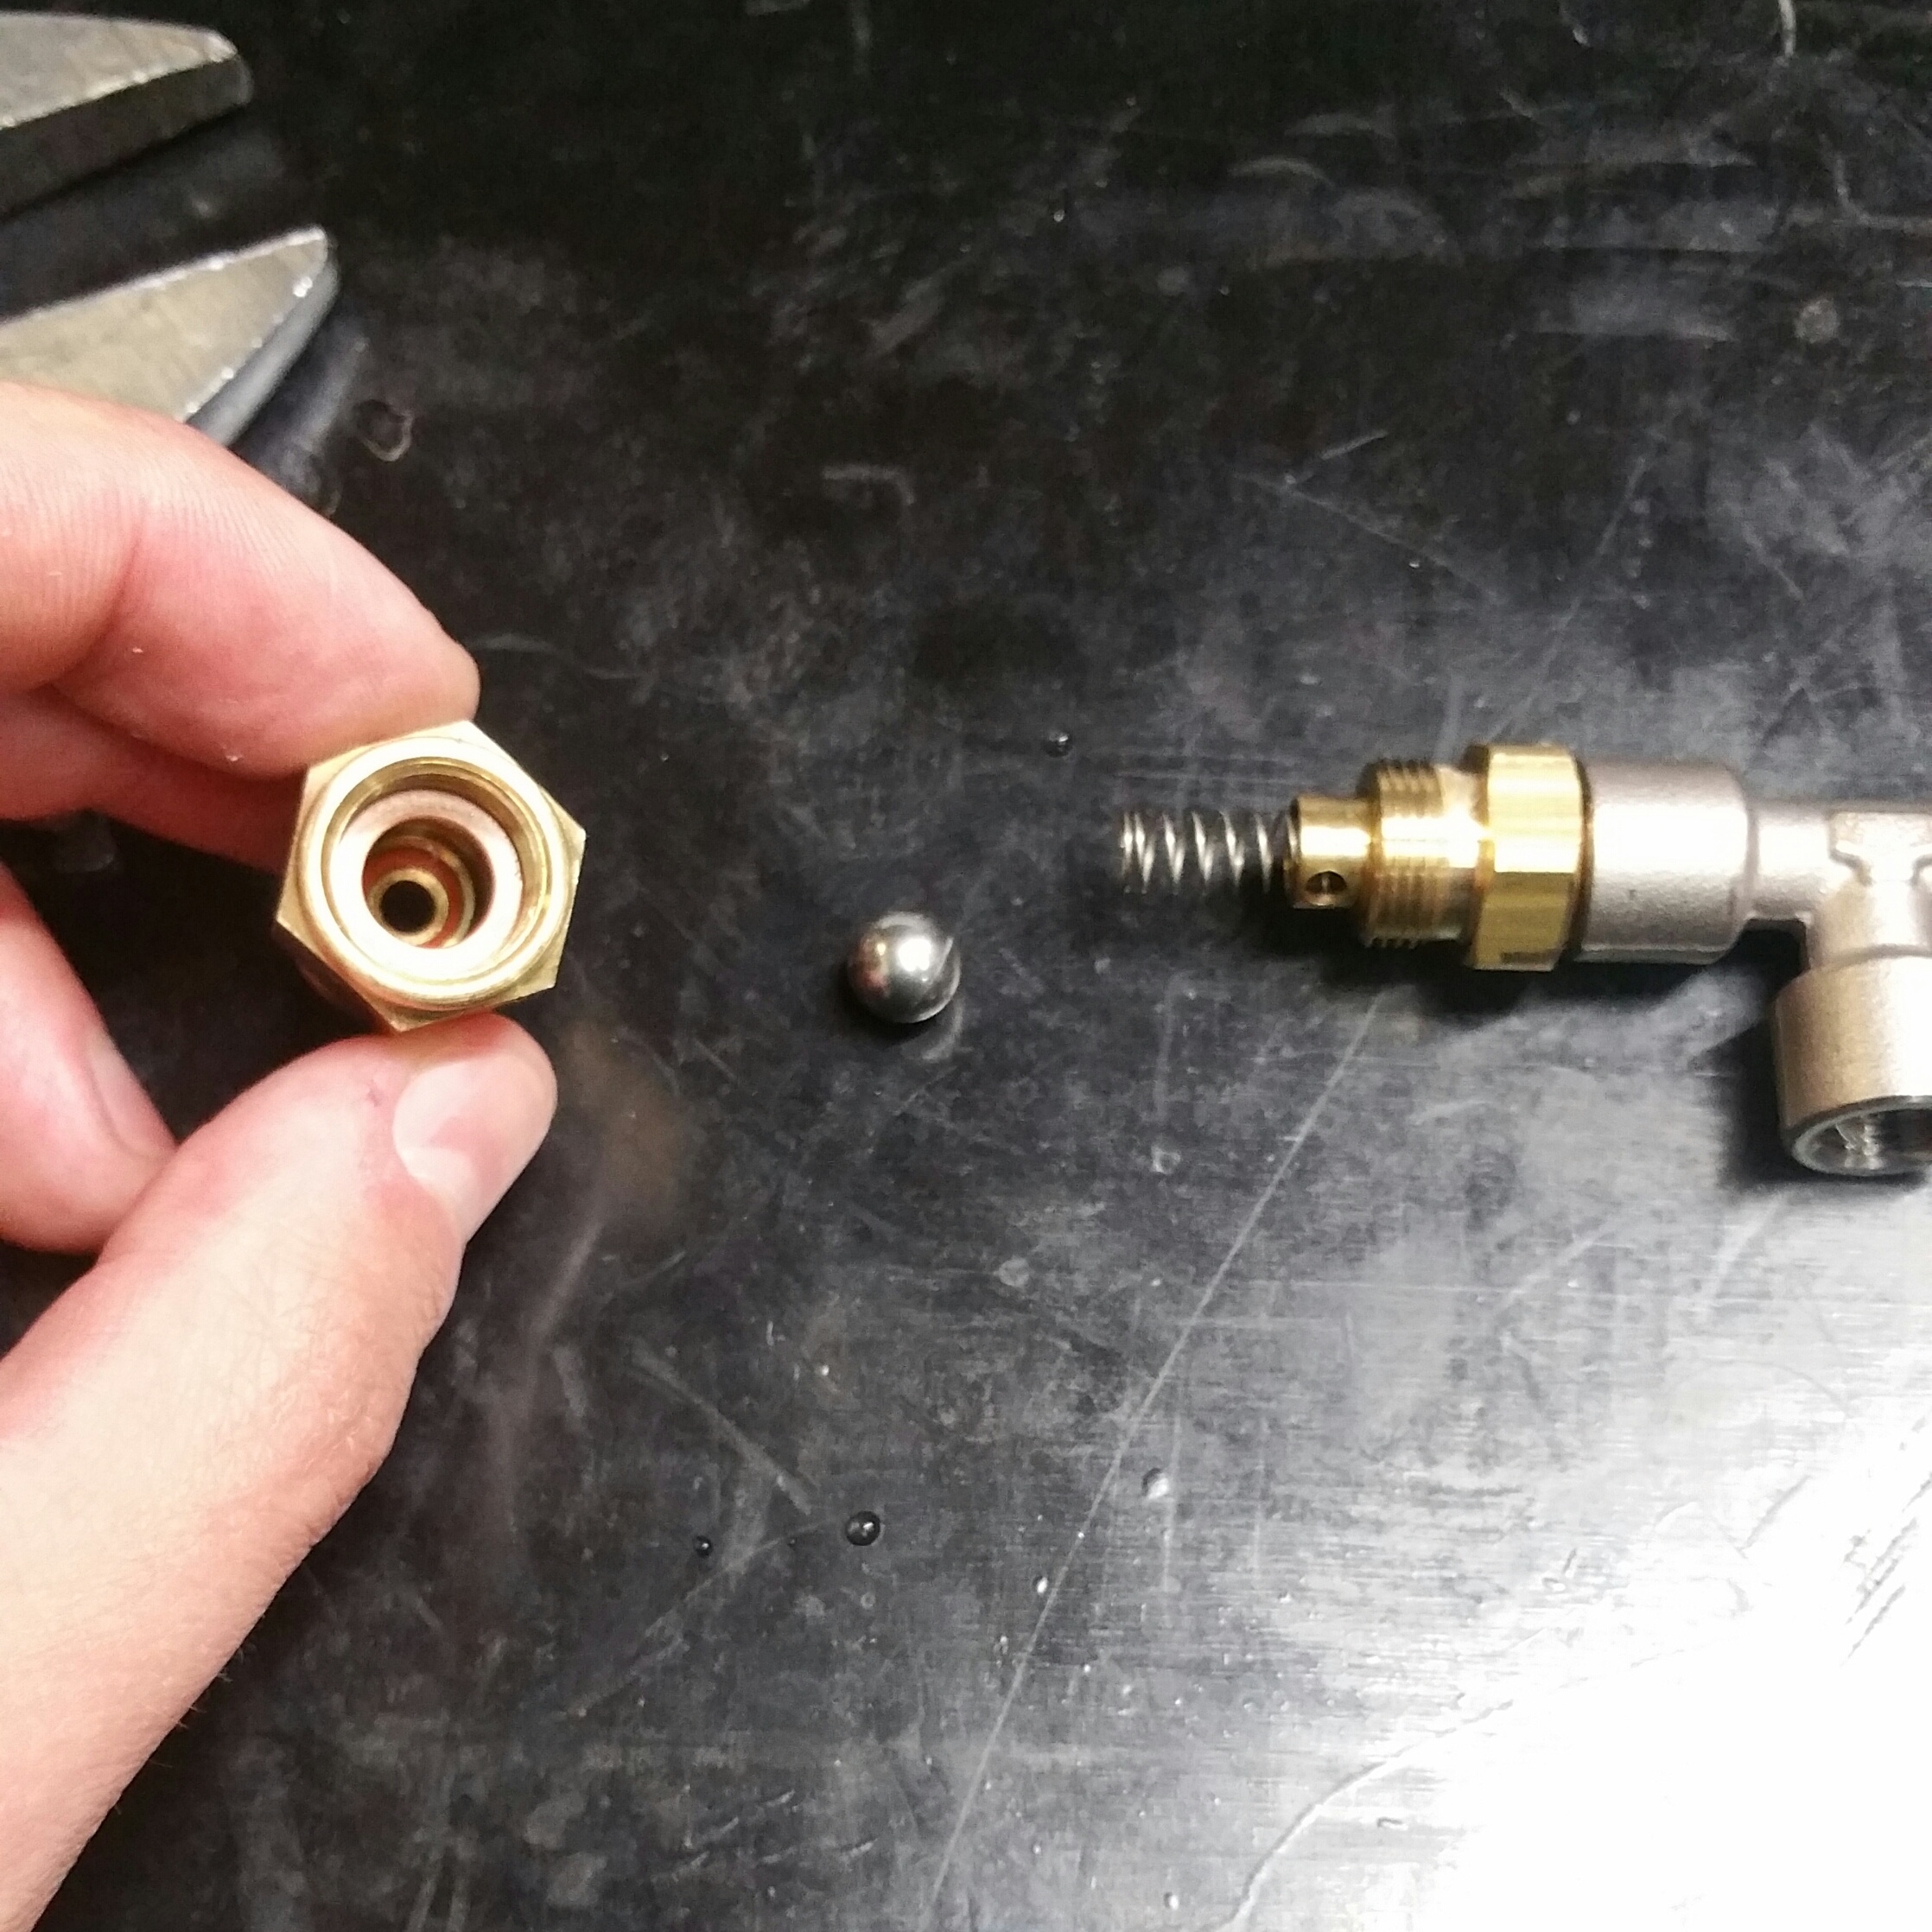
6. Use your wrenches to open up the check valve and check for any debris or scale buildup on the ball inside as well as the inside of the valve.
![](https://support.clivecoffee.com/hubfs/20180327_155302-1.jpg)