- Help Center
- Warranty, Ordering & Returns
- Repackaging Instructions
-
Getting Started
-
Espresso 101
-
Warranty, Ordering & Returns
-
Bezzera BZ10
-
Bezzera Duo DE
-
Bezzera Duo MN
-
LUCCA A53 (Direct Plumb & Mini) by La Spaziale
-
LUCCA M58 by Quick Mill
-
LUCCA S58 by Profitec
-
LUCCA X58 by Quick Mill
-
La Marzocco Linea Mini
-
La Marzocco GS3
-
Lelit Bianca
-
Lelit Elizabeth
-
Lelit Victoria
-
ECM Synchronika
-
ECM Special Edition Classika PID
-
ECM Mechanika V Slim
-
ECM Casa V
-
ECM Puristika
-
Profitec Pro 300
-
Profitec Pro 400
-
Profitec Pro 500
-
Profitec Pro 600
-
Profitec Pro 700
-
Profitec Pro 800
-
Rocket Appartamento
-
Rocket R58 / Cinquantotto
-
Rocket Giotto
-
Rocket R Nine One
-
La Spaziale S2 EK
-
Rancilio Silvia
-
Rancilio Silvia Pro
-
Rancilio Silvia Pro X
-
Izzo Alex Duetto
-
Quick Mill
-
Breville Oracle
-
Dalla Corte Mina
-
Slayer
-
Lucca Grinders
-
Baratza Grinders
-
LUCCA Atom 75
-
Eureka Grinders
-
ECM Grinders
-
Compak Grinders
-
Fellow ODE Grinder
-
Mahlkonig Grinders
-
Profitec Grinders
-
Breville Grinders
-
Dalla Corte Grinders
-
Macap Grinders
-
Fiorenzato Grinders
-
General Troubleshooting
-
Like New & Trade-In Program
-
Eureka Mignon Libra
-
Eureka Mignon Libra User Manual
-
Rocket Boxer Setup Guide
-
Rocket Boxer Timer User Manual
-
Baratza Encore ESP Setup Guide
-
Baratza Encore ESP User Manual
-
Fellow Opus User Manual
-
Fellow Opus Setup Guide
Repackaging the Profitec Pro 300
Below you will find step by step instructions on how to properly repackage the Profitec Pro 300 espresso machine.
1. Drain the boilers of your machine.
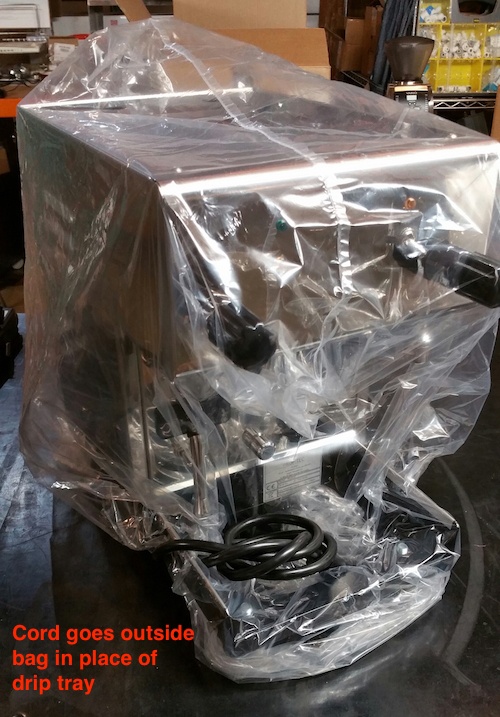
2. Remove drip tray, place bag over the top of the machine and wrap the cord into itself and place it in the space where the drip tray was. The cord will go outside of the bag to prevent it from scratching the face of the machine.

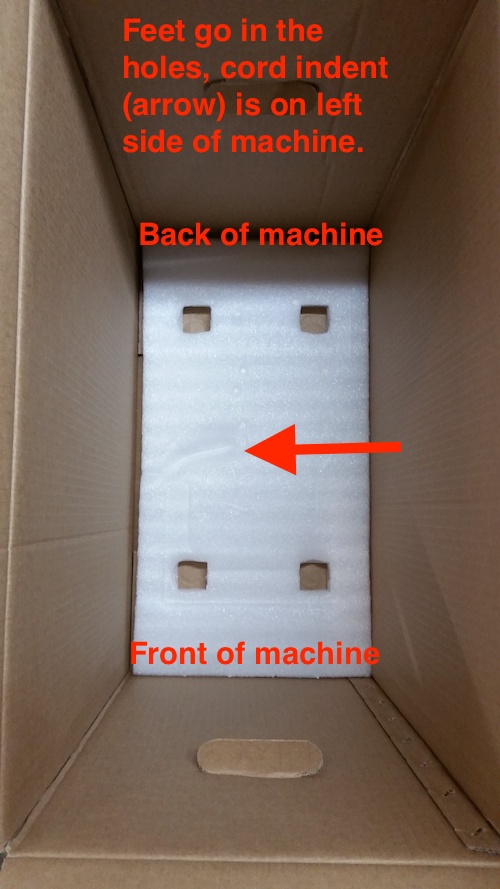
3. Place the machine in the box. Note that the bottom foam is not symmetrical and the indent of the cord will show you which way the machine goes. Make sure to match up the feet to the holes.

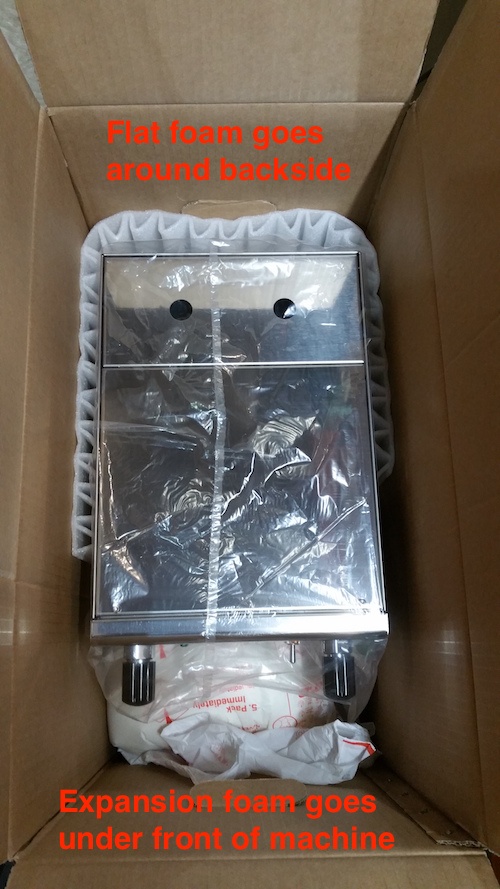
4. Once machine is in the box, place the flat foam around the backside of the machine, and the expansion foam underneath the group head.

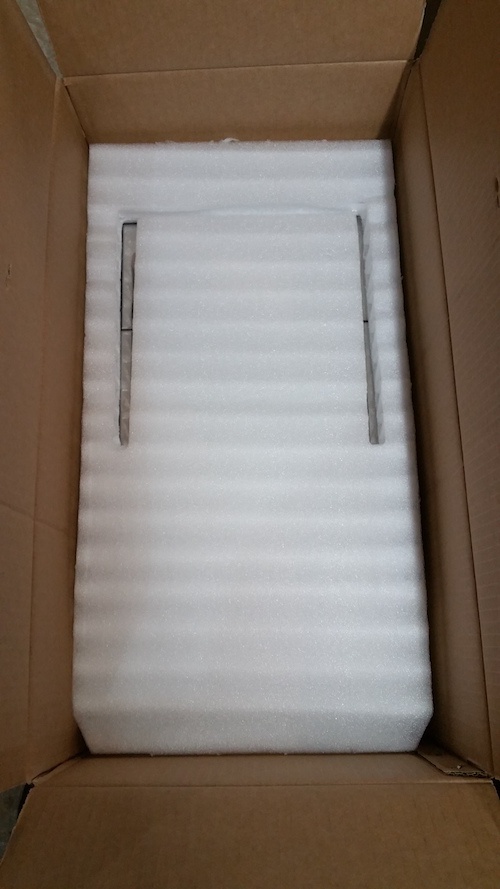
5. Place the top foam over the machine, the slotted side going over the rear of the machine.

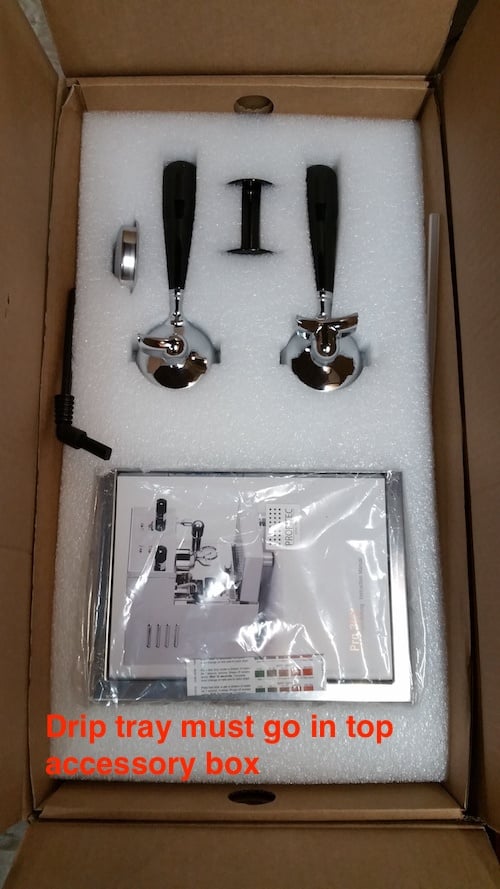
6. Place the accessory box on top. Ensure that each item is placed in its correct slot so that they are not loose and able to cause damage.

7. Place the machine box into a larger, outer box with padding on all sides, top and bottom before shipping.