Tools needed:
- 12mm crescent wrench
- 14mm crescent wrench
- 16mm crescent wrench
- 22mm crescent wrench
- optional: table vice
Make sure the machine is off, unplugged, and cooled down.
1. Start by removing the panels.
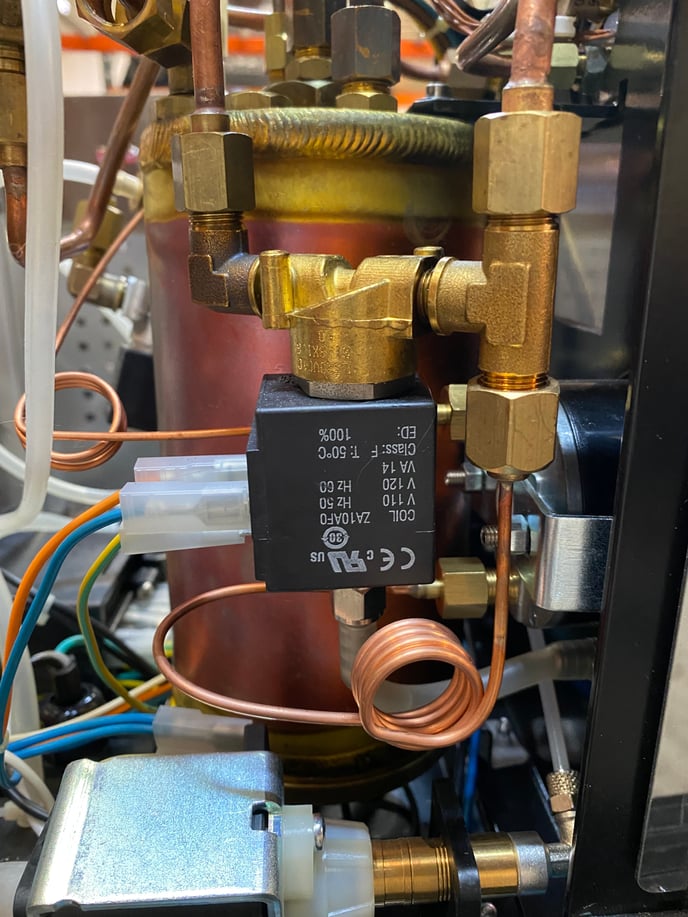
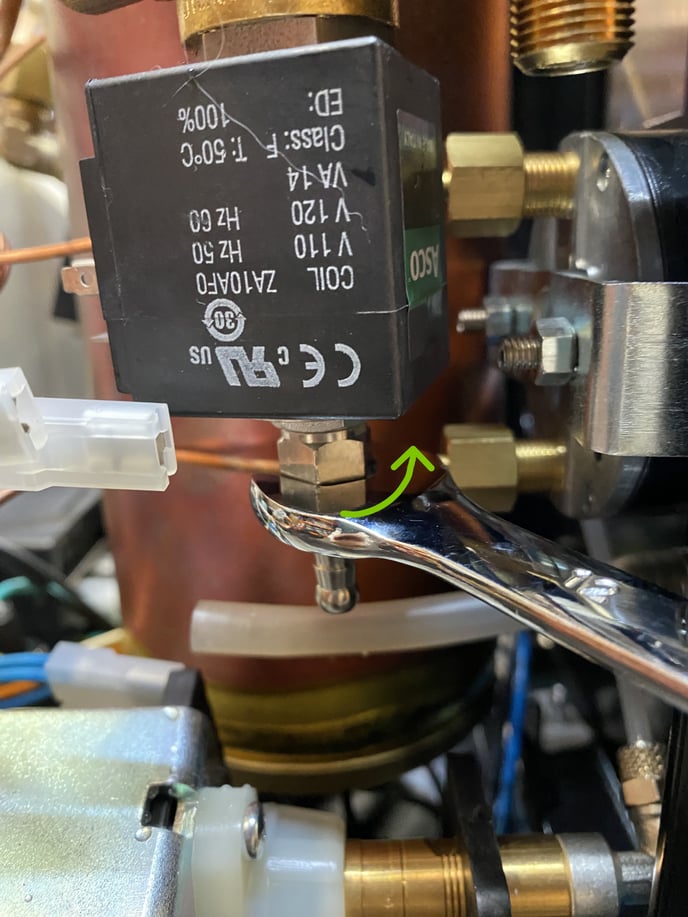
2. Locate the 3-way solenoid valve on the right hand side of the boiler:
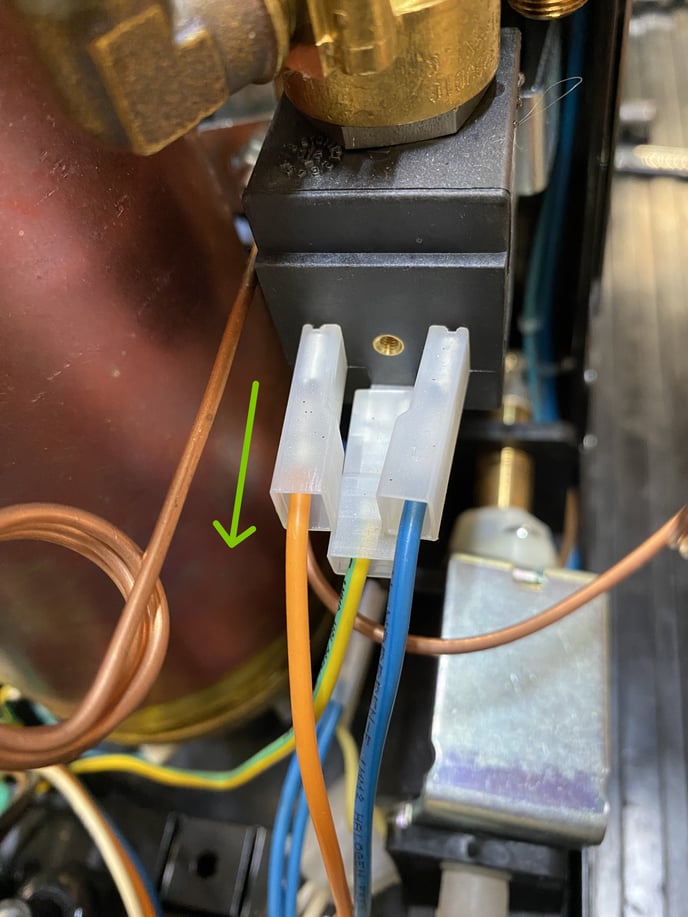
3. Remove the electrical leads from the solenoid box:
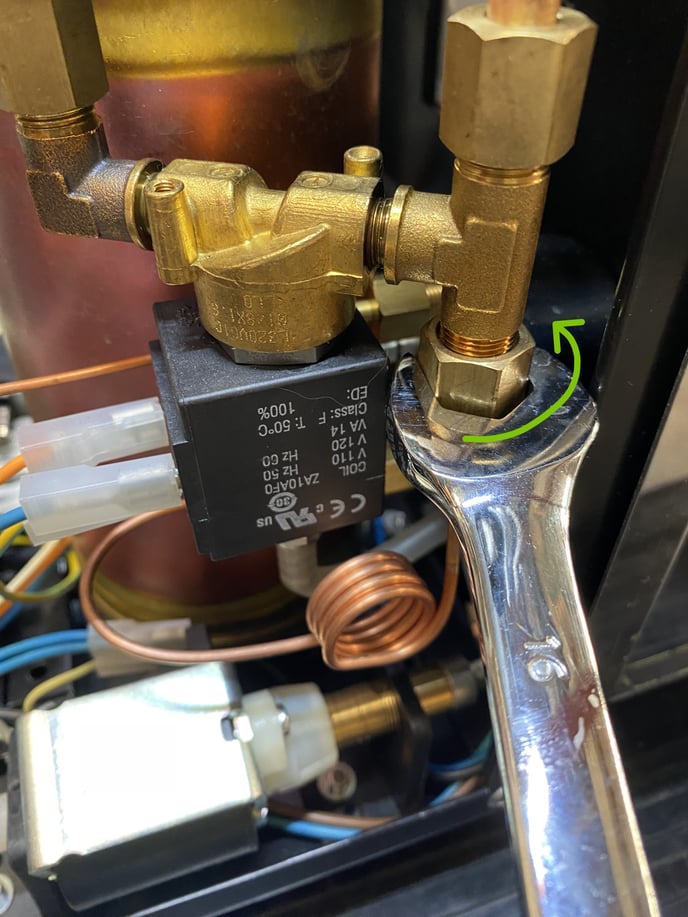
4. Using a 16mm crescent wrench, unscrew the capillary tube from the solenoid valve assembly and carefully push to the side:
5. Using the 12mm wrench, remove the silicon tube from the adapter attached to the solenoid box: 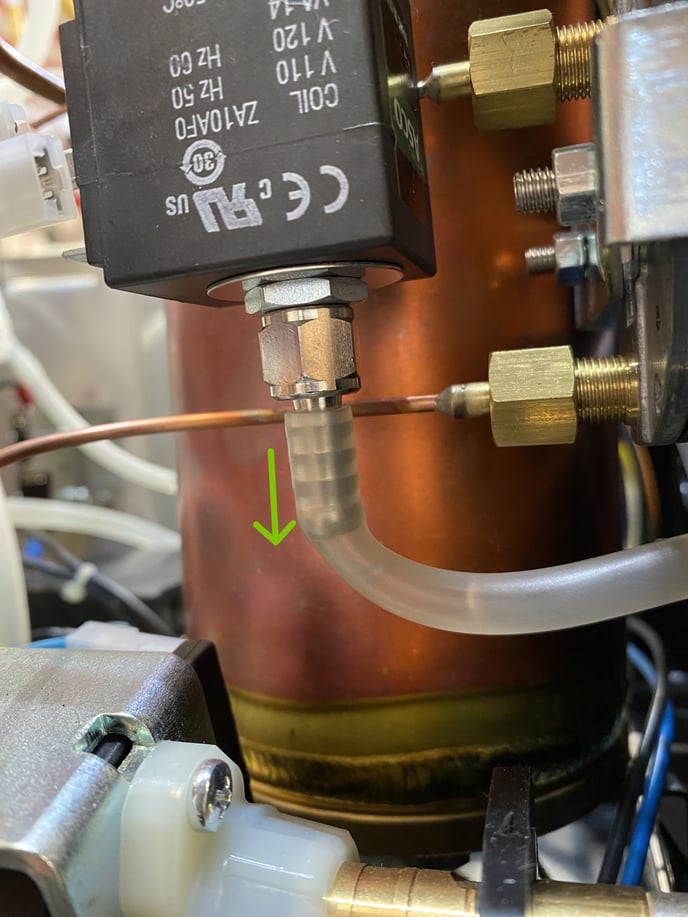
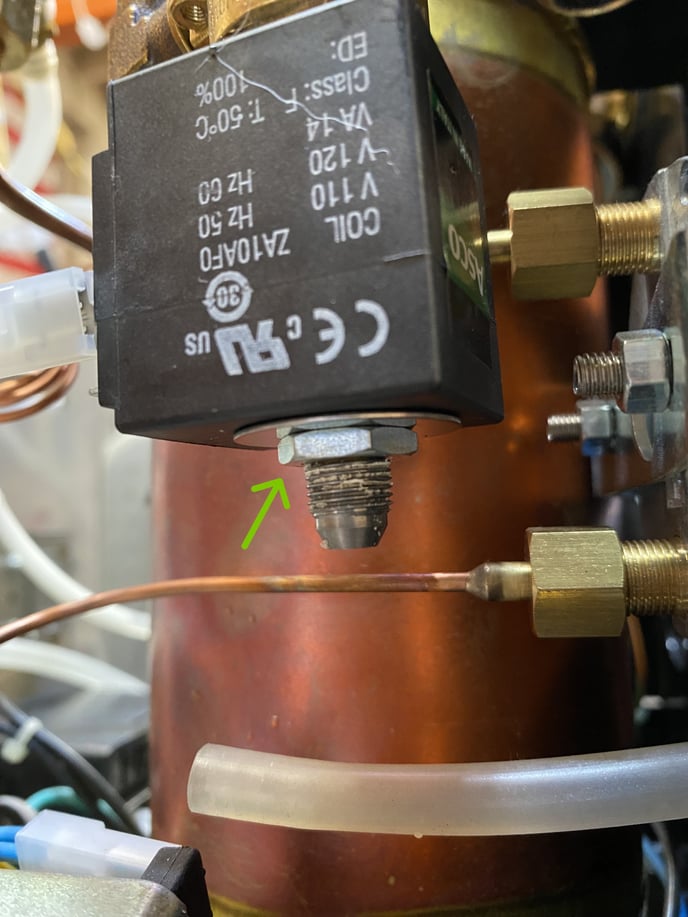
6. Remove the adapter from the solenoid box with the 14mm wrench:
7. Use a 14mm wrench to remove the retaining nut and the solenoid box should slide right off:
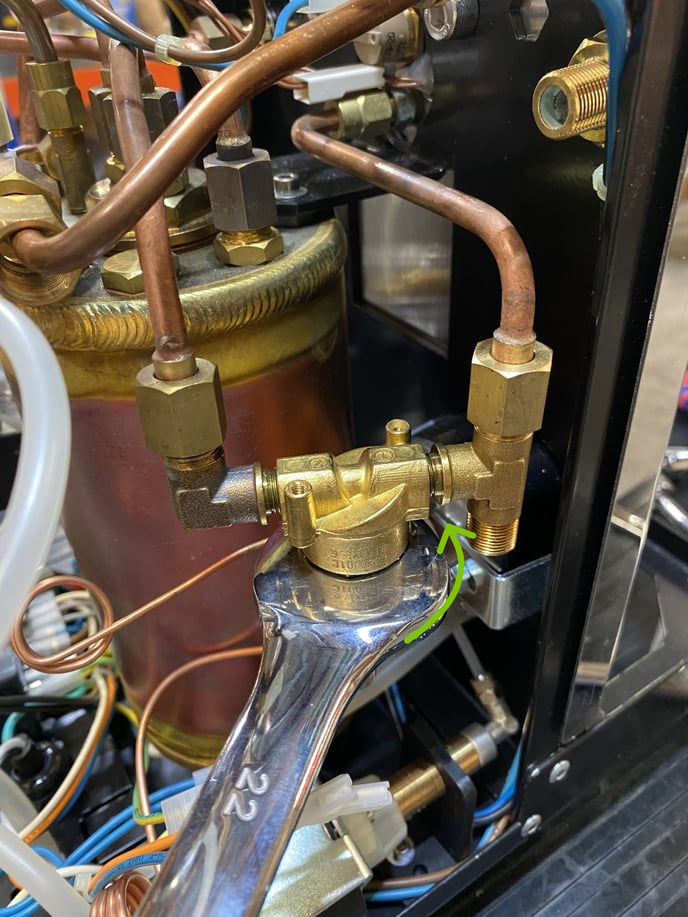
8. From here you can use the 22mm wrench to remove the armature from the assembly (make sure the copper tubing attached to the assembly does not become twisted):
Alternative option: With the 16mm wrench, loosen the nuts that attached the copper tubing to the valve assembly:
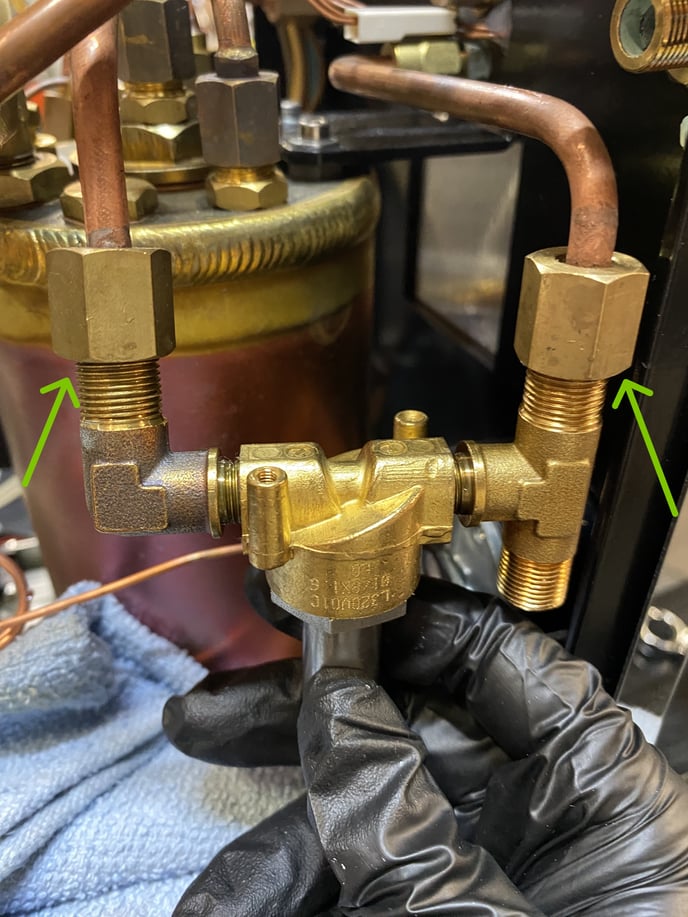
and use a table vice to hold the valve assembly while removing the armature:
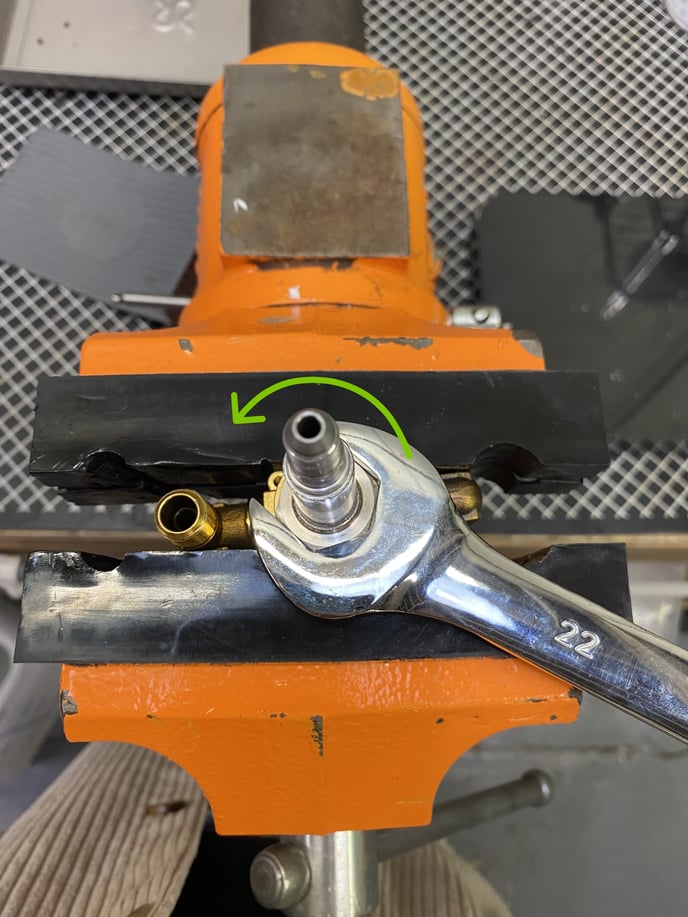
9. Inspect and clean the inside of the valve body and the armature then make sure the spring moves freely before reinstalling.

10. Reassemble the solenoid by following these steps in reverse order.