- Help Center
- ECM Synchronika
- General Maintenance
-
Getting Started
-
Espresso 101
-
Warranty, Ordering & Returns
-
Like New & Trade-In Program
-
General Troubleshooting
-
LUCCA A53 Direct Plumb
-
LUCCA A53 Mini/Mini Vivaldi
-
LUCCA M58 by Quick Mill
-
LUCCA X58 by Quick Mill
-
LUCCA Accessories
-
LUCCA S58 by Profitec
-
La Marzocco Linea Mini
-
La Marzocco GS3
-
Lelit Mara X
-
Lelit Bianca
-
Lelit Elizabeth
-
Lelit Victoria
-
ECM Synchronika
-
ECM Special Edition Classika PID
-
ECM Mechanika V Slim
-
ECM Mechanika VI Slim
-
ECM Casa V
-
ECM Puristika
-
Profitec GO
-
Profitec Pro 300
-
Profitec Pro 400
-
Profitec Pro 500
-
Profitec Pro 600
-
Profitec Pro 700
-
Profitec Pro 800
-
Profitec Drive
-
Rocket Appartamento
-
Rocket R58 / Cinquantotto
-
Rocket Giotto
-
Rocket R Nine One
-
Rocket Boxer
-
La Spaziale S2 EK
-
Rancilio Silvia
-
Rancilio Silvia Pro
-
Rancilio Silvia Pro X
-
Sanremo YOU
-
Ascaso Steel DUO
-
Breville Barista Pro
-
Breville Oracle Touch
-
Flair Classic Espresso Maker
-
Flair 58 Pro 2
-
Flair 58 Plus Espresso Maker
-
LUCCA Grinders
-
Baratza Grinders
-
Eureka Grinders
-
ECM Grinders
-
Fellow Grinders
-
Fellow Tally Precision Scale
-
Mahlkönig Grinders
-
DF64 Grinder
-
Quick Mill
-
Izzo Alex Duetto
-
Bezzera BZ10
-
Bezzera Duo DE
-
Bezzera Duo MN
-
Dalla Corte Mina
-
Compak Grinders
-
Dalla Corte Grinders
-
Profitec Grinders
-
Breville Grinders
-
Macap Grinders
-
Fiorenzato Grinders
-
Slayer
-
Eureka Mignon Zero
ECM Synchronika: Expansion Valve Replacement (post-2021 machines)
Late model ECM Synchronika (and Pro 700) machines use a non-adjustable/non-serviceable expansion valve. This article demonstrates how to replace that valve when it reaches the end of its service life.
Tools Needed:- 10mm crescent wrench
- 14mm crescent wrench
- PTFE tape
- Replacement expansion valve
NOTE: The machine must be unplugged and cool to the touch before beginning.
1. Start be removing the panels from the machine.
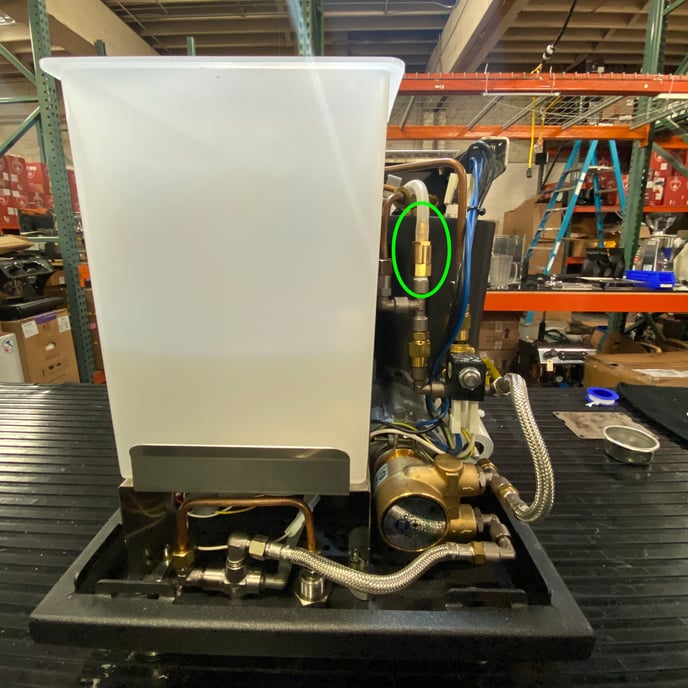
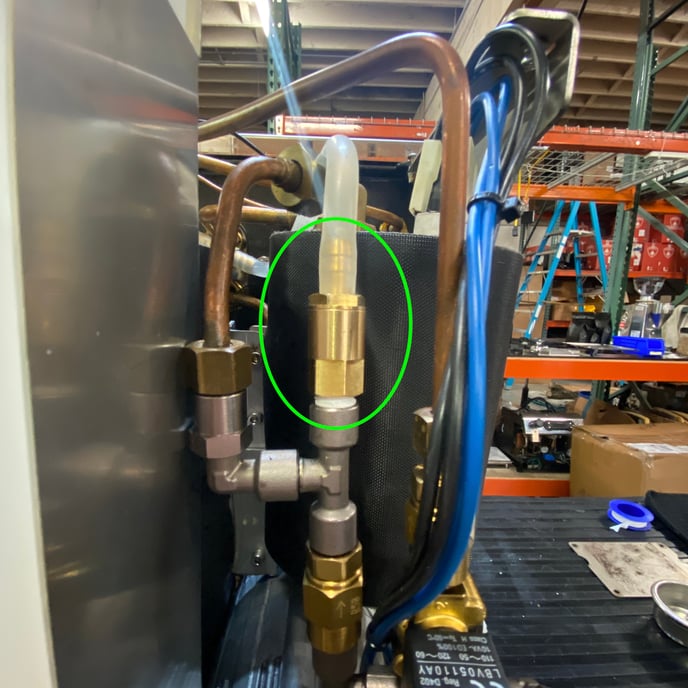
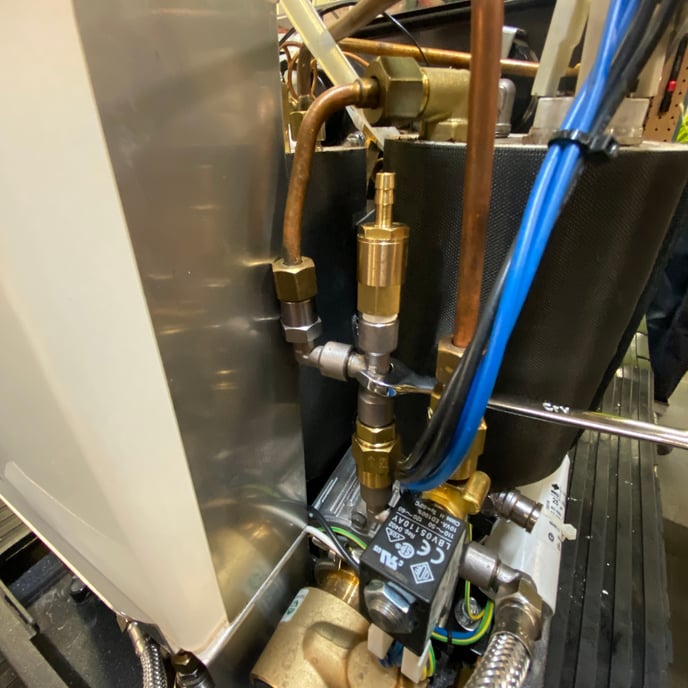
2. Identify the expansion valve in the machine.
![ECM_Synchronika_ns_expansion_valve_01](https://support.clivecoffee.com/hs-fs/hubfs/ECM_Synchronika_ns_expansion_valve_01.jpg?width=688&height=688&name=ECM_Synchronika_ns_expansion_valve_01.jpg)
![ECM_Synchronika_ns_expansion_valve_02](https://support.clivecoffee.com/hs-fs/hubfs/ECM_Synchronika_ns_expansion_valve_02.jpg?width=688&height=688&name=ECM_Synchronika_ns_expansion_valve_02.jpg)
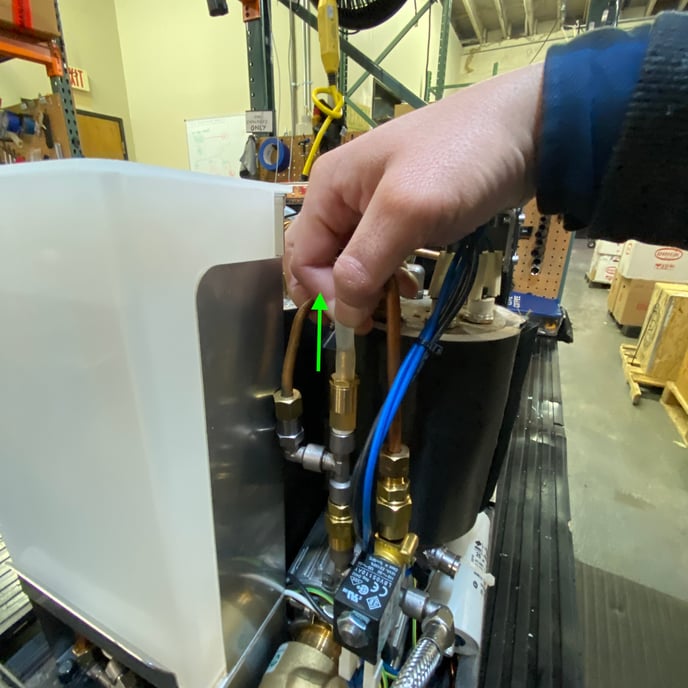
3. Remove the flexible silicone drain tube from the expansion valve.
![ECM_Synchronika_ns_expansion_valve_03](https://support.clivecoffee.com/hs-fs/hubfs/ECM_Synchronika_ns_expansion_valve_03.jpg?width=688&height=688&name=ECM_Synchronika_ns_expansion_valve_03.jpg)
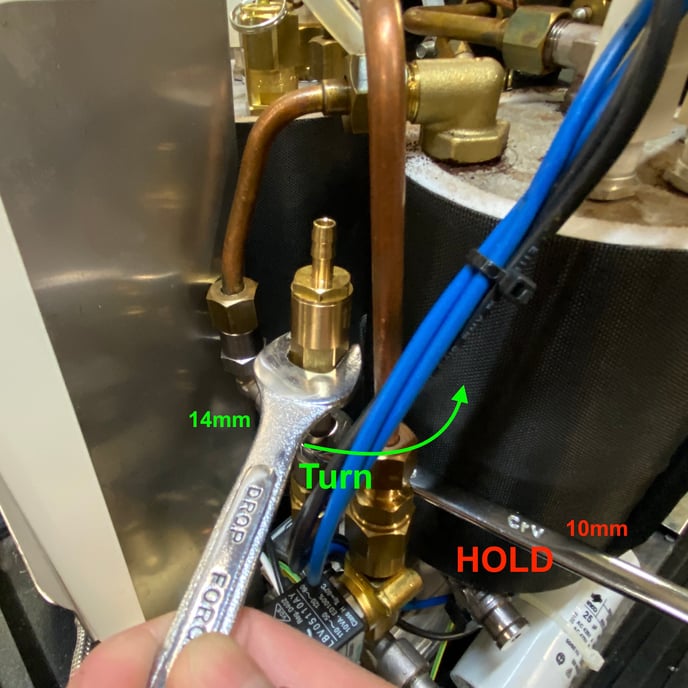
4. Use the 10mm wrench to hold the boiler plumbing steady.
![ECM_Synchronika_ns_expansion_valve_04](https://support.clivecoffee.com/hs-fs/hubfs/ECM_Synchronika_ns_expansion_valve_04.jpg?width=688&height=688&name=ECM_Synchronika_ns_expansion_valve_04.jpg)
![ECM_Synchronika_ns_expansion_valve_05](https://support.clivecoffee.com/hs-fs/hubfs/ECM_Synchronika_ns_expansion_valve_05.jpg?width=688&height=688&name=ECM_Synchronika_ns_expansion_valve_05.jpg)
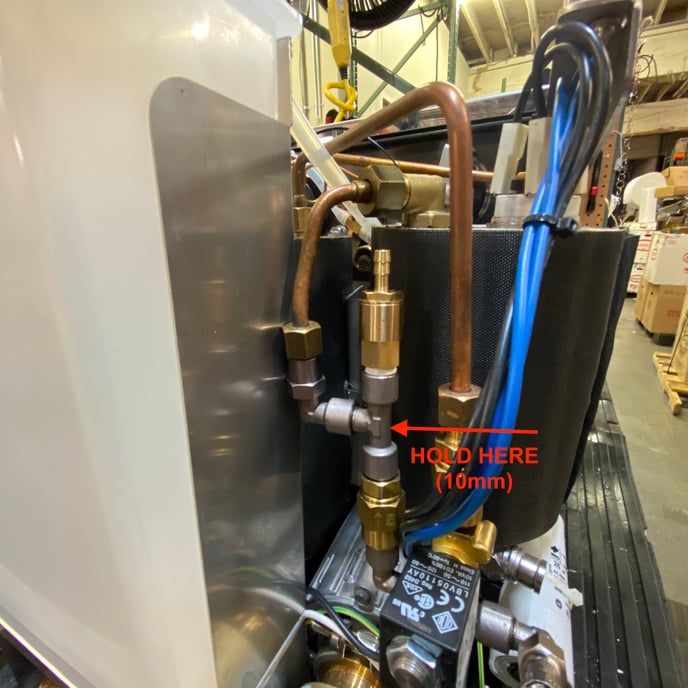
5. Use the 14mm wrench to unscrew the old expansion valve. Hold the boiler plumbing steady.
![ECM_Synchronika_ns_expansion_valve_06](https://support.clivecoffee.com/hs-fs/hubfs/ECM_Synchronika_ns_expansion_valve_06.jpg?width=688&height=688&name=ECM_Synchronika_ns_expansion_valve_06.jpg)
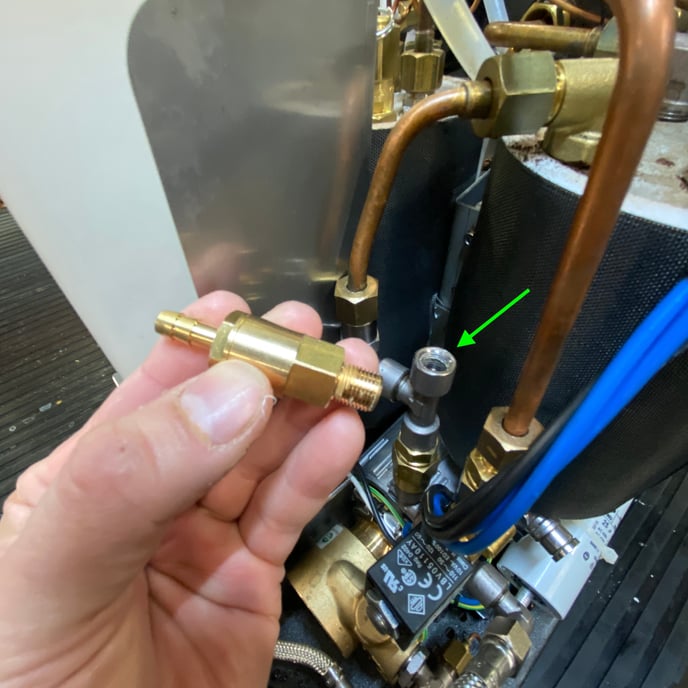
6. Remove the old expansion valve. Remember to clean off any debris or old thread sealant from the T-fitting.
![ECM_Synchronika_ns_expansion_valve_07](https://support.clivecoffee.com/hs-fs/hubfs/ECM_Synchronika_ns_expansion_valve_07.jpg?width=688&height=688&name=ECM_Synchronika_ns_expansion_valve_07.jpg)
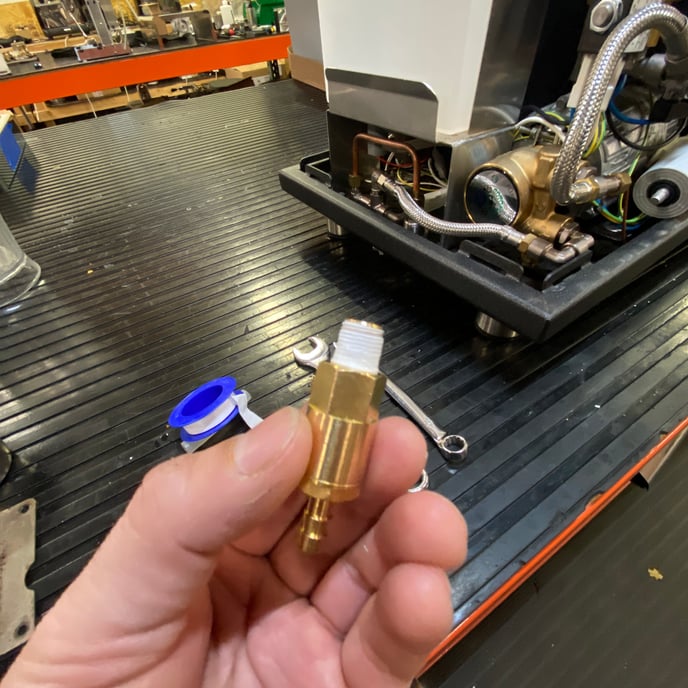
7. Seal the new expansion valve threads with a few wraps of PTFE tape.
![ECM_Synchronika_ns_expansion_valve_08](https://support.clivecoffee.com/hs-fs/hubfs/ECM_Synchronika_ns_expansion_valve_08.jpg?width=688&height=688&name=ECM_Synchronika_ns_expansion_valve_08.jpg)
8. Follow these instructions in reverse to install the new expansion valve.