- Help Center
- ECM Synchronika & Synchronika II
- Steam & Steam Boiler Maintenance
-
Getting Started
-
Espresso 101
-
Warranty, Ordering & Returns
-
Like New & Trade-In Program
-
General Troubleshooting
-
LUCCA A53 Direct Plumb
-
LUCCA A53 Mini/Mini Vivaldi
-
LUCCA M58 by Quick Mill
-
LUCCA X58 by Quick Mill
-
LUCCA Solo
-
LUCCA Accessories
-
LUCCA S58 by Profitec
-
La Marzocco Linea Mini
-
La Marzocco GS3
-
Lelit Mara X
-
Lelit Bianca
-
Lelit Elizabeth
-
Lelit Victoria
-
ECM Synchronika & Synchronika II
-
ECM Special Edition Classika PID
-
ECM Mechanika V Slim
-
ECM Mechanika VI Slim
-
ECM Casa V
-
ECM Puristika
-
Profitec MOVE
-
Profitec JUMP
-
Profitec GO
-
Profitec Pro 300
-
Profitec Pro 400
-
Profitec Pro 500
-
Profitec Pro 600
-
Profitec Pro 700
-
Profitec Pro 800
-
Profitec Drive
-
Rocket Appartamento
-
Rocket R58 / Cinquantotto
-
Rocket Giotto
-
Rocket R Nine One
-
Rocket Boxer
-
La Spaziale S2 EK
-
Rancilio Silvia
-
Rancilio Silvia Pro
-
Rancilio Silvia Pro X
-
Sanremo YOU
-
Ascaso Steel DUO
-
Breville Barista Pro
-
Breville Oracle Touch
-
Flair Classic Espresso Maker
-
Flair 58 Pro 2
-
Flair 58 Plus Espresso Maker
-
LUCCA Grinders
-
Baratza Grinders
-
Eureka Grinders
-
Eureka Mignon Zero
-
ECM Grinders
-
Fellow Grinders
-
Fellow Tally Precision Scale
-
Mahlkönig Grinders
-
DF64 Grinder
-
Quick Mill
-
Izzo Alex Duetto
-
Bezzera BZ10
-
Bezzera Duo DE
-
Bezzera Duo MN
-
Dalla Corte Mina
-
Compak Grinders
-
Dalla Corte Grinders
-
Profitec Grinders
-
Breville Grinders
-
Macap Grinders
-
Fiorenzato Grinders
-
Slayer
-
WEBER WORKSHOPS Grinders
ECM Synchronika: Steam/Hot Water Valve Joystick Seal Inspection and Replacement
A leaking hot water tap or a steam wand that fails to dispense steam may be the result of an obstructed or worn joystick seal gasket.
To perform this repair you will need to have your machine unplugged and completely cool.
Tools needed:
- 2.5 mm, 3mm, and 6mm Allen wrenches
- 17mm wrench
- New Joystick Seal Gasket
1. Start by removing the top and side panels.
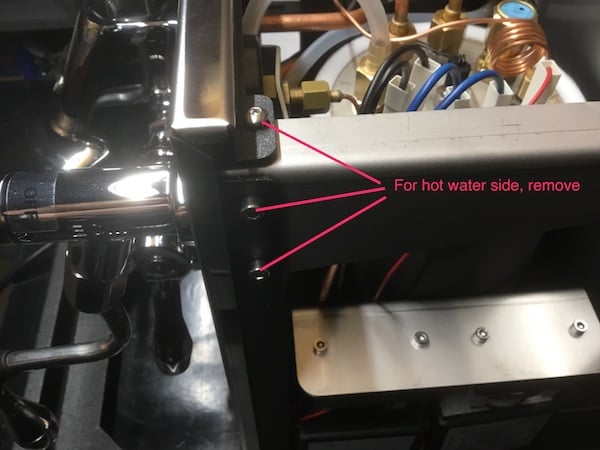
2. Next, use the 2.5mm and/or 3mm Allen keys to remove the support bracket(s) as shown.

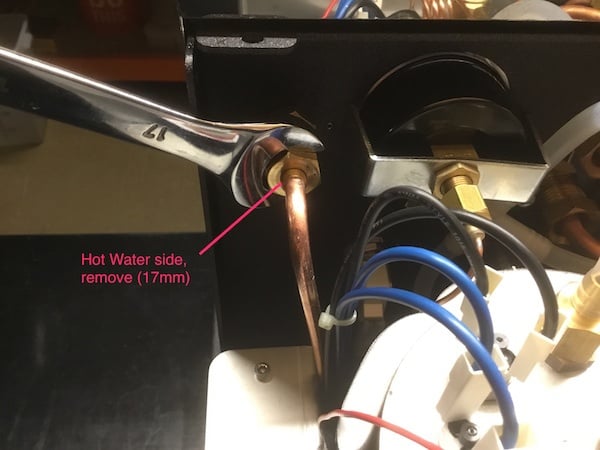
3. Use the 17mm wrench to unscrew the compression fitting holding the copper delivery tube to the valve.

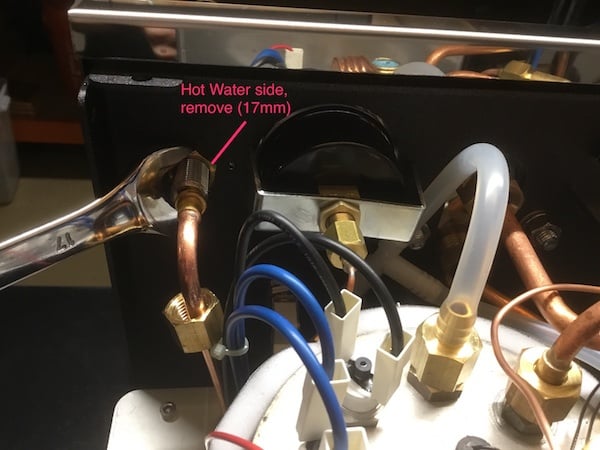
4. Unscrew the 17mm retaining nut holding the hot water valve to the frame.

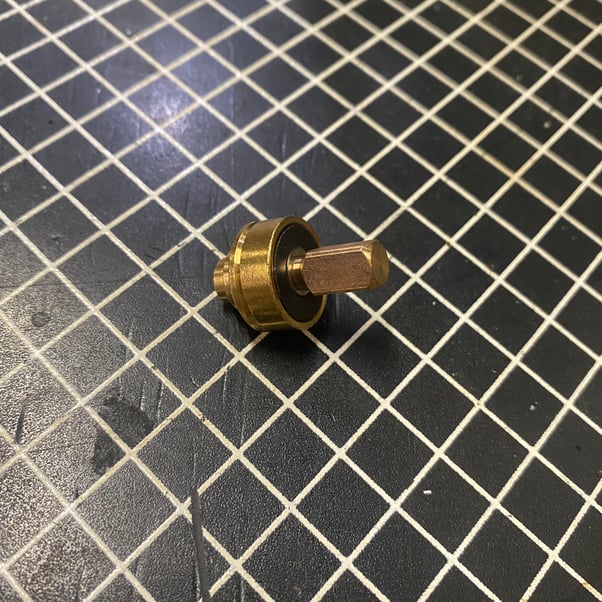
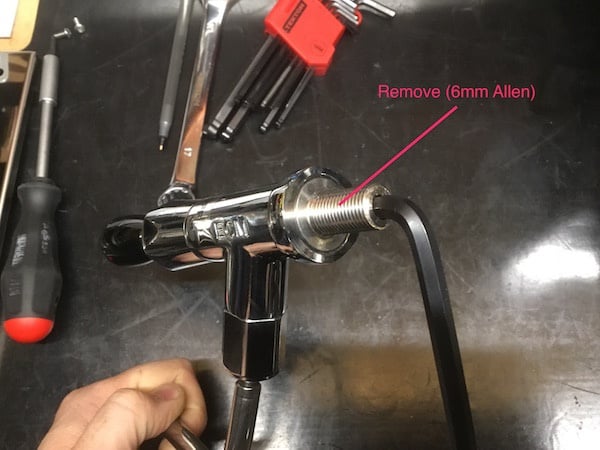
5. With the hot water valve removed from the machine, insert the 6mm Allen wrench into the back of the valve and remove the stainless fitting.

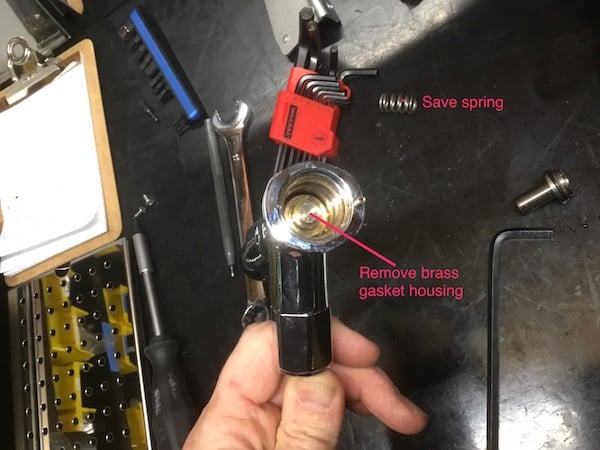
6. Remove brass and rubber seal gasket from valve. Make sure not to lose the spring.

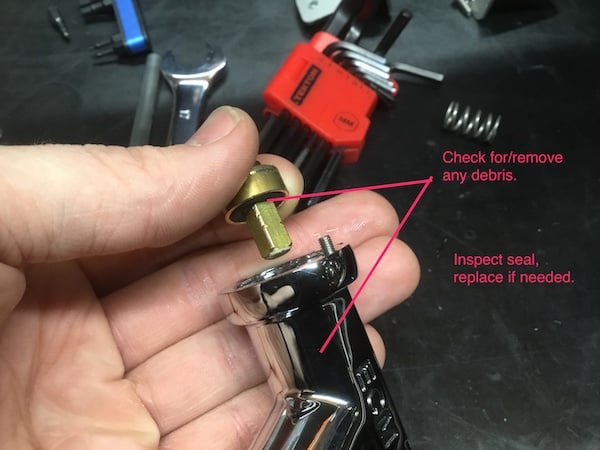
7. Inspect seal and inside of valve for any debris. Remove debris. Inspect seal condition, replace if needed.

A badly worn joystick seal gasket:
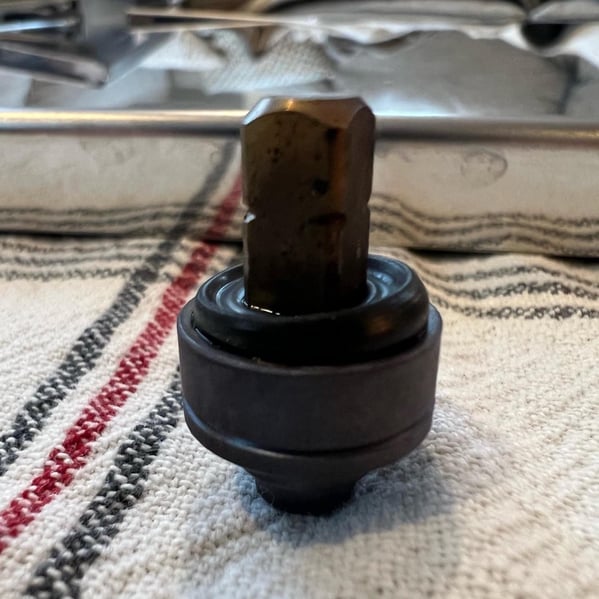
This used joystick seal gasket may still be re-usable, we'll need to clean it up and
re-install to test it out:
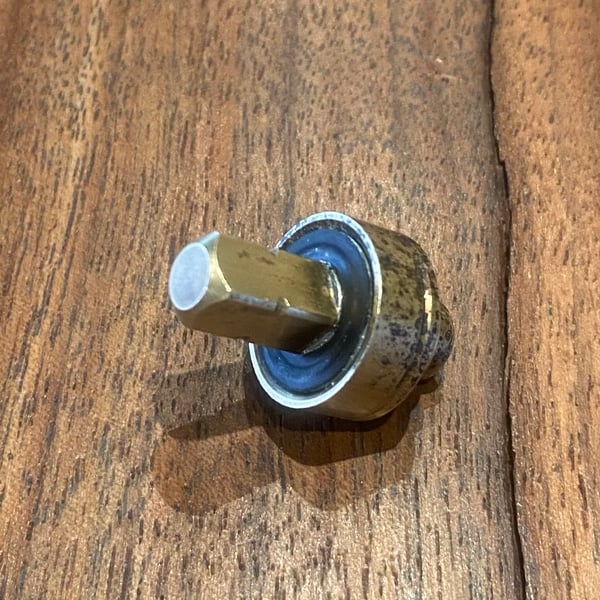
A brand new joystick seal gasket: