Tools Needed:
- 3mm hex key or hex driver
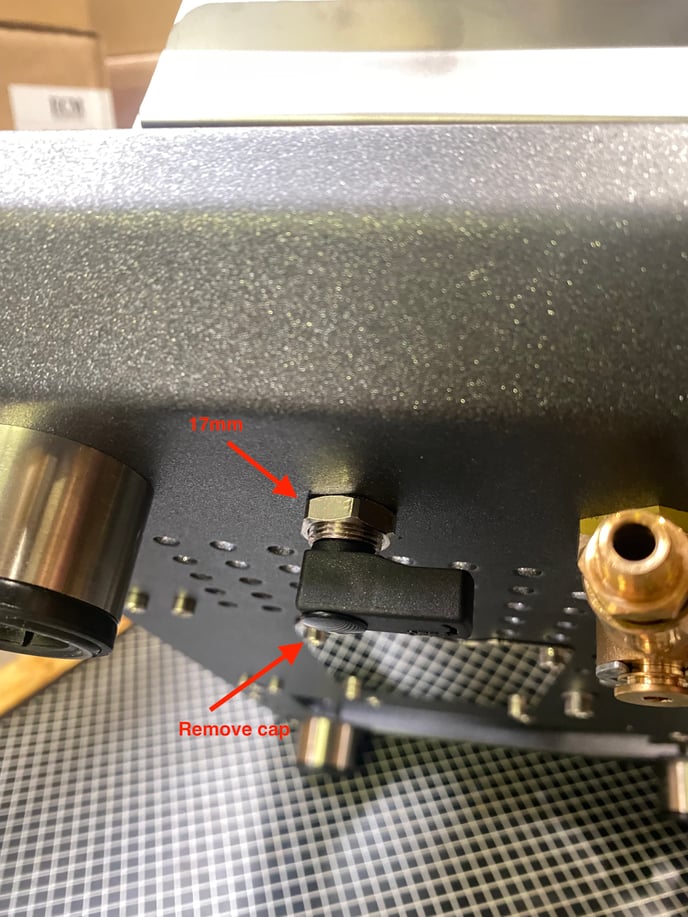
3. From underneath the machine: gently pry off the little round cap on the black plastic flipper lever, then use a small Phillips screwdriver to remove the retaining screw to dismount the flipper lever. Remove the 17mm retaining nut from the ball valve assembly.
- 3mm hex key or hex driver
- Flat head screwdriver 1/4"-5/16"
- #1 Phillips screwdriver
- 10mm, 13mm, 14mm, 17mm open ended wrenches
- Teflon plumber's tape
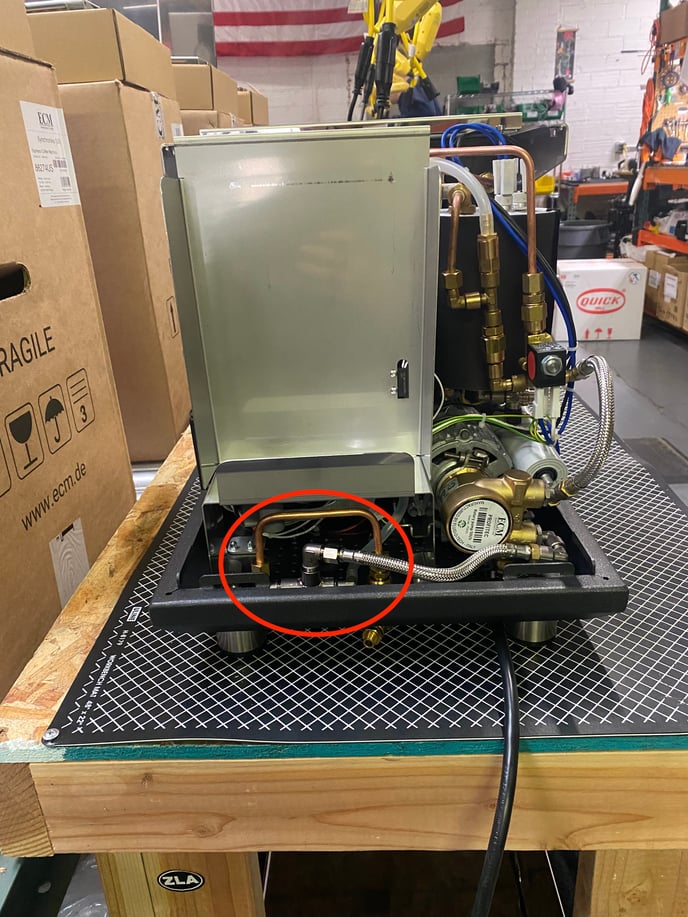
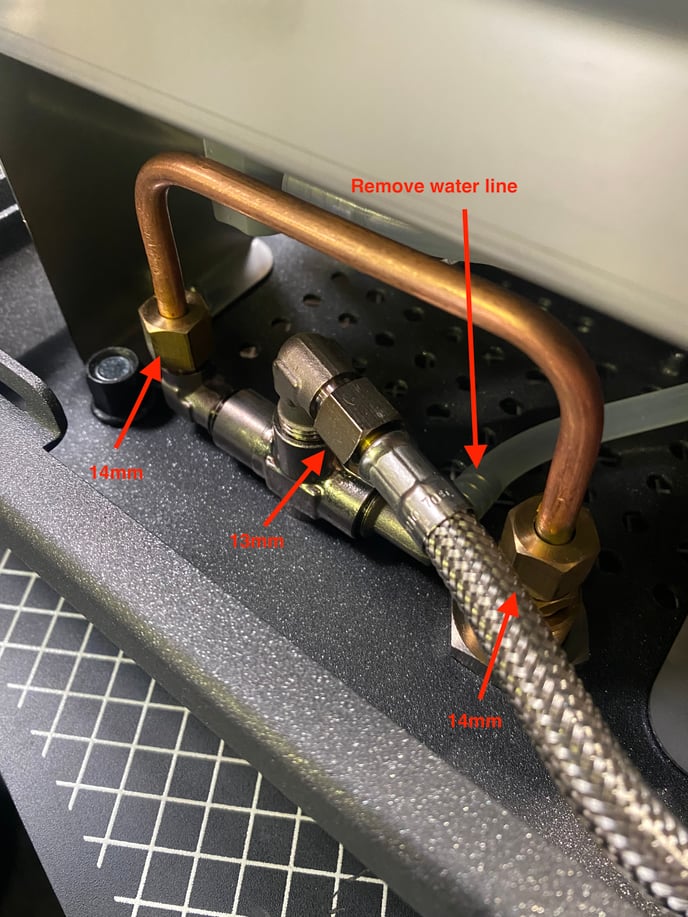
2. Disconnect the copper tube, the braided line, and the water line from the ball valve. Make sure to disconnect the copper "U" tube from both ends entirely, as this will make removing/reinstalling the ball valve easier.
3. From underneath the machine: gently pry off the little round cap on the black plastic flipper lever, then use a small Phillips screwdriver to remove the retaining screw to dismount the flipper lever. Remove the 17mm retaining nut from the ball valve assembly.
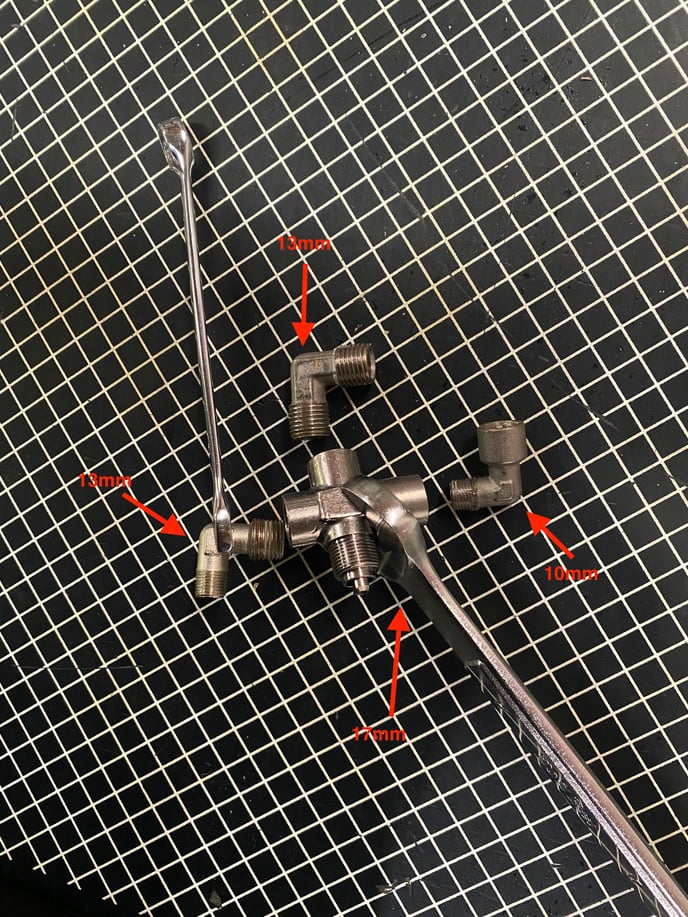
You should now be able to fully remove the old ball valve from the machine. To avoid confusion as you proceed, it can be helpful to mark the faulty part with an "X" using a marker.
4. Remove the elbow fittings from the faulty part and then reinstall them on the new part. Be sure the elbow fittings are installed and oriented the correct way. Teflon plumber's tape on the elbow fitting threads will help prevent leaks. Note: a bench vise may be necessary to loosen stubborn fittings.
5. The installation process for the new ball valve is just these steps in reverse. Make sure all connections are tight, but not overly so - brass/copper fittings are especially prone to damage from over-tightening.