- Help Center
- Eureka Grinders
- Eureka Mignons (Silenzio, Perfetto, Specialita, Oro XL)
-
Getting Started
-
Espresso 101
-
Warranty, Ordering & Returns
-
Bezzera BZ10
-
Bezzera Duo DE
-
Bezzera Duo MN
-
LUCCA A53 (Direct Plumb & Mini) by La Spaziale
-
LUCCA M58 by Quick Mill
-
LUCCA S58 by Profitec
-
LUCCA X58 by Quick Mill
-
La Marzocco Linea Mini
-
La Marzocco GS3
-
Lelit Mara X
-
Lelit Bianca
-
Lelit Elizabeth
-
Lelit Victoria
-
ECM Synchronika
-
ECM Special Edition Classika PID
-
ECM Mechanika V Slim
-
ECM Mechanika VI Slim
-
ECM Casa V
-
ECM Puristika
-
Profitec Pro 300
-
Profitec Pro 400
-
Profitec Pro 500
-
Profitec Pro 600
-
Profitec Pro 700
-
Profitec Pro 800
-
Profitec GO
-
Rocket Appartamento
-
Rocket R58 / Cinquantotto
-
Rocket Giotto
-
Rocket R Nine One
-
Rocket Boxer
-
La Spaziale S2 EK
-
Rancilio Silvia
-
Rancilio Silvia Pro
-
Rancilio Silvia Pro X
-
Sanremo YOU
-
Izzo Alex Duetto
-
Quick Mill
-
Breville Oracle
-
Dalla Corte Mina
-
Slayer
-
LUCCA Grinders
-
Baratza Grinders
-
Eureka Grinders
-
ECM Grinders
-
Compak Grinders
-
Fellow Grinders
-
Mahlkonig Grinders
-
Profitec Grinders
-
Breville Grinders
-
Dalla Corte Grinders
-
Macap Grinders
-
Fiorenzato Grinders
-
LUCCA E61 Flow Control
-
General Troubleshooting
-
Like New & Trade-In Program
-
Breville Barista Pro
-
Breville Oracle Touch
-
Fellow Tally Precision Scale
-
DF64
-
LUCCA DF64
Eureka Oro Mignon: Inspecting and Cleaning the Burrs
This article provides a brief guide to inspecting and cleaning the burrs on Eureka Oro Mignon grinders, like the XL or Single Dose.
NOTE: If you need to access the chute or perform a more thorough cleaning, please reference the general Eureka Mignon grinder cleaning article.Tools Needed:
- #2 Phillips screwdriver
- Pick or similar implement
- Vacuum with hose attachment
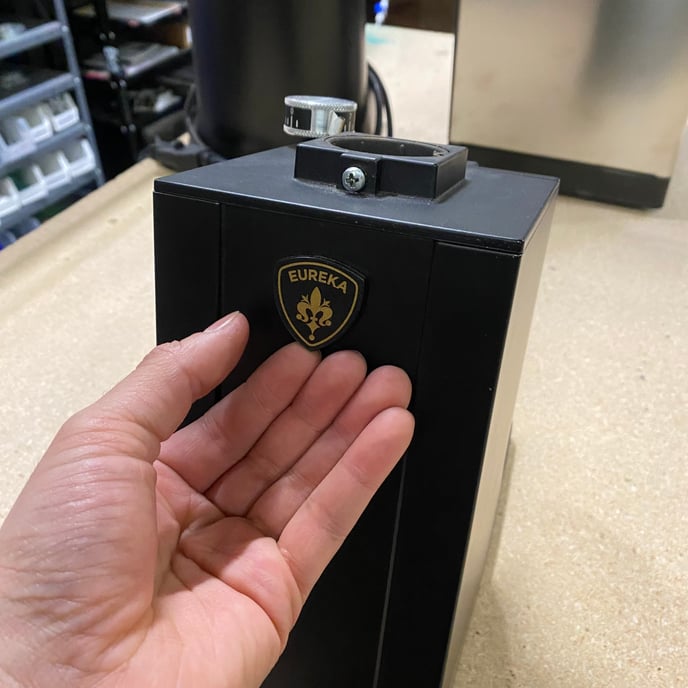
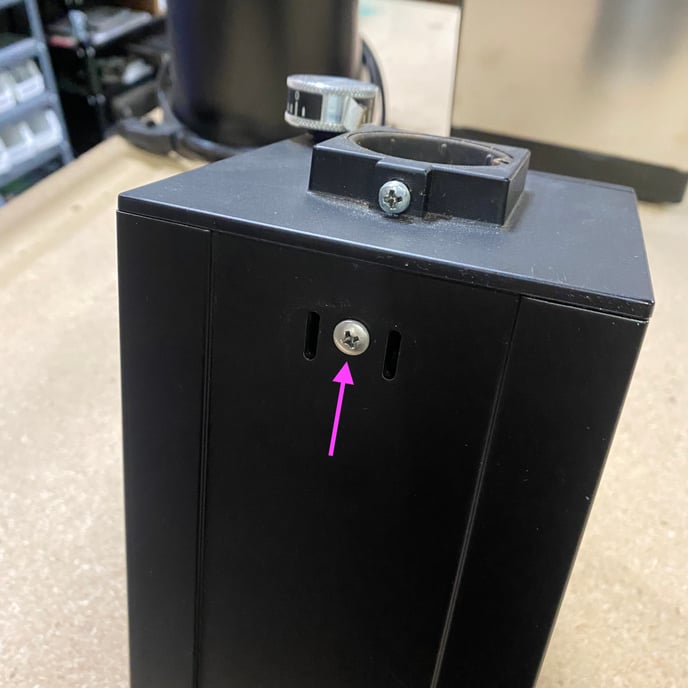
1. Gently pry the emblem cap off the back of the grinder to expose the top plate retaining screw; remove the screw and set it aside.


2. Remove the two screws securing the top burr carrier to the grind chamber.
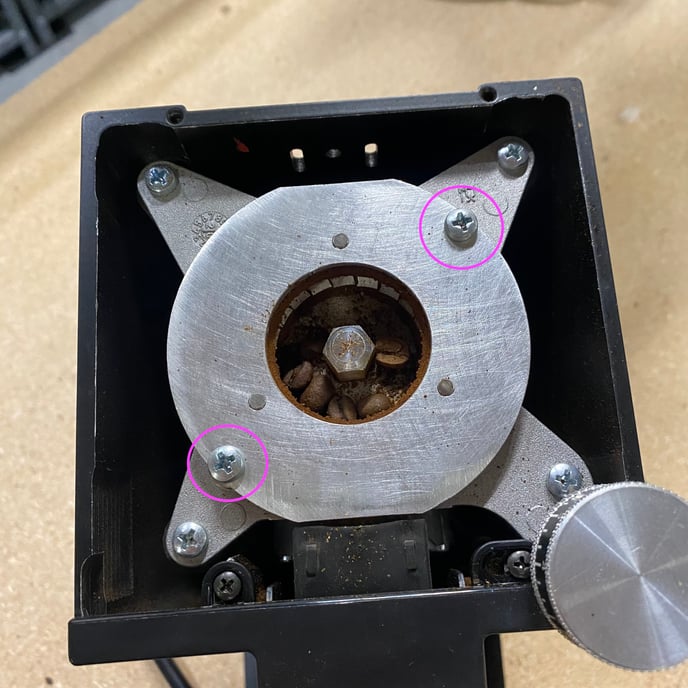
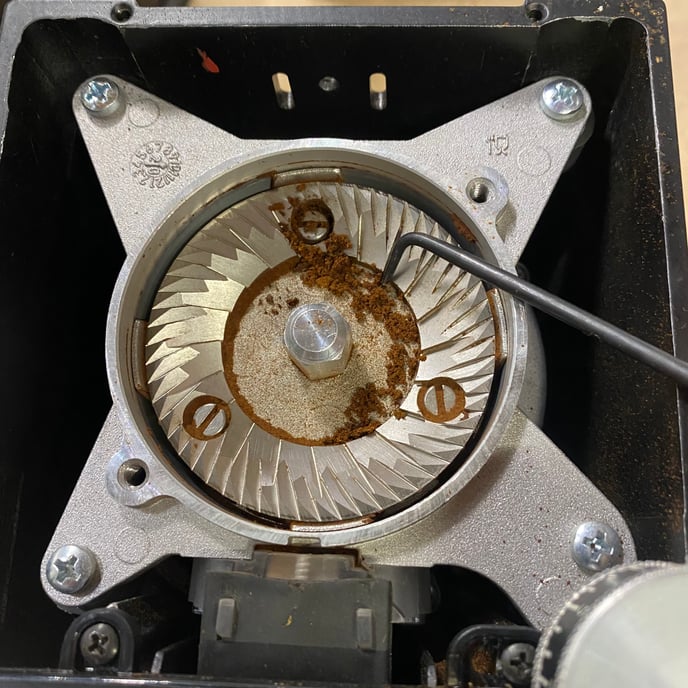
3. Inspect the burr and burr carriers for damage or signs of wear.
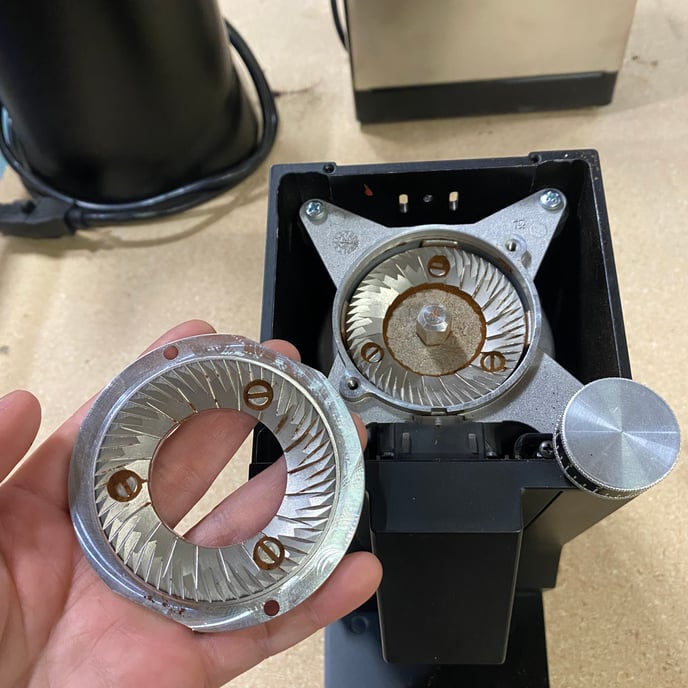
4. Use a pick or similar implement to scrape away any built up coffee and/or cakey residue, then vacuum the grind chamber and re-assemble.