- Help Center
- La Marzocco Linea Mini
-
Getting Started
-
Espresso 101
-
Warranty, Ordering & Returns
-
Bezzera BZ10
-
Bezzera Duo DE
-
Bezzera Duo MN
-
LUCCA A53 (Direct Plumb & Mini) by La Spaziale
-
LUCCA M58 by Quick Mill
-
LUCCA S58 by Profitec
-
LUCCA X58 by Quick Mill
-
La Marzocco Linea Mini
-
La Marzocco GS3
-
Lelit Bianca
-
Lelit Elizabeth
-
Lelit Victoria
-
ECM Synchronika
-
ECM Special Edition Classika PID
-
ECM Mechanika V Slim
-
ECM Casa V
-
ECM Puristika
-
Profitec Pro 300
-
Profitec Pro 400
-
Profitec Pro 500
-
Profitec Pro 600
-
Profitec Pro 700
-
Profitec Pro 800
-
Rocket Appartamento
-
Rocket R58 / Cinquantotto
-
Rocket Giotto
-
Rocket R Nine One
-
La Spaziale S2 EK
-
Rancilio Silvia
-
Rancilio Silvia Pro
-
Rancilio Silvia Pro X
-
Izzo Alex Duetto
-
Quick Mill
-
Breville Oracle
-
Dalla Corte Mina
-
Slayer
-
Lucca Grinders
-
Baratza Grinders
-
LUCCA Atom 75
-
Eureka Grinders
-
ECM Grinders
-
Compak Grinders
-
Fellow ODE Grinder
-
Mahlkonig Grinders
-
Profitec Grinders
-
Breville Grinders
-
Dalla Corte Grinders
-
Macap Grinders
-
Fiorenzato Grinders
-
General Troubleshooting
-
Like New & Trade-In Program
-
Eureka Mignon Libra
-
Eureka Mignon Libra User Manual
-
Rocket Boxer Setup Guide
-
Rocket Boxer Timer User Manual
-
Baratza Encore ESP Setup Guide
-
Baratza Encore ESP User Manual
-
Fellow Opus User Manual
-
Fellow Opus Setup Guide
Linea Mini: Steam Gauge Replacement
If you need to replace the steam pressure gauge on your Linea Mini, here's how: (Difficulty ☕☕☕)
You'll need:
14mm Wrench
16mm Wrench
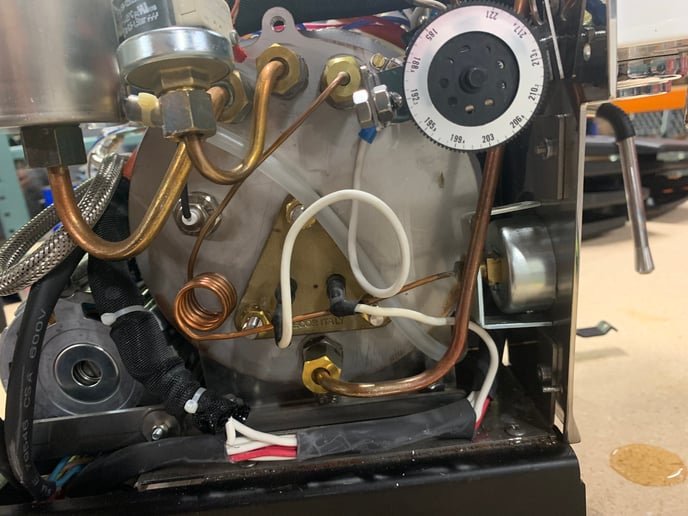
Before getting to the gauge, you'll need to remove your panels.
Once inside, take a look at the left side of the machine. You'll see the steam gauge, and its capillary tube connected to the side of the boiler.
Use the 14mm wrench to loosen the nut on the back of the bracket that is holding the gauge tight to the face of the machine. Once loose, you can use your fingers to unscrew the nut the rest of the way.
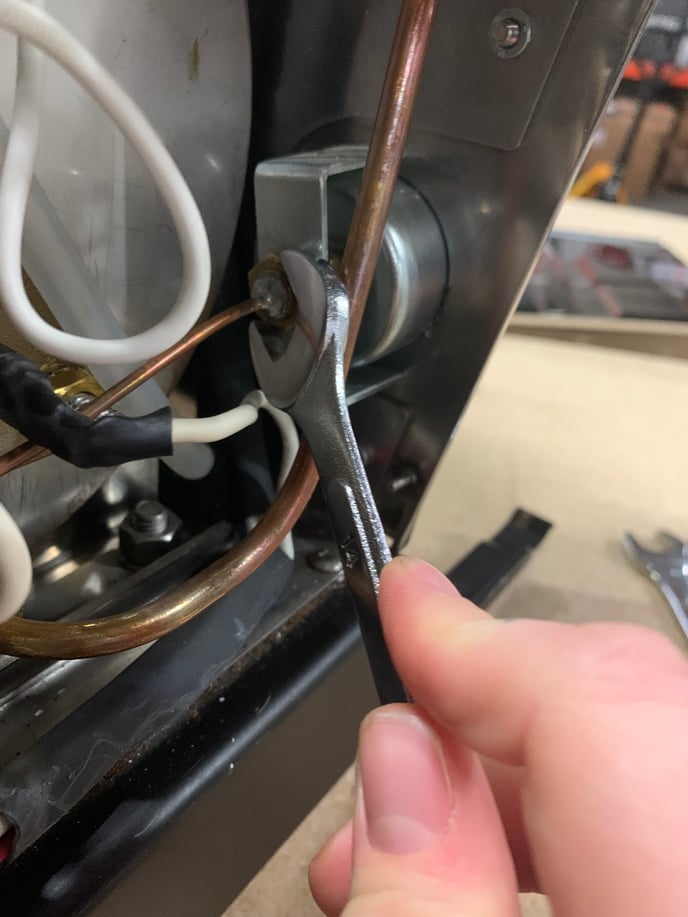
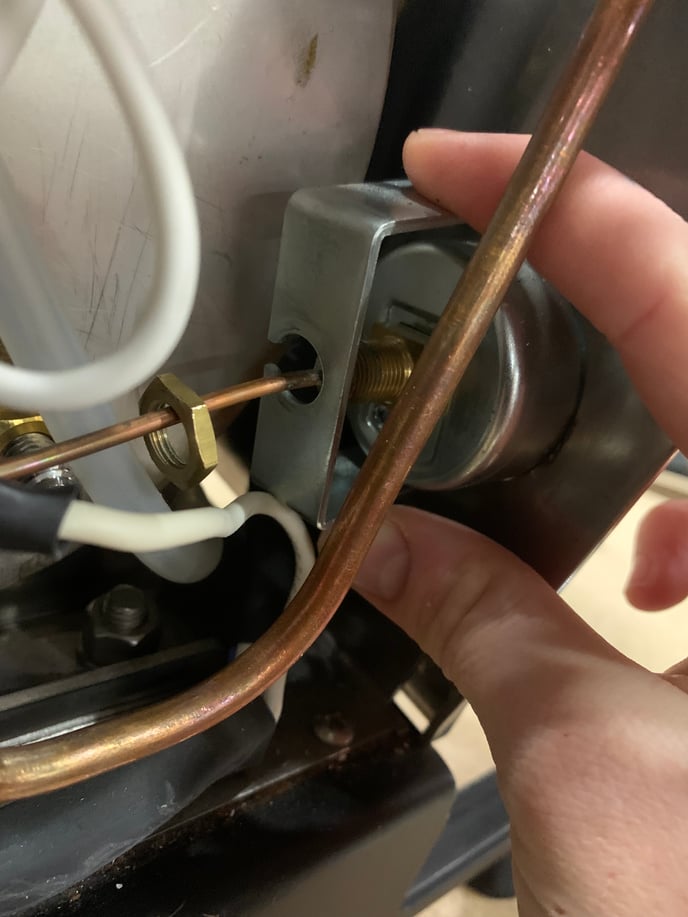
Slide the bracket back, off of the threading. There is a slot in the bracket to pull it off of the capillary tube. Slide the bracket off of the copper capillary tube, and set it aside for later.
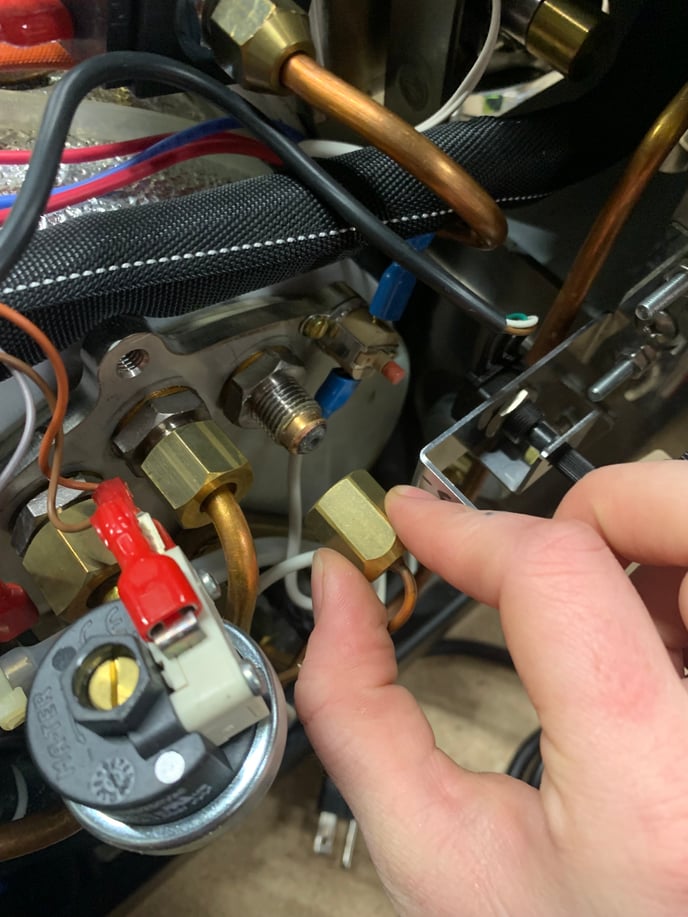
Now turn your attention to the connection at the steam boiler. Use the 16mm wrench to loosen the nut here. Again, once loose, you can use your hand to unscrew the rest of the way.
Now that your gauge is fully free, you can pull the gauge out through the hole in the front face of the machine.
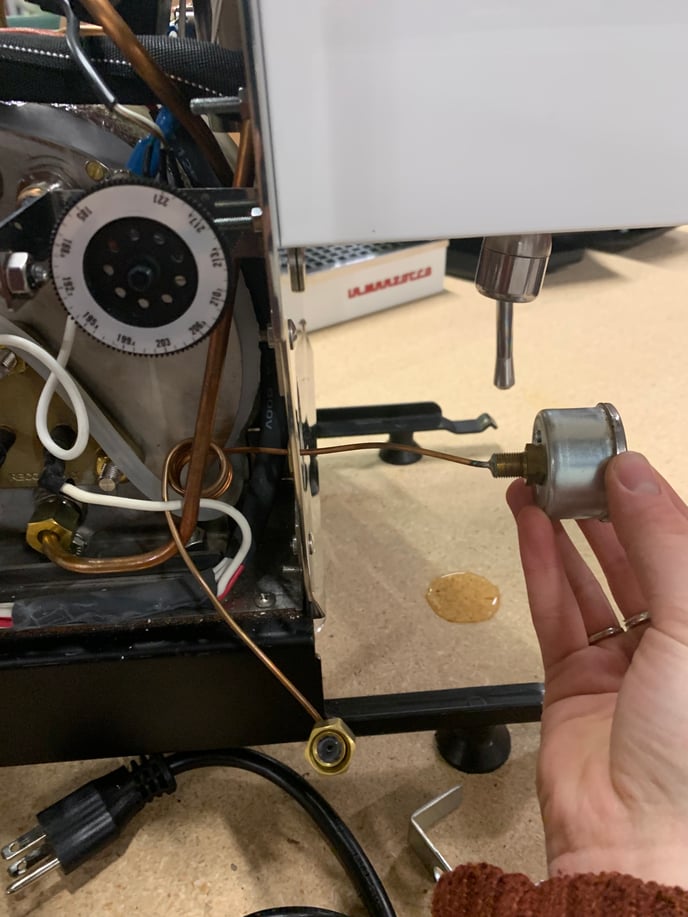
Now you can feed the replacement gauge back through the opening, following these instructions in reverse order to reinstall. If you have any questions, reach out to us at support@clivecoffee.com.