- Help Center
- LUCCA A53 Mini/Mini Vivaldi
- Cleaning/Maintenance
-
Getting Started
-
Espresso 101
-
Warranty, Ordering & Returns
-
Like New & Trade-In Program
-
General Troubleshooting
-
LUCCA A53 Direct Plumb
-
LUCCA A53 Mini/Mini Vivaldi
-
LUCCA M58 by Quick Mill
-
LUCCA X58 by Quick Mill
-
LUCCA Solo
-
LUCCA Accessories
-
LUCCA S58 by Profitec
-
La Marzocco Linea Mini
-
La Marzocco GS3
-
Lelit Mara X
-
Lelit Bianca
-
Lelit Elizabeth
-
Lelit Victoria
-
ECM Synchronika & Synchronika II
-
ECM Special Edition Classika PID
-
ECM Mechanika V Slim
-
ECM Mechanika VI Slim
-
ECM Casa V
-
ECM Puristika
-
Profitec MOVE
-
Profitec JUMP
-
Profitec GO
-
Profitec Pro 300
-
Profitec Pro 400
-
Profitec Pro 500
-
Profitec Pro 600
-
Profitec Pro 700
-
Profitec Pro 800
-
Profitec Drive
-
Rocket Appartamento
-
Rocket R58 / Cinquantotto
-
Rocket Giotto
-
Rocket R Nine One
-
Rocket Boxer
-
La Spaziale S2 EK
-
Rancilio Silvia
-
Rancilio Silvia Pro
-
Rancilio Silvia Pro X
-
Sanremo YOU
-
Ascaso Steel DUO
-
Breville Barista Pro
-
Breville Oracle Touch
-
Flair Classic Espresso Maker
-
Flair 58 Pro 2
-
Flair 58 Plus Espresso Maker
-
LUCCA Grinders
-
Baratza Grinders
-
Eureka Grinders
-
Eureka Mignon Zero
-
ECM Grinders
-
Fellow Grinders
-
Fellow Tally Precision Scale
-
Mahlkönig Grinders
-
DF64 Grinder
-
Quick Mill
-
Izzo Alex Duetto
-
Bezzera BZ10
-
Bezzera Duo DE
-
Bezzera Duo MN
-
Dalla Corte Mina
-
Compak Grinders
-
Dalla Corte Grinders
-
Profitec Grinders
-
Breville Grinders
-
Macap Grinders
-
Fiorenzato Grinders
-
Slayer
-
WEBER WORKSHOPS Grinders
LUCCA A53 Mini / Mini Vivaldi: Cleaning Fill Probe and Sealing Boiler Connection
A dirty fill probe can cause your espresso machine's steam boiler to over fill and leak excess water — follow these steps to remove and clean the fill probe on your Lucca A53. (Difficulty ☕☕)
Before proceeding with this procedure, it's important to drain the boilers and allow the machine to fully cool. Always unplug the machine from its power source before disassembling.
Tools required:
- Phillips screw driver
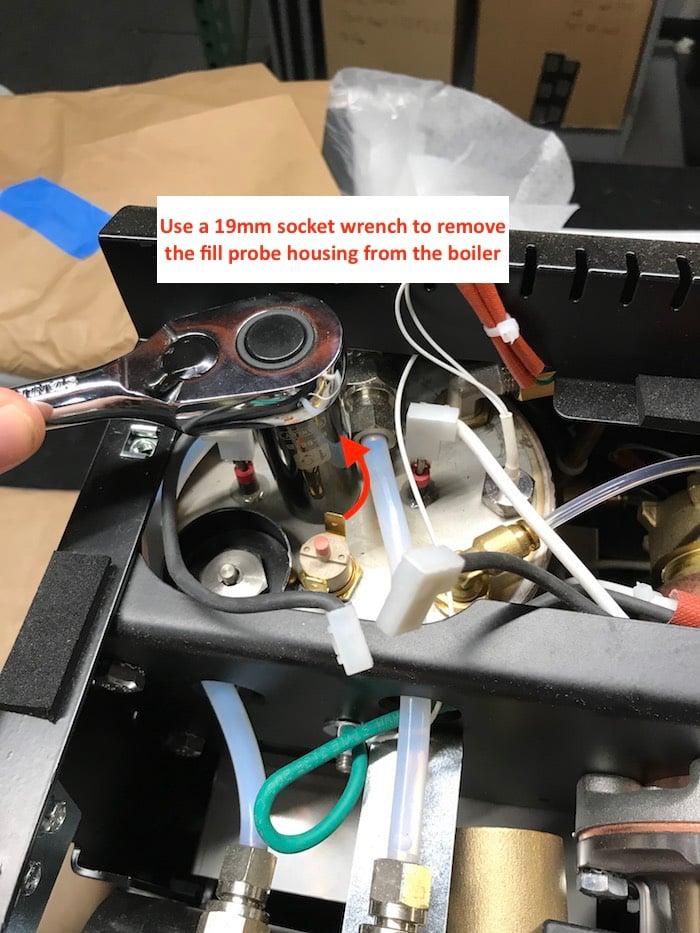
- 19mm socket wrench
- adjustable wrench
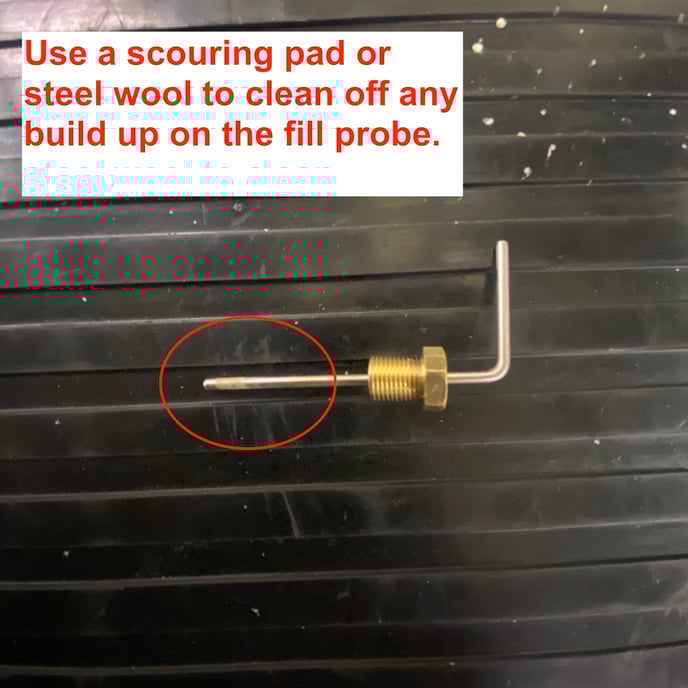
- metal brush / cleaning tool
- If needed, a new Fill Probe
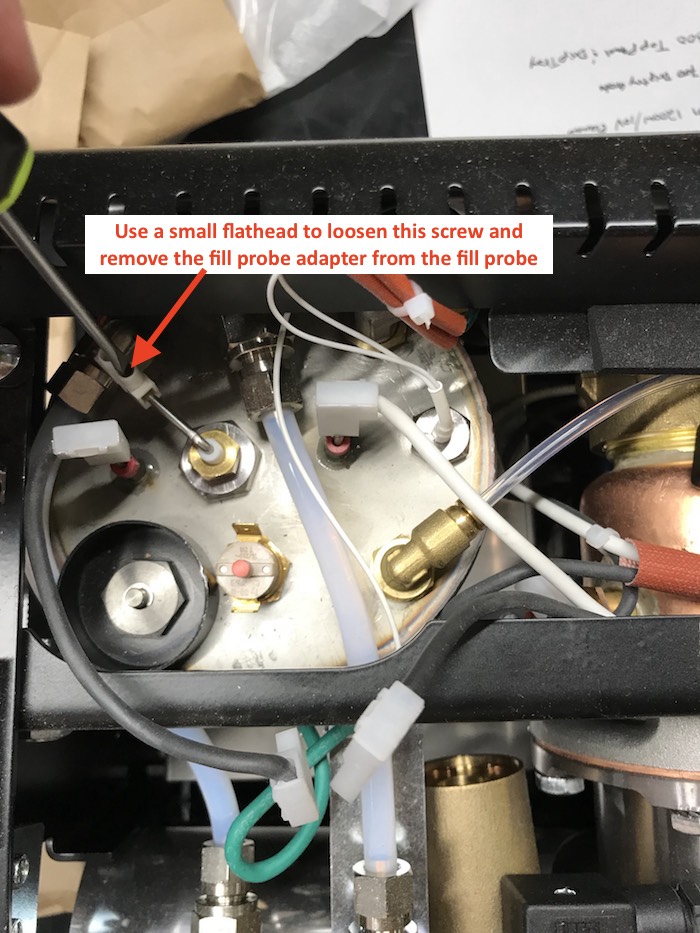
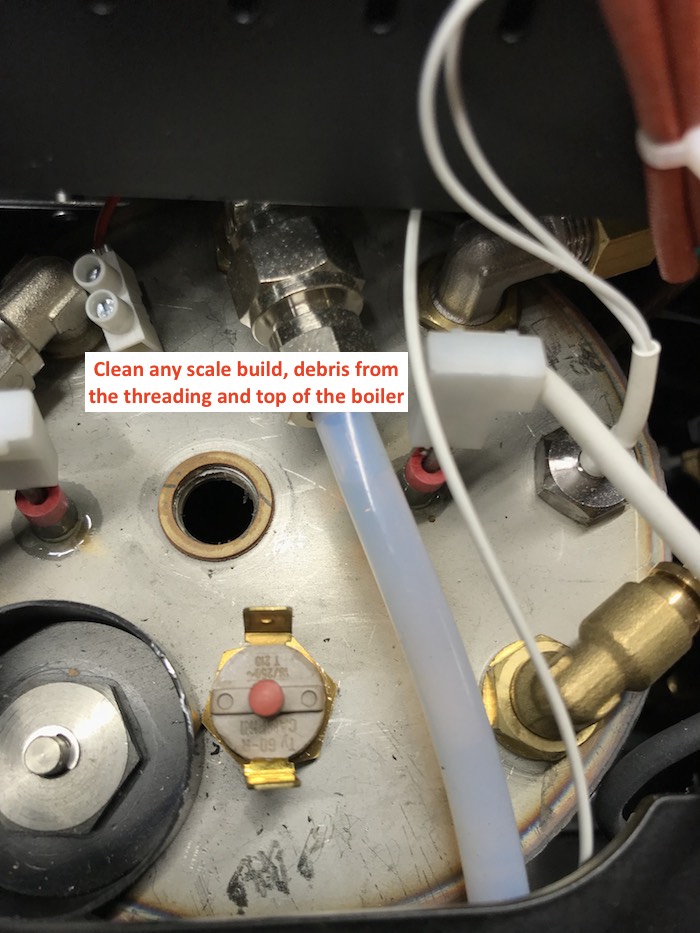
2. Once the top panel is removed:
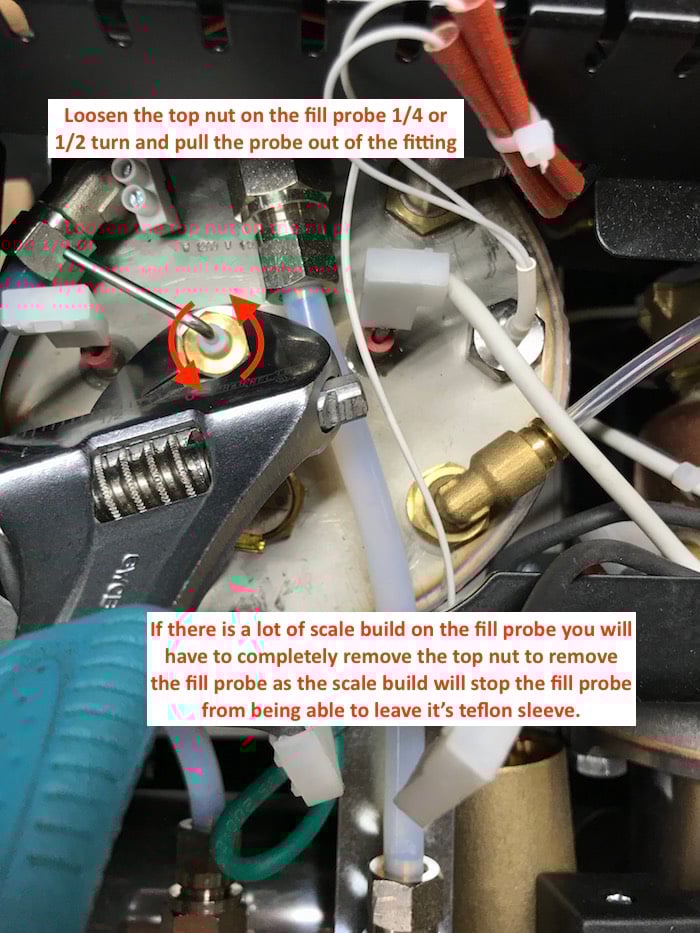
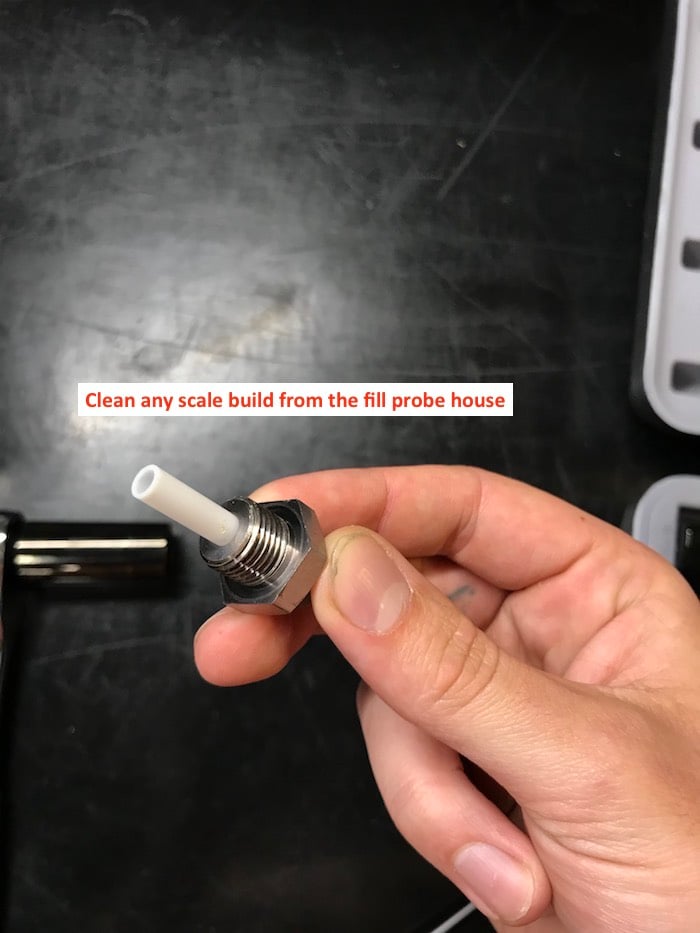
If you need to remove the whole fill probe assembly from the boiler to seal the threads, follow these steps after removing the fill probe from the base fitting as shown above:
Reassemble the machine in the reverse order you repaired it and test it for a leak when the machine is heating the steam boiler.
Don't forget to drain the steam boiler before testing the machine!