LUCCA A53 Mini / Mini Vivaldi: Cleaning Flowmeter
Below you will find instructions for cleaning the flowmeter on the La Spaziale LUCCA A53 Mini / Mini Vivaldi espresso machine.
Tools needed:
- Phillips screwdriver
- 3.5mm Allen wrench
- 7mm crescent wrench
- 13mm crescent wrench
- 16mm crescent wrench
- 17mm crescent wrench
1. Remove the panels from the machine.
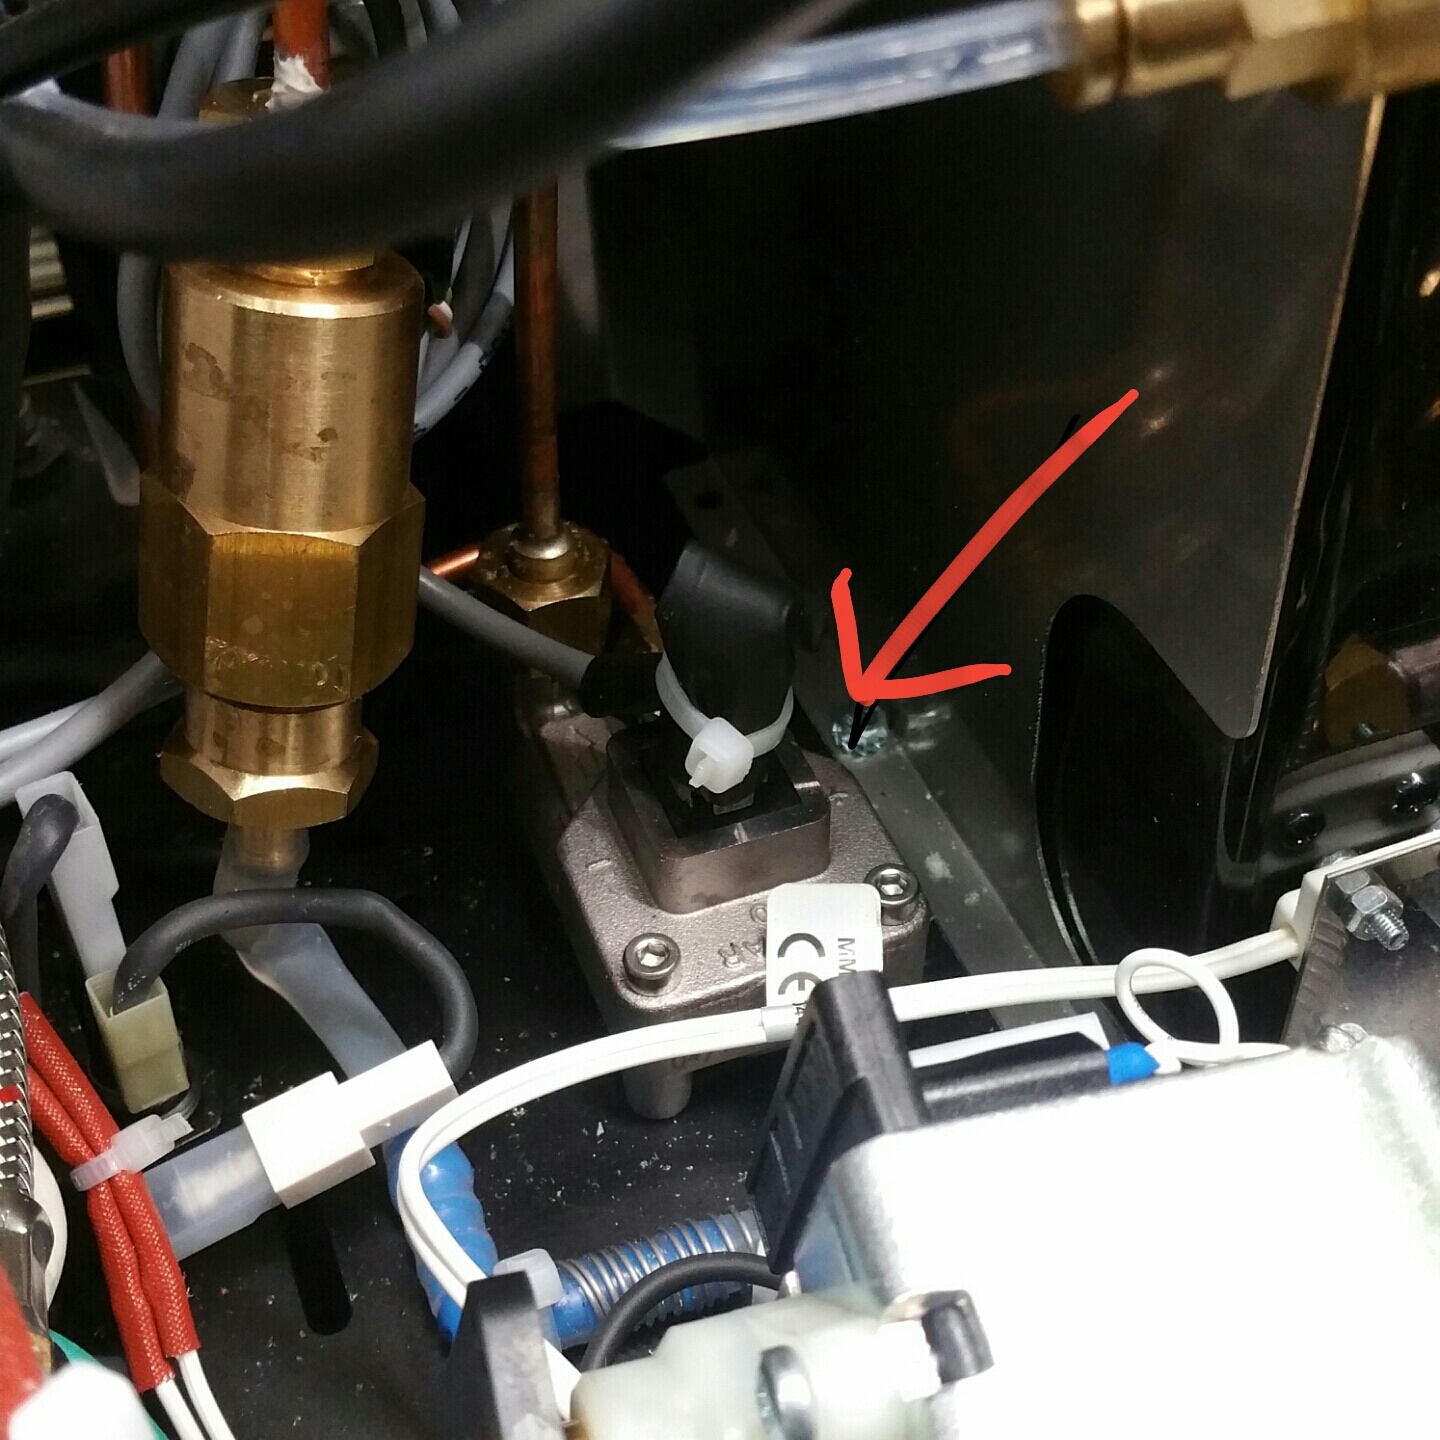
2. Locate the flowmeter, remove the 3 screws that secure the top. You may need to snip the zip tie holding the wires in place to more easily access the 3rd screw.
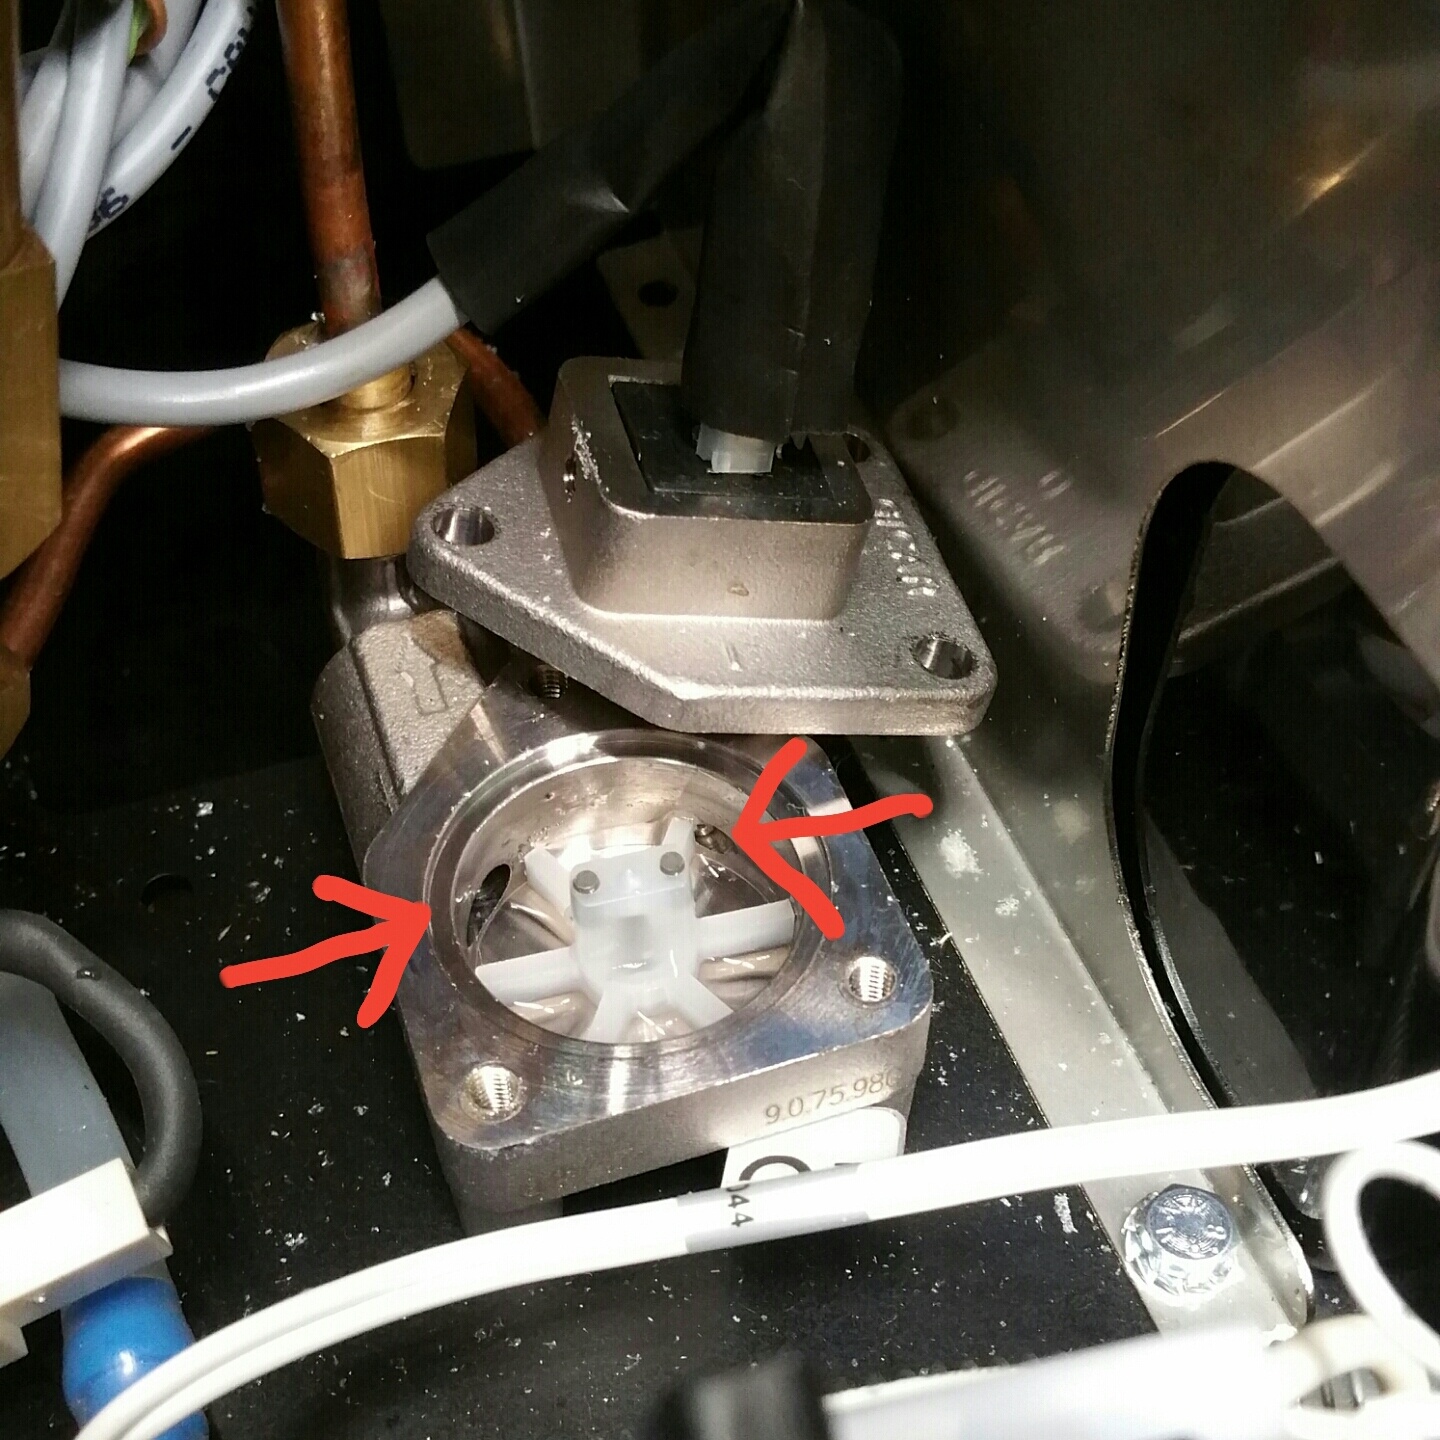
3. When the top of the flowmeter is removed, you'll see there is an inlet and outlet pointed out here, make sure both passageways are clear and that the white magnet holder spins freely. Don't forget to clean the underside of the top cover where the magnet sensor sits.
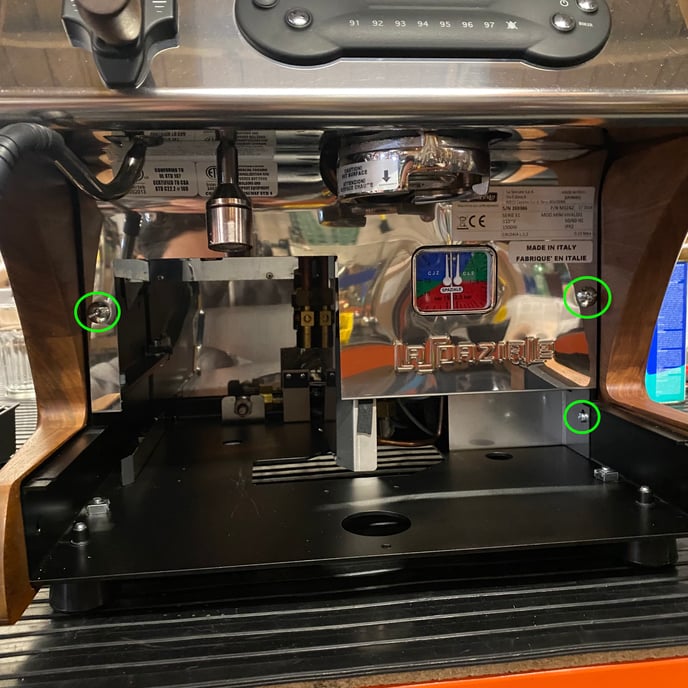
3. Now move to the front of the machine and remove the lower front panel and splash plate by removing the screws indicated here:
4. Remove the brass compression fittings from the flow meter body inlet/outlet fittings as shown. You may need to tilt the machine up and utilize the access window underneath the machine to undo the left fitting.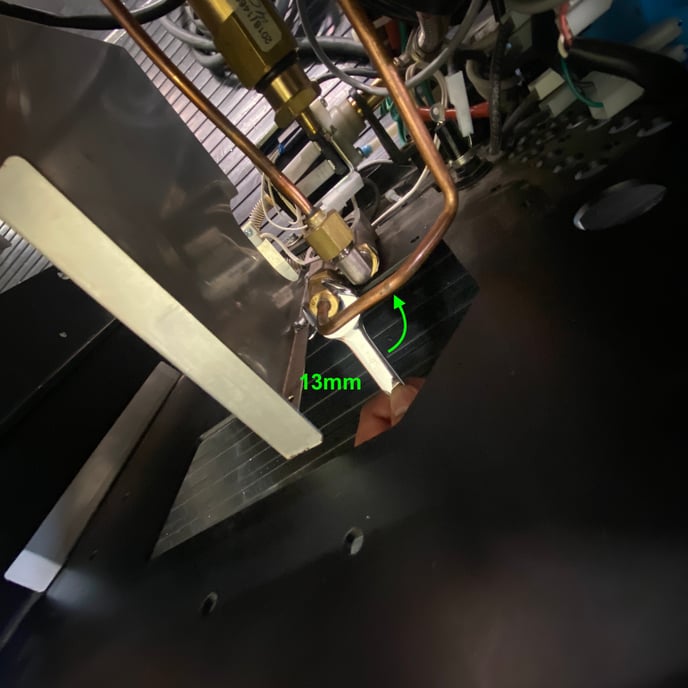
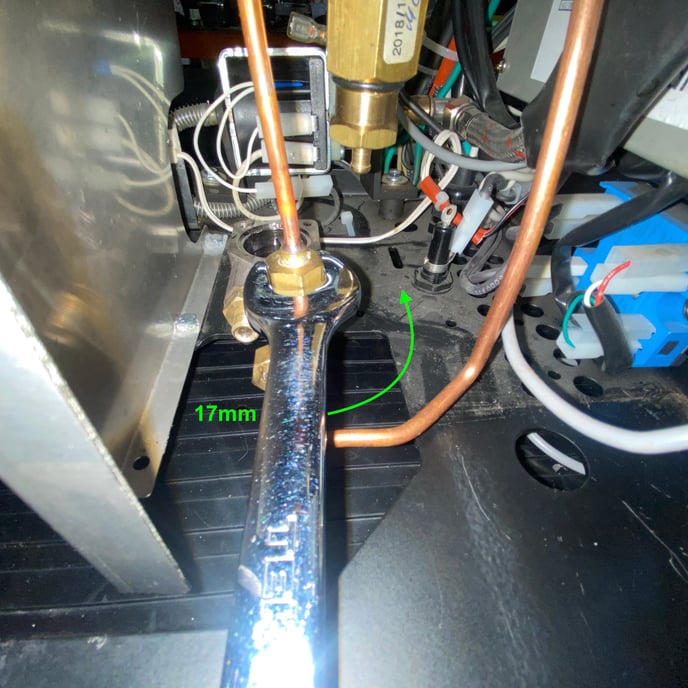
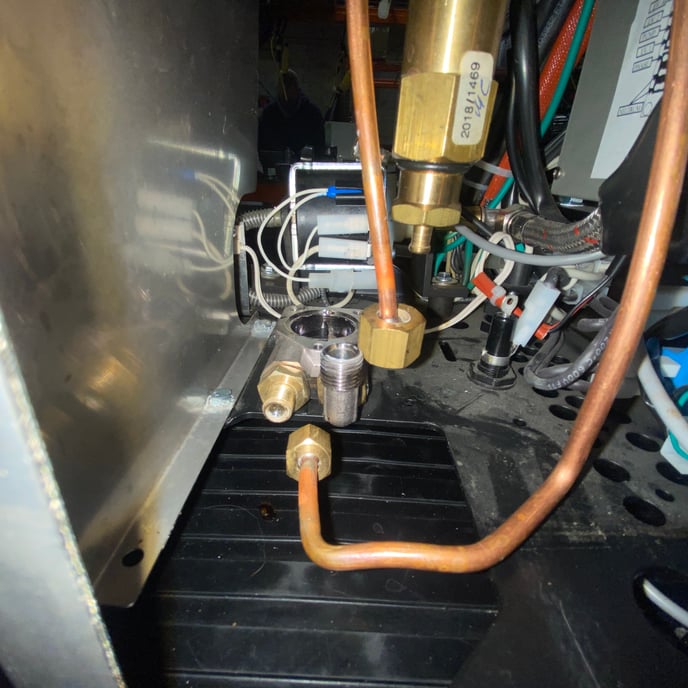
5. Tilt the machine up and remove the two bolts securing the flowmeter body to the bottom of the machine.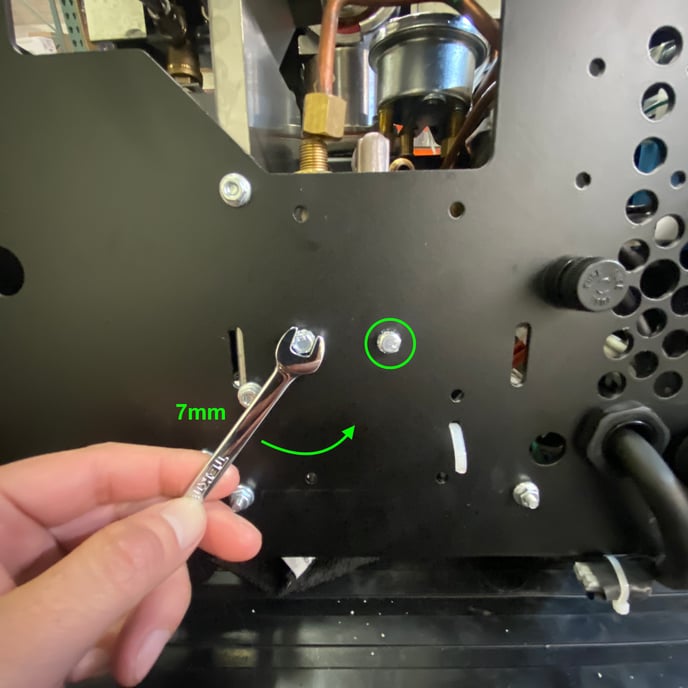
6. You can now remove the flowmeter body from the machine. Use compressed air or a fine pipe cleaner to make sure both passages through the inlet/outlet fittings are completely clear. In a pinch, you can blow into each fitting with your mouth.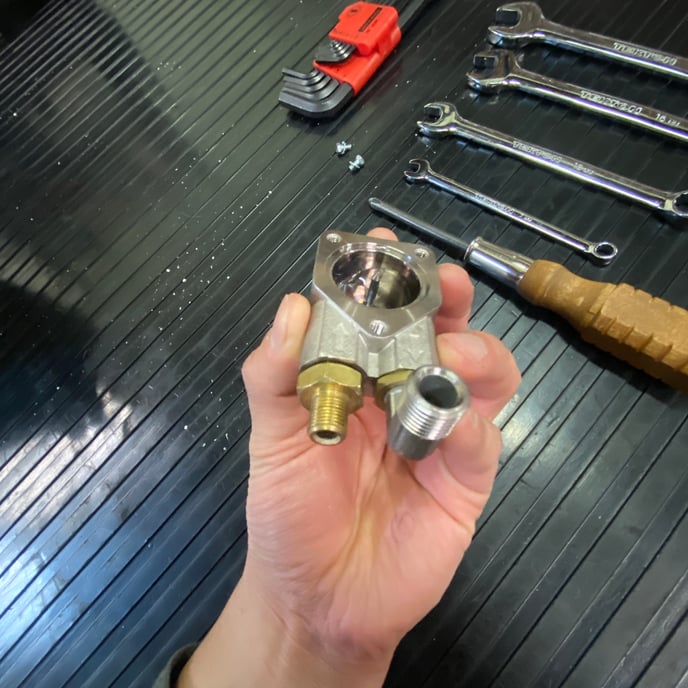
7. If you encounter a stubborn blockage, you may need to remove the plumbing fittings from the flowmeter body to ensure that they're completely clear. There is a mesh screen, retaining spring and flow restrictor (gicleur) housed in the side with the straight fitting — this is usually the location of such a blockage.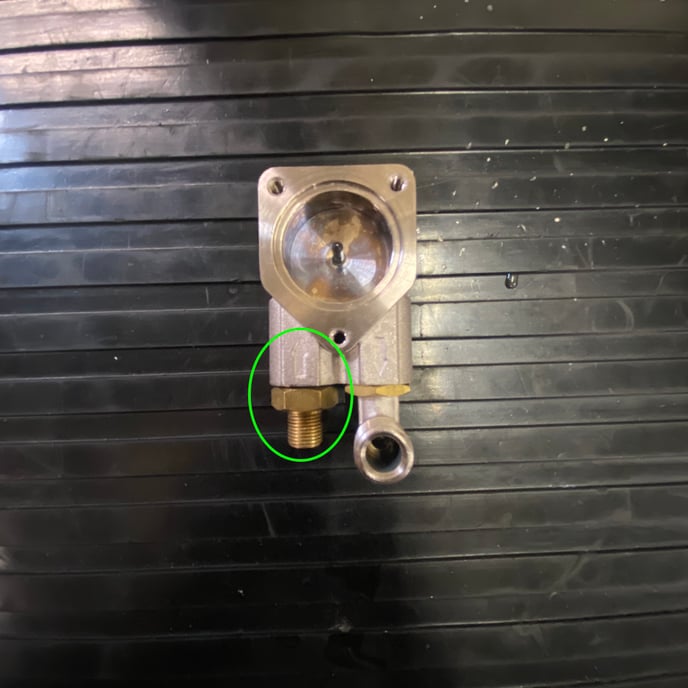
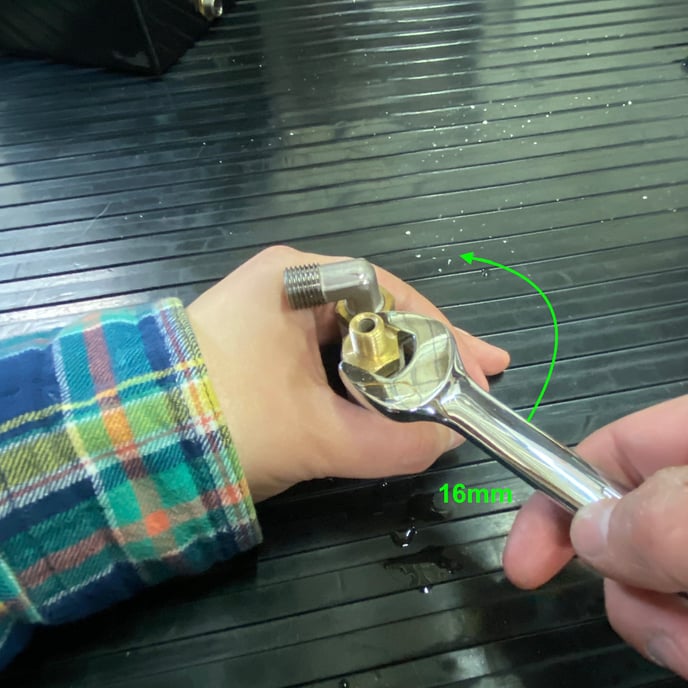
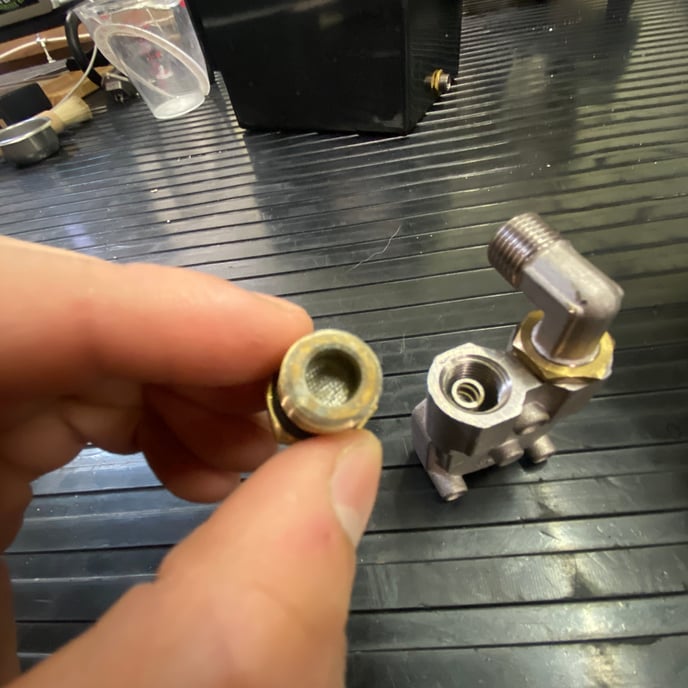
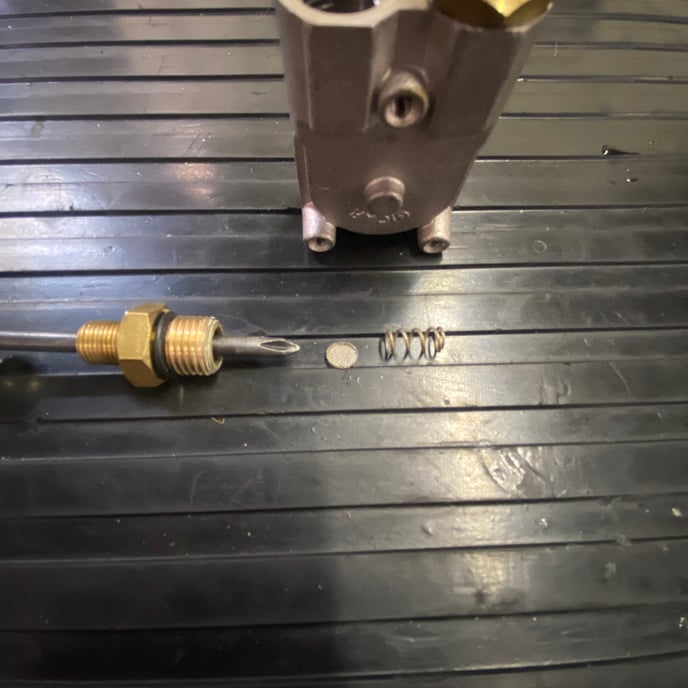
NOTE: As of 2022 the Clive Coffee tech department has determined that it is safe to operate your A53 Mini without the flow meter screen. You may omit the screen and retaining spring to prevent potential flow problems.
If you are using RO/DI water with a re-mineralizer such as Third Wave, the screen and retaining spring can be removed to prevent further obstructions by the re-mineralizing agents.
If you are using well filtered and conditioned water, it is also recommended to remove this screen. As your machine ages, the screen can deteriorate and cause reduced flow.
8. Make sure that the flow restrictor (gicleur) is clear of any debris.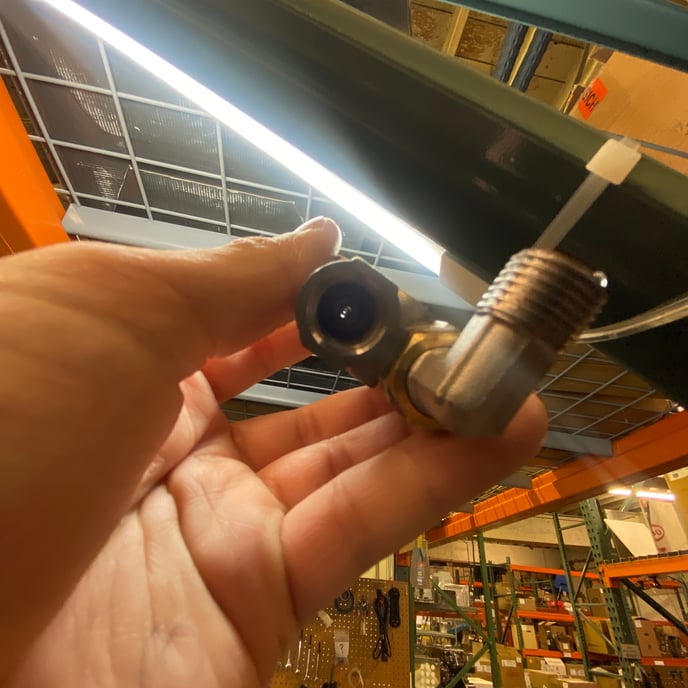
9. Re-assemble the flow meter and re-install it in the machine by following these steps in reverse order.