Tools Needed:
- Phillips screwdriver
- Pry bar or similar
- Mallet/hammer
- 5mm Allen Wrench
- Silicone sealant
1. Remove the panels of the machine.
2. Drain the brew boiler of the machine.
- For Minis, follow our instructions here.
- For plumbed in units, close the water line, run the coffee boiler until no water is coming out. There will be water that will leak out of the boiler, so a towel will be useful to keep it from going everywhere.
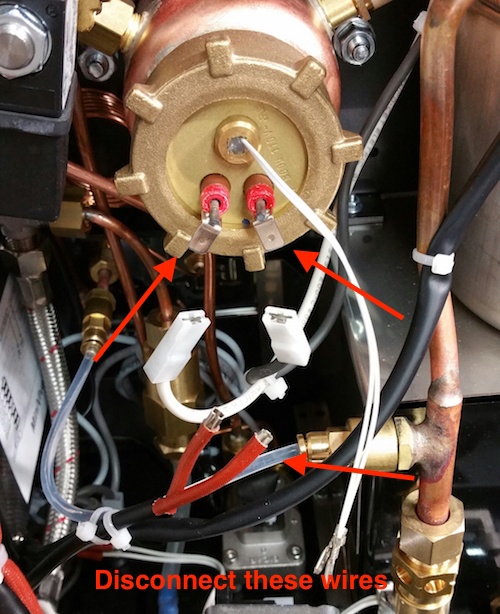
3. Unplug the brew boiler element and disconnect the temperature probe wires from inside the orange sleeves.
4. Using a pry bar or similar tool and a mallet, carefully knock the collar loose (counterclockwise). Once it breaks free you should be able to unthread it with your hand. The brew boiler is securely mounted to the frame of the machine, you will find the most important part of this step is making sure the pry bar stays in place when striking it as the boiler itself will not move.
NOTE: A straight bar is a much more useful tool than the one we're using here.

If you are replacing the machine's brew boiler you can stop here and transfer the heating element assembly to the new boiler.
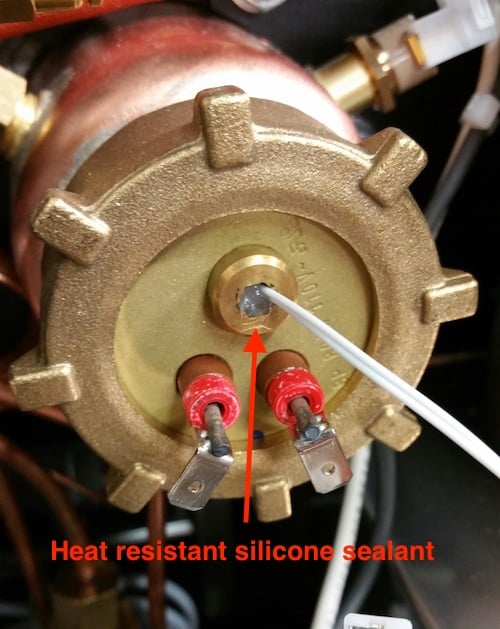
5. Remove the silicone plug and pull out the temperature probe. Once the silicone sealant is out, use a 5mm wrench to remove the temperature probe sleeve out of the element.

6. Swap the gasket on the inside of the element, or install a new one if necessary. Reassemble element and tighten down collar, using the crowbar and mallet to make sure it's snug. Reseal the the temperature probe with silicone sealant once the temperature probe sleeve is back in the element. Make sure to refill the machine's brew boiler before allowing the machine to heat.