- Help Center
- Lelit Bianca
- General Maintenance
-
Getting Started
-
Espresso 101
-
Warranty, Ordering & Returns
-
Like New & Trade-In Program
-
General Troubleshooting
-
LUCCA A53 Direct Plumb
-
LUCCA A53 Mini/Mini Vivaldi
-
LUCCA M58 by Quick Mill
-
LUCCA X58 by Quick Mill
-
LUCCA Solo
-
LUCCA Accessories
-
LUCCA S58 by Profitec
-
La Marzocco Linea Mini
-
La Marzocco GS3
-
Lelit Mara X
-
Lelit Bianca
-
Lelit Elizabeth
-
Lelit Victoria
-
ECM Synchronika & Synchronika II
-
ECM Special Edition Classika PID
-
ECM Mechanika V Slim
-
ECM Mechanika VI Slim
-
ECM Casa V
-
ECM Puristika
-
Profitec MOVE
-
Profitec JUMP
-
Profitec GO
-
Profitec Pro 300
-
Profitec Pro 400
-
Profitec Pro 500
-
Profitec Pro 600
-
Profitec Pro 700
-
Profitec Pro 800
-
Profitec Drive
-
Rocket Appartamento
-
Rocket R58 / Cinquantotto
-
Rocket Giotto
-
Rocket R Nine One
-
Rocket Boxer
-
La Spaziale S2 EK
-
Rancilio Silvia
-
Rancilio Silvia Pro
-
Rancilio Silvia Pro X
-
Sanremo YOU
-
Ascaso Steel DUO
-
Breville Barista Pro
-
Breville Oracle Touch
-
Flair Classic Espresso Maker
-
Flair 58 Pro 2
-
Flair 58 Plus Espresso Maker
-
LUCCA Grinders
-
Baratza Grinders
-
Eureka Grinders
-
Eureka Mignon Zero
-
ECM Grinders
-
Fellow Grinders
-
Fellow Tally Precision Scale
-
Mahlkönig Grinders
-
DF64 Grinder
-
Quick Mill
-
Izzo Alex Duetto
-
Bezzera BZ10
-
Bezzera Duo DE
-
Bezzera Duo MN
-
Dalla Corte Mina
-
Compak Grinders
-
Dalla Corte Grinders
-
Profitec Grinders
-
Breville Grinders
-
Macap Grinders
-
Fiorenzato Grinders
-
Slayer
-
WEBER WORKSHOPS Grinders
Lelit Bianca: PID Unit Replacement
If you need to replace the PID unit and display screen on your Lelit Bianca, here's how! (Difficulty ☕☕☕)
Tools needed:
- #2 Phillips screwdriver
First, you'll need to remove the panels.
At the front of the machine, above the motor, you'll see the display fastened to the front face by this metal bracket.
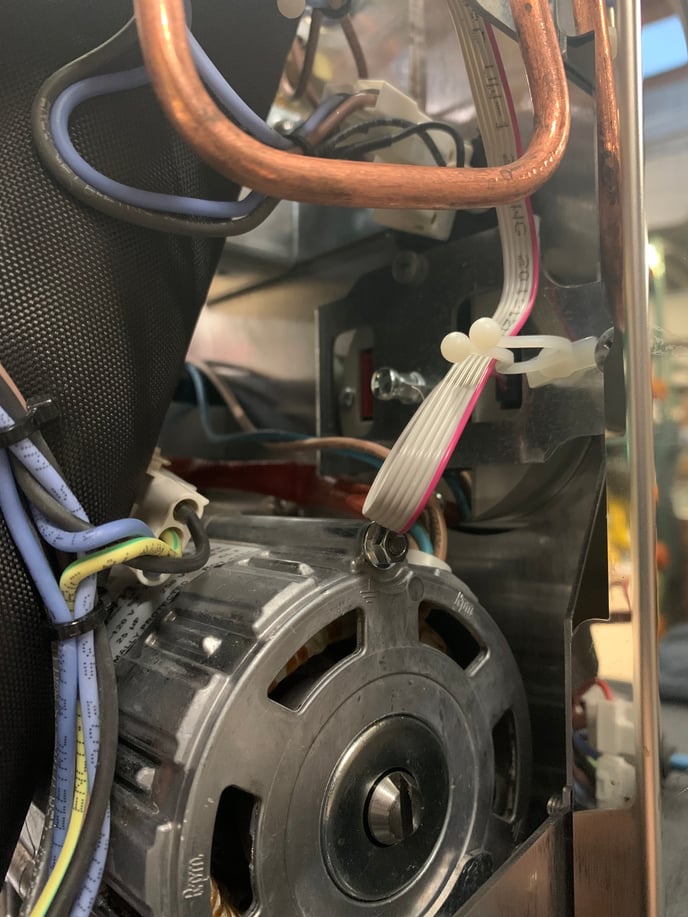
Remove this screw from the bracket.
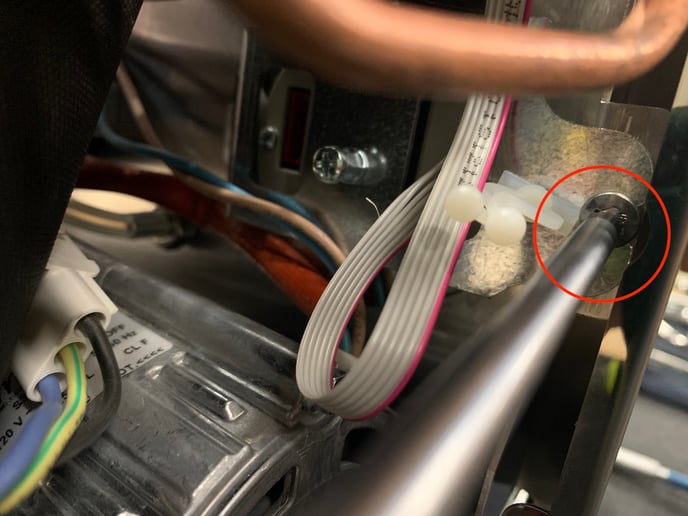
Then slide the bracket out of its slot on the other side.
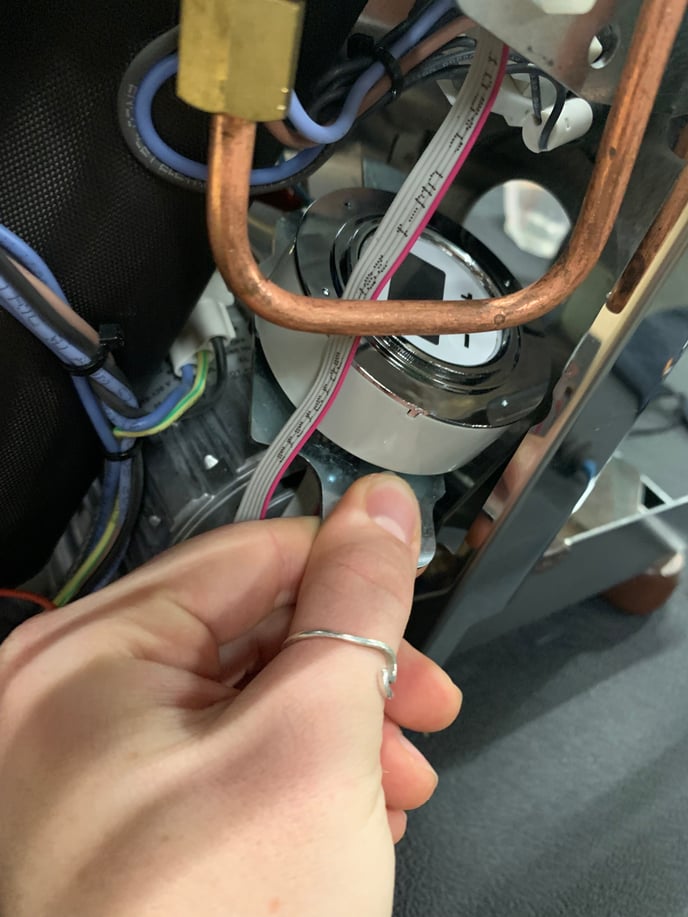
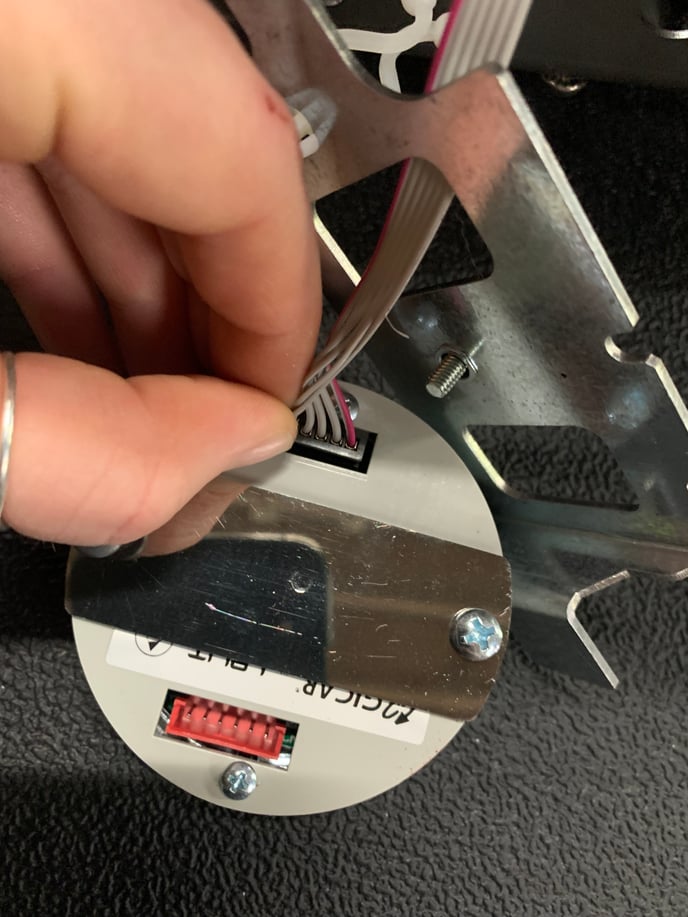
Flip the display over to see the wired connection, and slide the bracket out of the way.
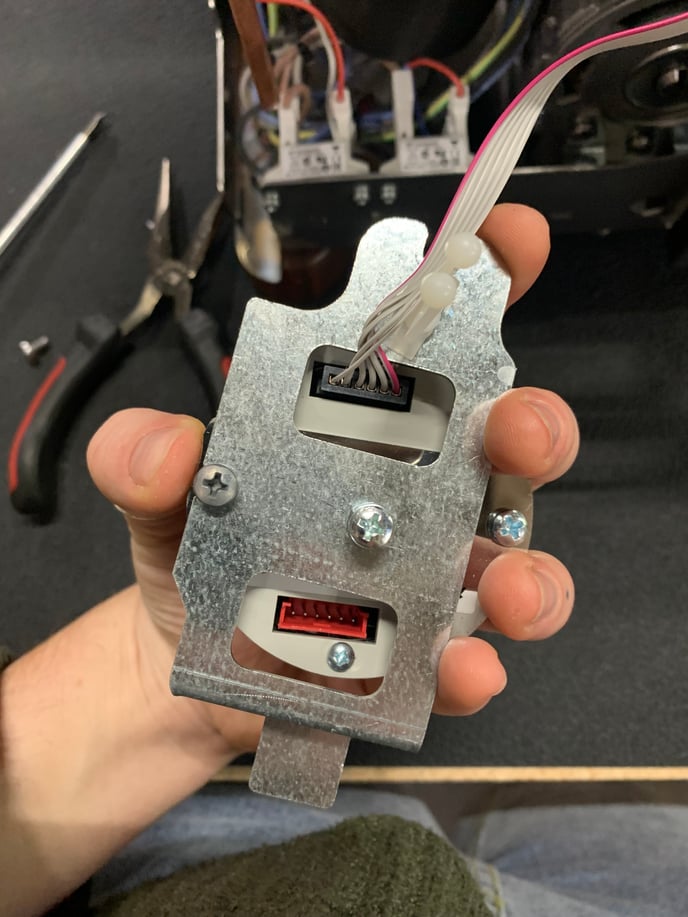
Remove the connection.
Remove these two screws! It's okay for one to jut out longer than the other, it helps to keep the display straight and level.
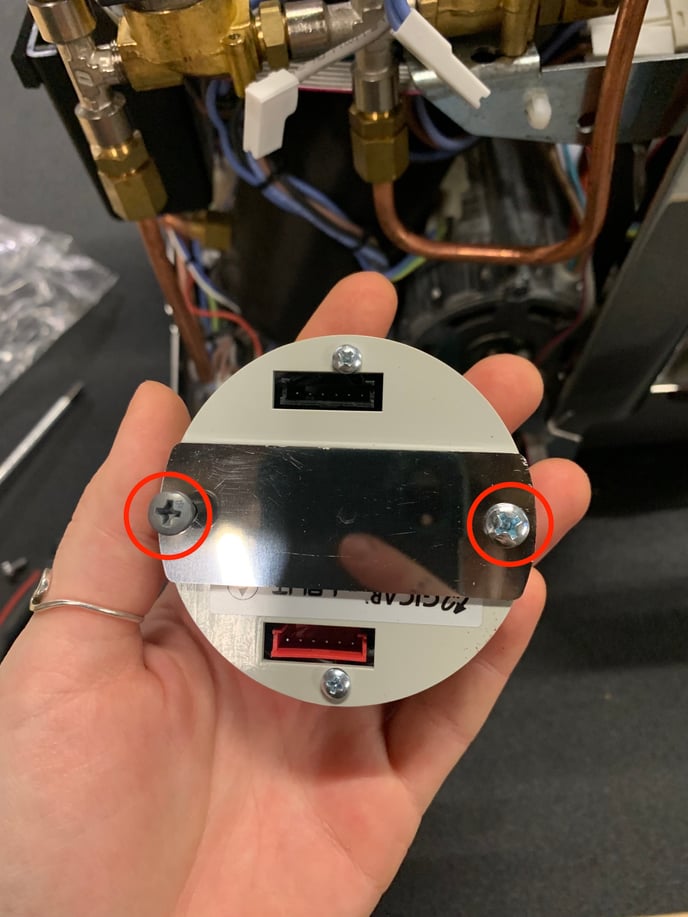
Remove this panel and transfer to your new display! Follow these steps in reverse order, and reassemble.
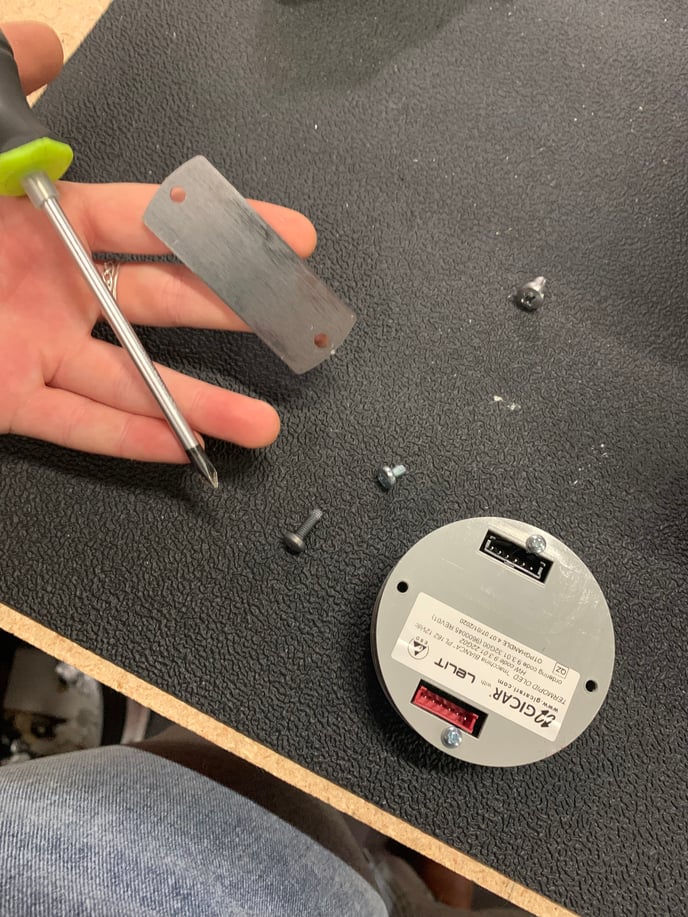
If you have any questions, reach out to us at support@clivecoffee.com