This procedure should only be performed with the machine unplugged and once it has completely cooled and depressurized.
Tools Needed:
- Phillips screwdriver
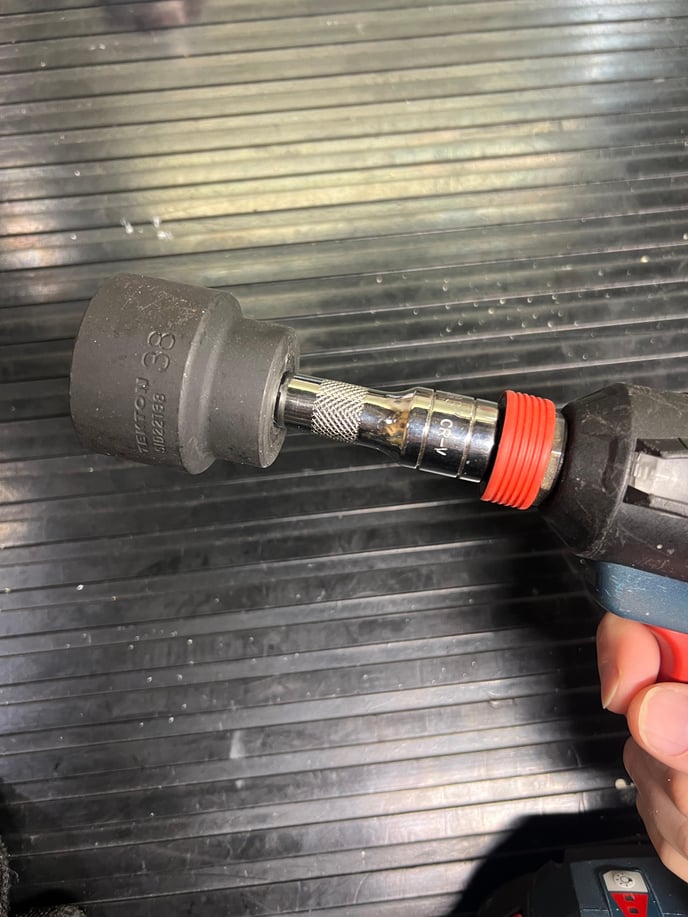
- Impact Driver
- 38mm Impact Socket and Extension
- Shop towel
- Something to elevate the grouphead (like a block of wood)
- Flat-blade screwdriver (optional)
- Needle-nose pliers (optional)
Parts Needed:
- Replacement Lelit Bianca Steam Boiler Heating Element
- Replacement Lelit Bianca Heating Element Gasket
1. Drain the steam boiler of your Lelit Bianca by following one of the following set of instructions:
OR
2. Place something to elevate the grouphead onto your work surface, covering it with a shop towel to protect the finish of your machine. Tip your Bianca forward so it is resting on the grouphead.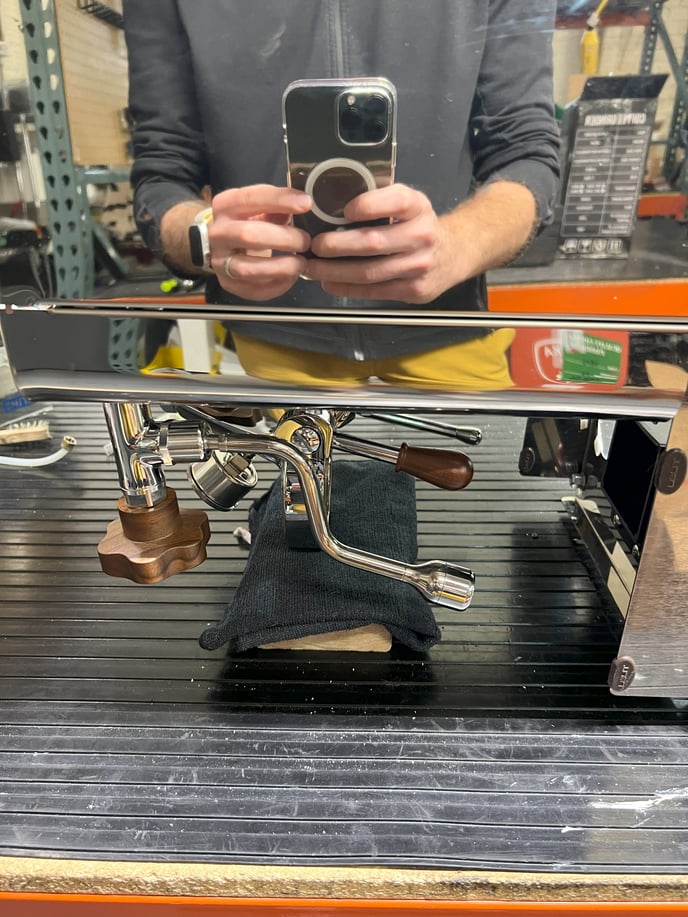
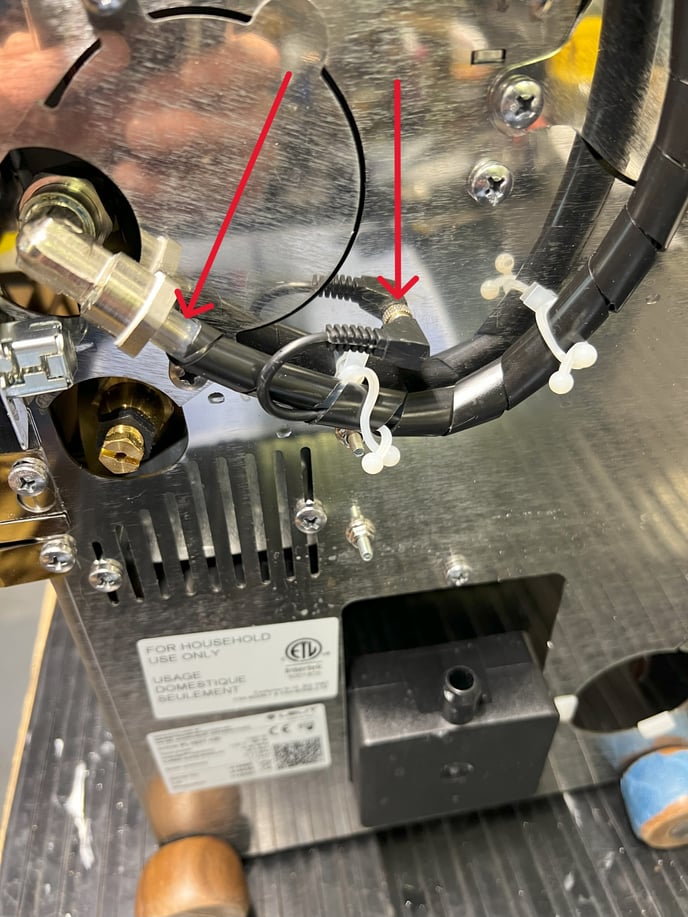
3. On the bottom of your Bianca disconnect the wire from the jack input and remove the silicone tube from the pump inlet. It may be necessary to use a flat-blade screwdriver to pry the silicone tube loose. Take care to not tear the tube.
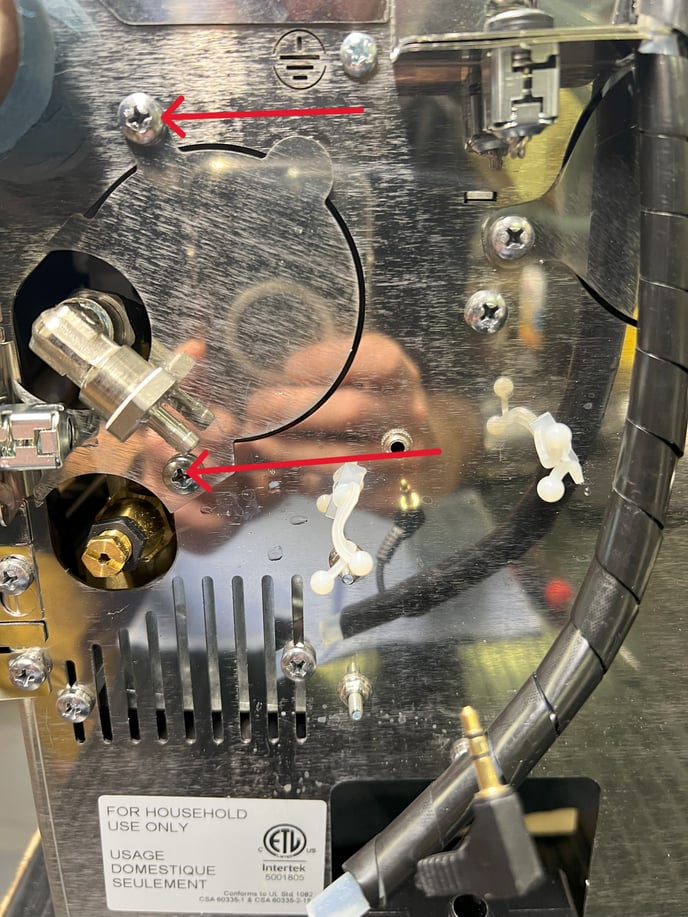
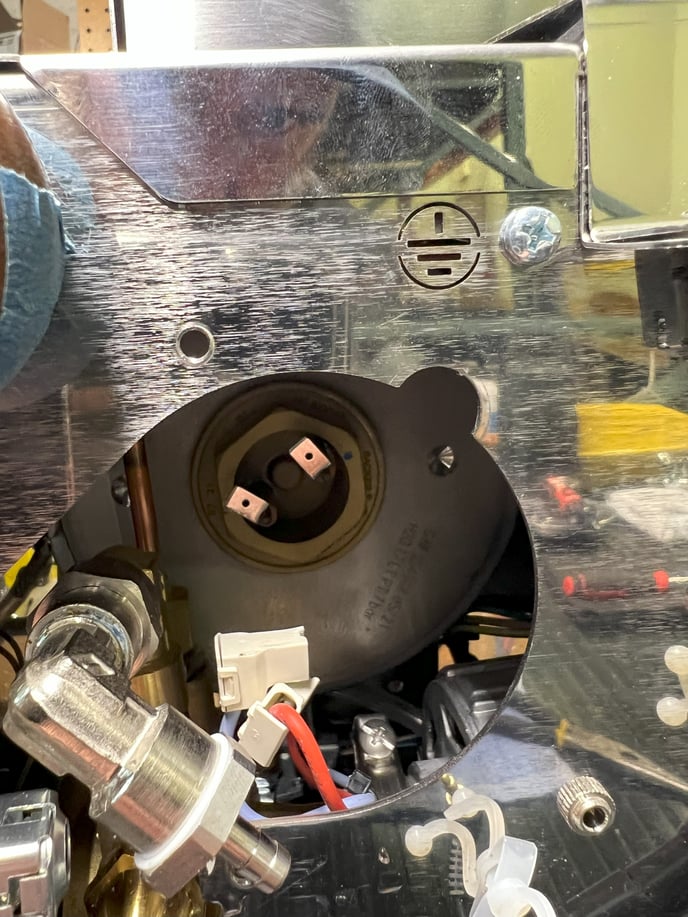
4. Remove the 2 screws that hold the element access panel in place and remove the panel.
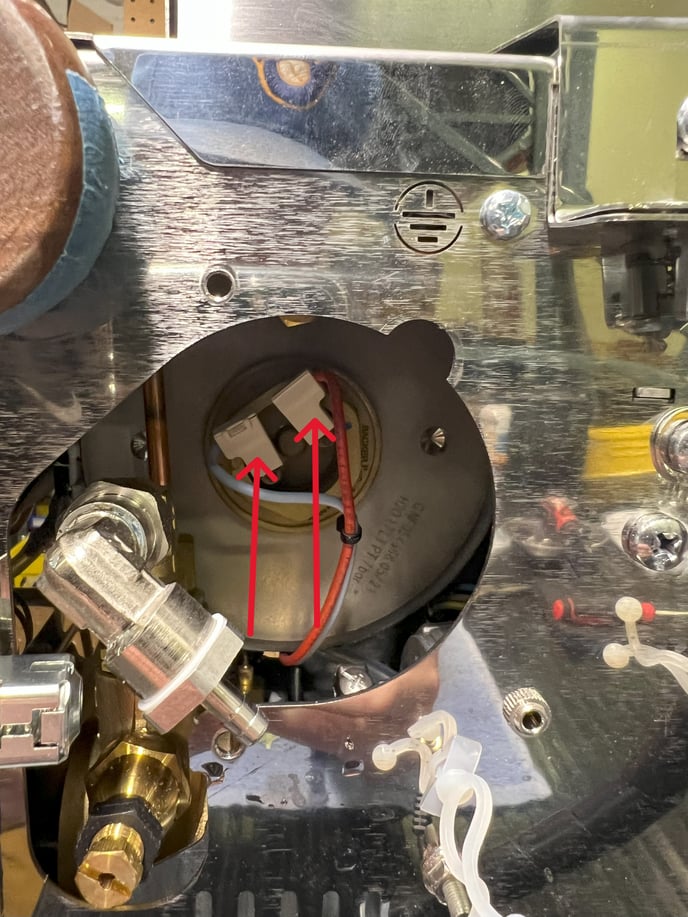
5. With the heating element now accessible, disconnect the wires from the heating element legs. It may be helpful to use needle-nose pliers to reach the connections.
6. Use the impact driver and 38mm impact socket to unthread the element from the bottom of the boiler. Use the driver extension if needed to reach the element.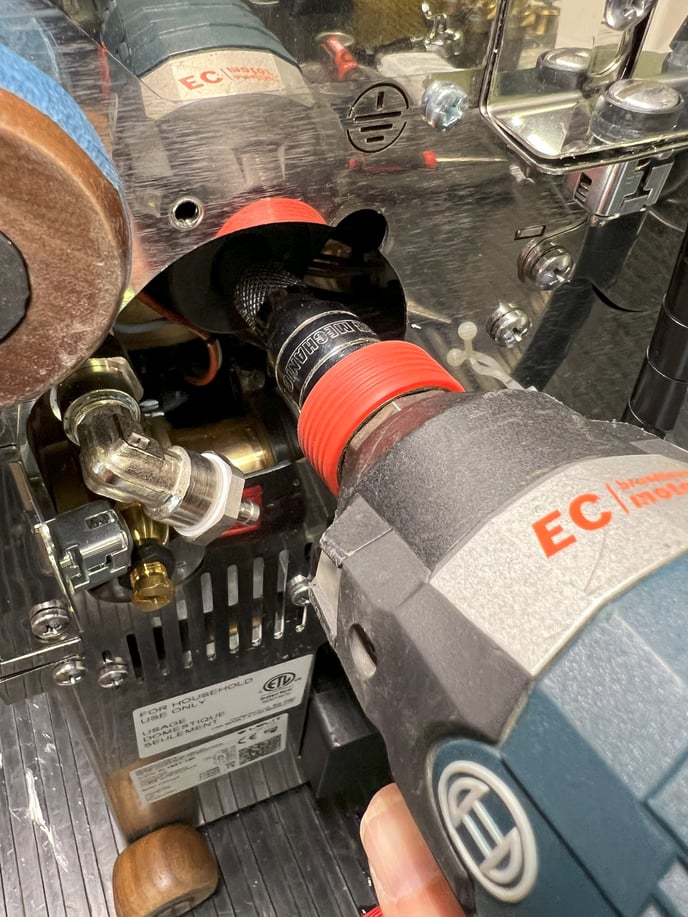
7. Remove the old element and gasket.
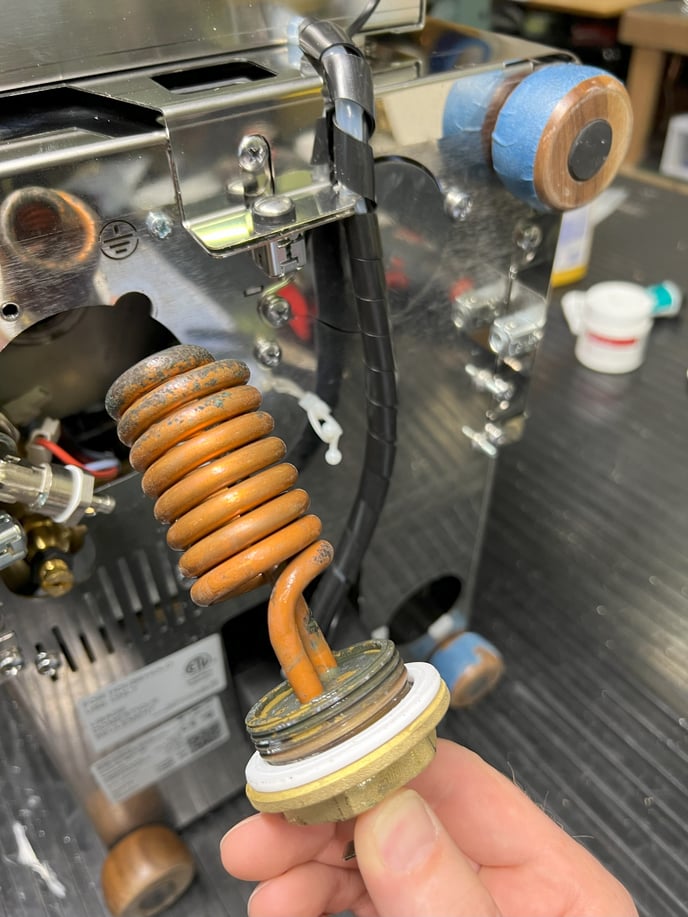
8. Thread the new element and gasket into the bottom of the boiler. Use the impact driver to tighten the element down securely.
NOTE: Enough torque must be applied to the heating element mounting base to deform the Teflon gasket in order to make a pressure-tight and water-tight seal. It is not possible to apply sufficient torque with hand tools without damaging the boiler mounting bracket.
9. Follow the directions in reverse order to reconnect and reinstall the remaining components.