- Help Center
- Lelit Bianca
- Steam/Hot Water Maintenance
-
Getting Started
-
Espresso 101
-
Warranty, Ordering & Returns
-
Bezzera BZ10
-
Bezzera Duo DE
-
Bezzera Duo MN
-
LUCCA A53 (Direct Plumb & Mini) by La Spaziale
-
LUCCA M58 by Quick Mill
-
LUCCA S58 by Profitec
-
LUCCA X58 by Quick Mill
-
La Marzocco Linea Mini
-
La Marzocco GS3
-
Lelit Bianca
-
Lelit Elizabeth
-
Lelit Victoria
-
ECM Synchronika
-
ECM Special Edition Classika PID
-
ECM Mechanika V Slim
-
ECM Casa V
-
ECM Puristika
-
Profitec Pro 300
-
Profitec Pro 400
-
Profitec Pro 500
-
Profitec Pro 600
-
Profitec Pro 700
-
Profitec Pro 800
-
Rocket Appartamento
-
Rocket R58 / Cinquantotto
-
Rocket Giotto
-
Rocket R Nine One
-
La Spaziale S2 EK
-
Rancilio Silvia
-
Rancilio Silvia Pro
-
Rancilio Silvia Pro X
-
Izzo Alex Duetto
-
Quick Mill
-
Breville Oracle
-
Dalla Corte Mina
-
Slayer
-
Lucca Grinders
-
Baratza Grinders
-
LUCCA Atom 75
-
Eureka Grinders
-
ECM Grinders
-
Compak Grinders
-
Fellow ODE Grinder
-
Mahlkonig Grinders
-
Profitec Grinders
-
Breville Grinders
-
Dalla Corte Grinders
-
Macap Grinders
-
Fiorenzato Grinders
-
General Troubleshooting
-
Like New & Trade-In Program
-
Eureka Mignon Libra
-
Eureka Mignon Libra User Manual
-
Rocket Boxer Setup Guide
-
Rocket Boxer Timer User Manual
-
Baratza Encore ESP Setup Guide
-
Baratza Encore ESP User Manual
-
Fellow Opus User Manual
-
Fellow Opus Setup Guide
Lelit Bianca: Vacuum Breaker Inspection and Service
A dripping drain valve, weak or absent steam/hot water, intermittent pressure-relief sounds that continue long after the machine has reached full temperature — these are all signs that your Bianca's vacuum breaker may need attention. (Difficulty ☕☕)
Tools needed:
- 17mm crescent wrench or deep socket
- Needle-nose pliers
- Phillips head screwdriver
- Flat head screwdriver
Parts needed:
Vacuum Breaker Rebuild Kit
2. Locate the vacuum breaker and remove the flexible tube.
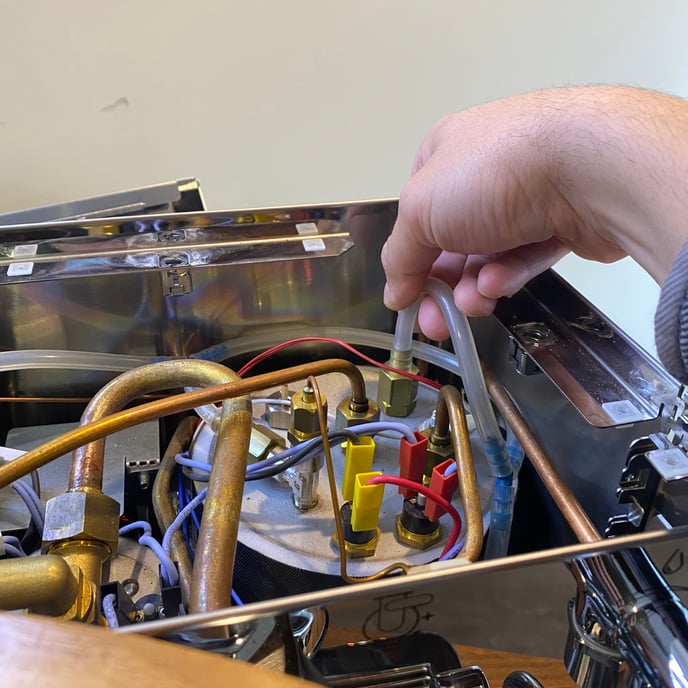
3. Using a crescent wrench or deep socket, carefully unscrew the vacuum breaker cap. (You may need to hold the bottom fitting with a second wrench to keep it from turning with the cap.)
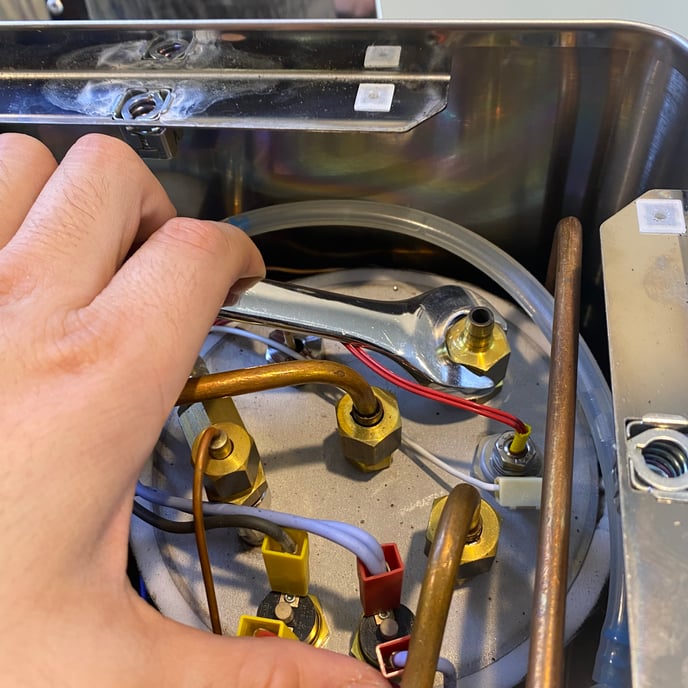
4. Gently grip the vacuum breaker valve stem with the needle-nose pliers and pull the internal components free. Take note of the internal components' assembly orientation.
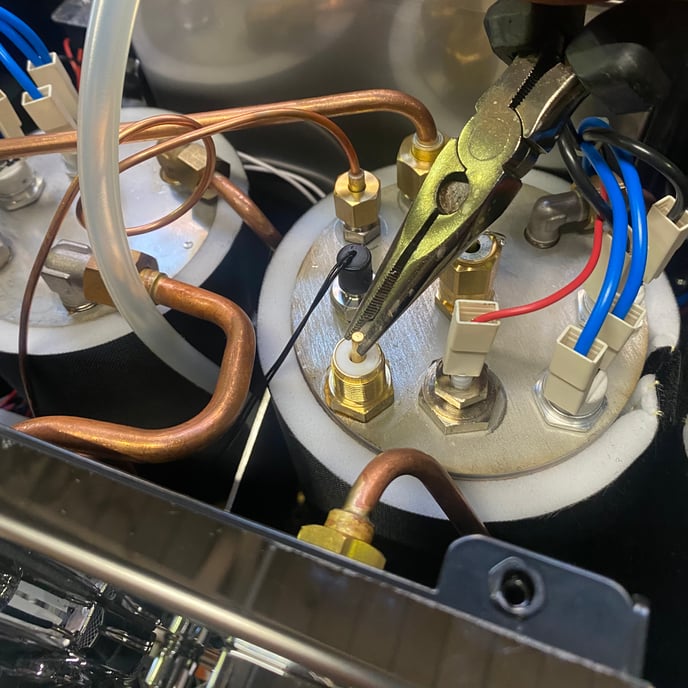
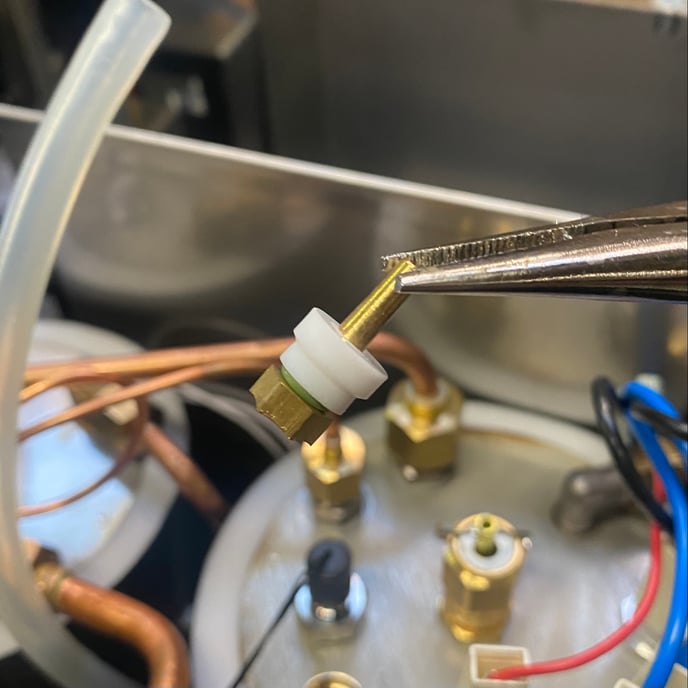
5. Inspect the internal components for scale build-up or signs of wear. It may be possible to resolve the issue by simply cleaning these components thoroughly and reassembling OR you may need to replace them with new parts before reassembly.
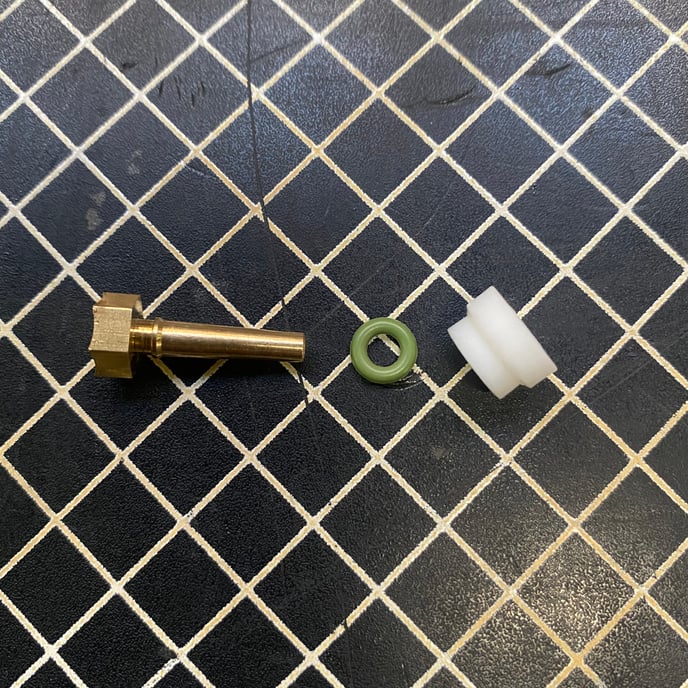
6. Don't forget to inspect and clean inside the cap and lower fitting!