Tools Needed:
- Phillips head screw driver
- 7mm wrench or deep socket
- 12mm Crescent Wrench
- 13mm Crescent Wrench
- Flathead screw driver (optional)
- PTFE tape
- Replacement pump
1. First, you will need to remove the panels of your machine, you can follow along with these instructions on how to do so: Lelit Mara X Removing the Panels
2. Next, you will need to remove the water reservoir housing by following along with these instructions: Lelit Mara X: Disassembling the Reservoir Tray
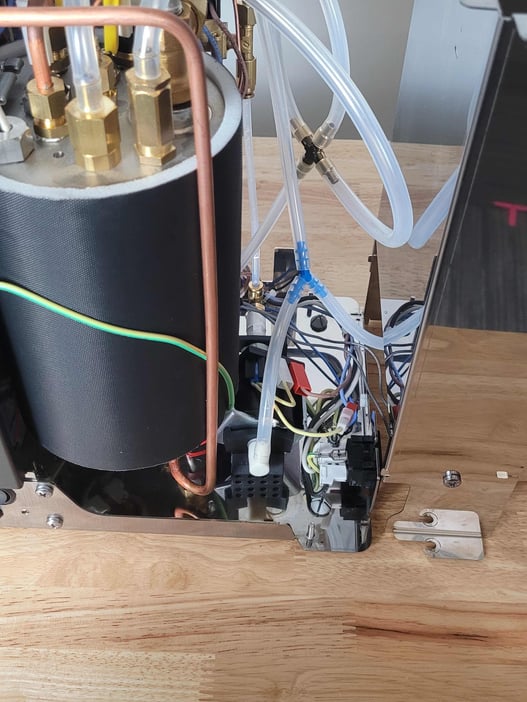
3. Once you have laid the reservoir tray to the side, you should have access to the vibratory pump.
4. Remove the elbow fitting on the inlet side of the pump (you can lay a towel below to help catch any spills). If this part seems a little snug, you can use the flat head to carefully separate the elbow from the pump and then remove it by hand.

5. To remove the push connect fitting from the other side of the pump, press in on the brass ring with one hand, then press in and pull the tube out with the other hand.
6. Take note of the locations of each wire before you unplug them (if it is difficult to remove, you may use the flat head once more to carefully lift the wires off of the terminal). 
7. Remove the rubber pump bracket from the inlet side first.
8. Then carefully pull the pump and the fittings through the other pump bracket to remove it from the machine.
9. You will need to use a 12mm crescent wrench on the white tool flat points on the outlet side of the pump to hold it in place, and then use a 13mm crescent wrench to turn counterclockwise to remove the elbow push connect fitting.
10. Clean up this fitting and wrap it in a few layers of PTFE tape before installing it onto the new pump (please use caution not to overtighten this fitting onto the new plastic threads).
11. Follow these steps in reverse to install the new pump, and we would also recommend leaving your panels removed while you turn the machine back on to test for leaks.