Lelit Mara X: Resetting the Safety Switches
Sometimes called safety thermostats or high-limit switches, these specially designed components protect your machine in the even of an over-temperature condition. Learn how to re-set and test them by following along with this guide.
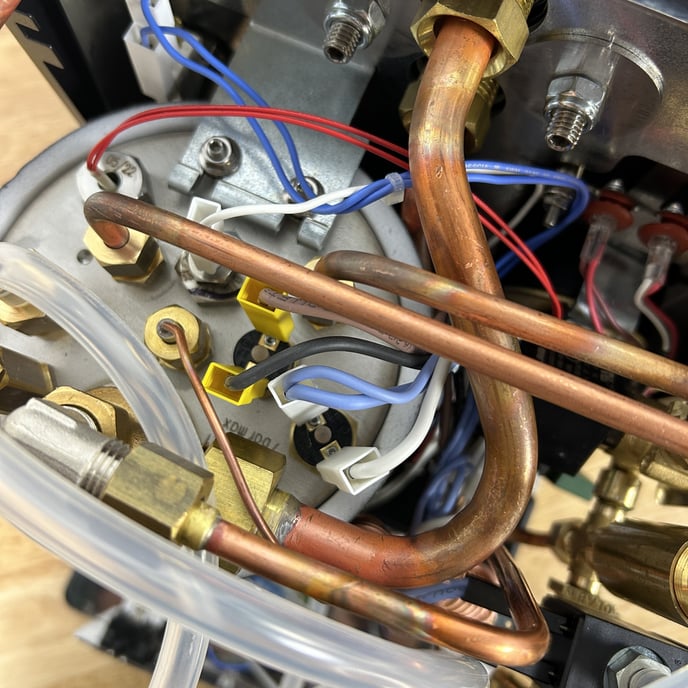
- Small flat bladed screwdriver
NOTE: It's best to unplug the machine and allow it to fully cool before re-setting these switches.
1. Start by removing the top panel from the machine.
2. Identify the two safety switches screwed into the top of the boiler. Each has a small black button in the center (sometimes this button is orange, red, or brown). This button pops up to break continuity through the switch to prevent the machine from continuing to heat in the event that the boiler gets too hot — just like a circuit breaker.

3. Carefully press down on the button to re-set the safety switch. You should feel a slight "click".
(You can use your finger if the machine is cool or a screwdriver if the boiler is still hot. Avoid touching either of the electrical connectors as you do this.)
4. Plug the machine back in and power on to test the heating function.
NOTE: If the machine still fails to heat after resetting the safety switch, you may wish to test the safety switches for continuity. No continuity indicates a failed safety switch that will need to be replaced. Proceed with the following instruction to accomplish this task:
Tools Needed:
- Multimeter or simple continuity test light
1. Set your multimeter to the resistance setting measured in Ohms (Ω).
(If your multimeter is not auto-ranging, select the lowest setting.)
2. Simultaneously back-probe the two electrical connectors attached to the safety switch. You should see a very low resistance value; ~1Ω or less.
3. If the multimeter displays the 'OL' code or otherwise indicates infinite resistance (open circuit), this means that the switch has failed and will need to be replaced.
4. Unplug the electrical connectors going to the safety switch(s).
5. Use your fingers to unscrew the safety switch. If the switch is too tight to unscrew with your fingers, you can use an appropriately sized wrench to a start it loose.
6. Install the new switch by hand, it only needs to be finger tight.
Never use tools to install a safety switch.