- Help Center
- La Marzocco Linea Mini
-
Getting Started
-
Espresso 101
-
Warranty, Ordering & Returns
-
Bezzera BZ10
-
Bezzera Duo DE
-
Bezzera Duo MN
-
LUCCA A53 (Direct Plumb & Mini) by La Spaziale
-
LUCCA M58 by Quick Mill
-
LUCCA S58 by Profitec
-
LUCCA X58 by Quick Mill
-
La Marzocco Linea Mini
-
La Marzocco GS3
-
Lelit Bianca
-
Lelit Elizabeth
-
Lelit Victoria
-
ECM Synchronika
-
ECM Special Edition Classika PID
-
ECM Mechanika V Slim
-
ECM Casa V
-
ECM Puristika
-
Profitec Pro 300
-
Profitec Pro 400
-
Profitec Pro 500
-
Profitec Pro 600
-
Profitec Pro 700
-
Profitec Pro 800
-
Rocket Appartamento
-
Rocket R58 / Cinquantotto
-
Rocket Giotto
-
Rocket R Nine One
-
La Spaziale S2 EK
-
Rancilio Silvia
-
Rancilio Silvia Pro
-
Rancilio Silvia Pro X
-
Izzo Alex Duetto
-
Quick Mill
-
Breville Oracle
-
Dalla Corte Mina
-
Slayer
-
Lucca Grinders
-
Baratza Grinders
-
LUCCA Atom 75
-
Eureka Grinders
-
ECM Grinders
-
Compak Grinders
-
Fellow ODE Grinder
-
Mahlkonig Grinders
-
Profitec Grinders
-
Breville Grinders
-
Dalla Corte Grinders
-
Macap Grinders
-
Fiorenzato Grinders
-
General Troubleshooting
-
Like New & Trade-In Program
-
Eureka Mignon Libra
-
Eureka Mignon Libra User Manual
-
Rocket Boxer Setup Guide
-
Rocket Boxer Timer User Manual
-
Baratza Encore ESP Setup Guide
-
Baratza Encore ESP User Manual
-
Fellow Opus User Manual
-
Fellow Opus Setup Guide
Linea Mini: Pressure Stat Replacement
Your machine's pressure stat plays an important role in regulating the temperature and pressure inside the steam boiler — follow these instructions to replace a defective pressure stat with a new one. (Difficulty ☕☕)
Tools Needed:- 17mm crescent wrench
- Adjustable wrench
- PTFE tape aka plumber's tape/Teflon tape
Optional: 17mm jam nut wrench or slim profile wrench
1. Remove the panels.
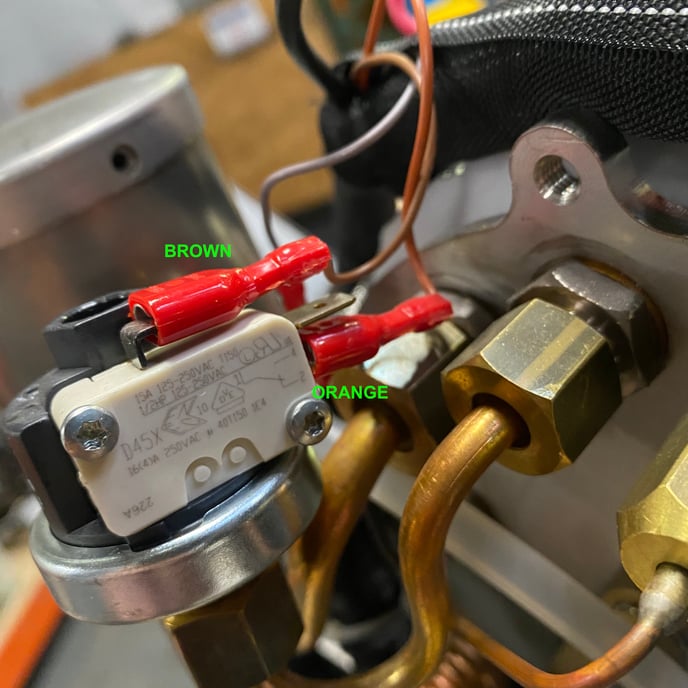
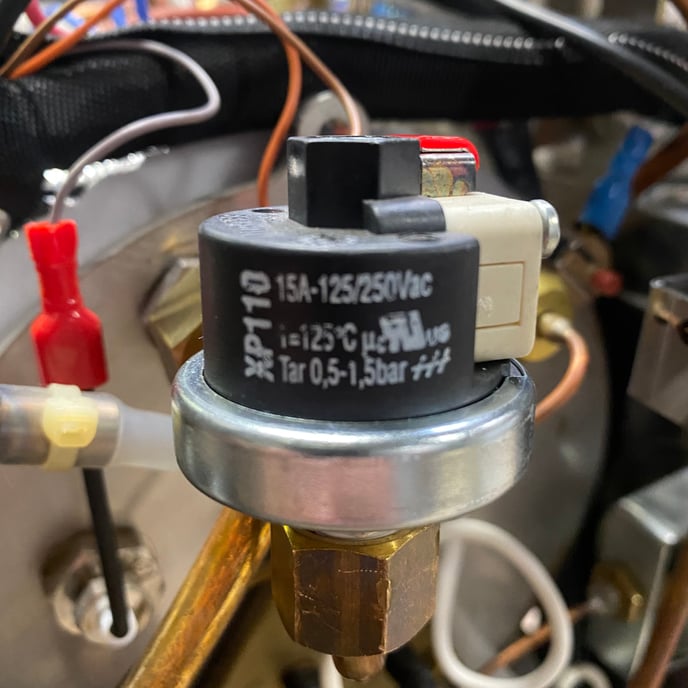
2. Identify the pressure stat and remove the electrical connections. Take note of which color wire goes where or refer to the image in Step 6 below during reassembly.

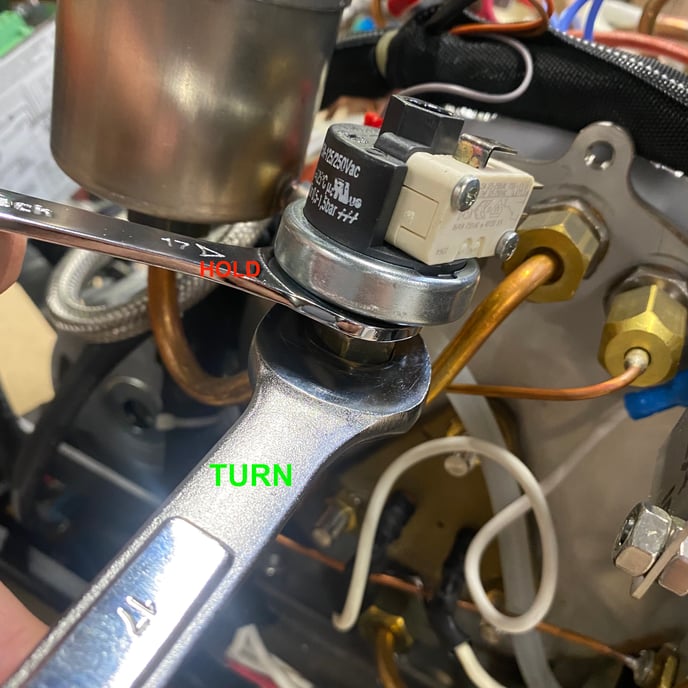
3. Use one wrench to firmly hold the pressure stat in place while loosening the brass compression fitting retaining nut with the other wrench. Take care not to bend the copper tube too much.
(If you're having trouble fitting a wrench on the pressure stat, you can grip it firmly with your hand instead. Be careful, as this is more difficult and puts more strain on the copper tubing.)
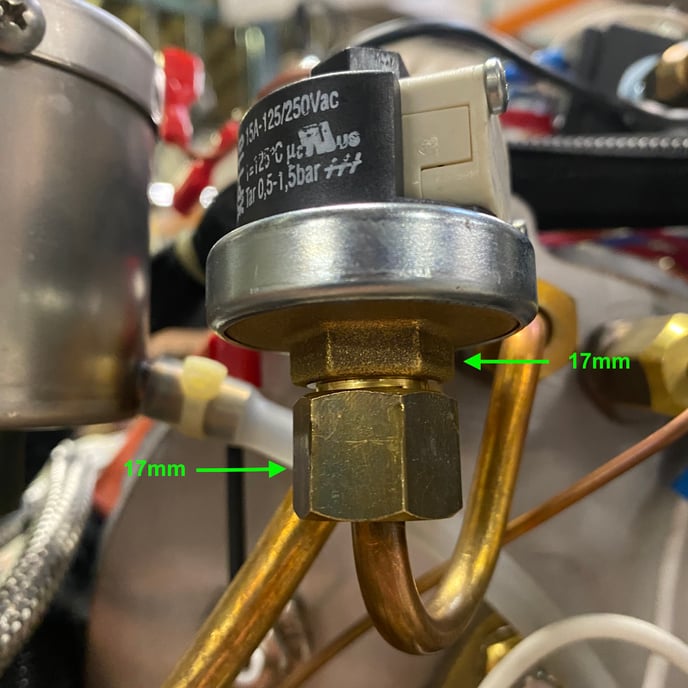
4. Apply ~3 turns of PTFE tape to the new pressure stat, taking care not to obstruct the brass inlet surface.
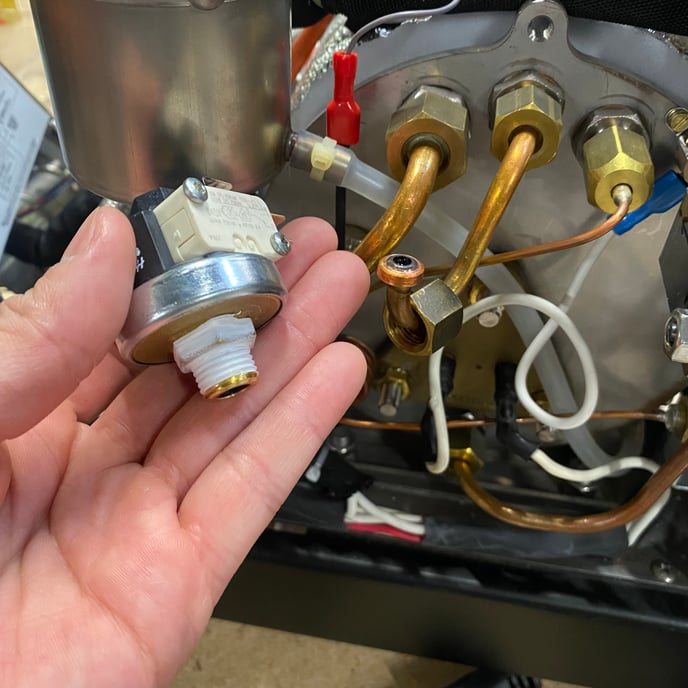
5. Hold the new pressure stat steady and level on the end of the compression fitting. Start threading the brass retaining nut by hand, then use your wrench(es) to finish tightening the nut. Take care not to over-tighten.
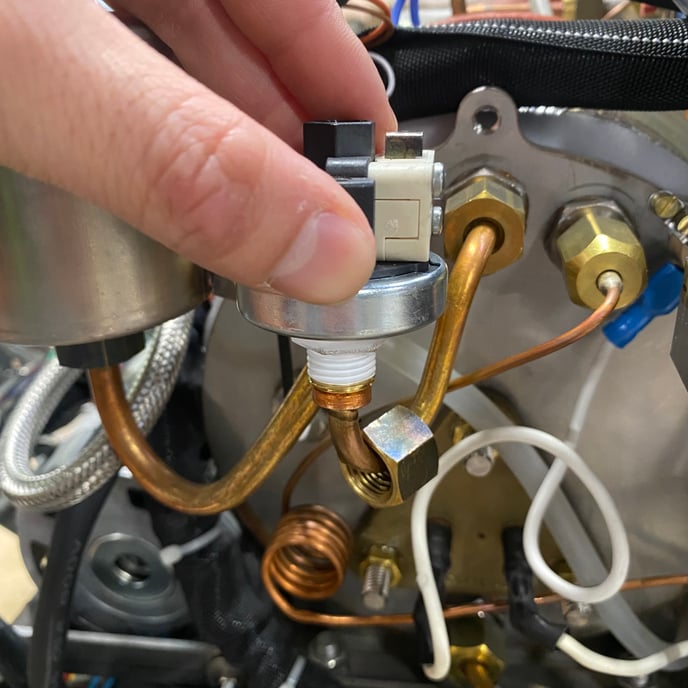
6. Reattach the electrical connections.