Tools Required:
- 2.5mm Allen wrench or hex driver
- 17mm wrench or adjustable wrench
- Recommended: 17mm deep socket and socket wrench with extension
- Vacuum Breaker Rebuild Kit
NOTE: The machine should be unplugged and cool to the touch before you begin.
1. Use the 2.5mm Allen key or hex driver to remove the top panel from the machine.
2. Identify the vacuum breaker.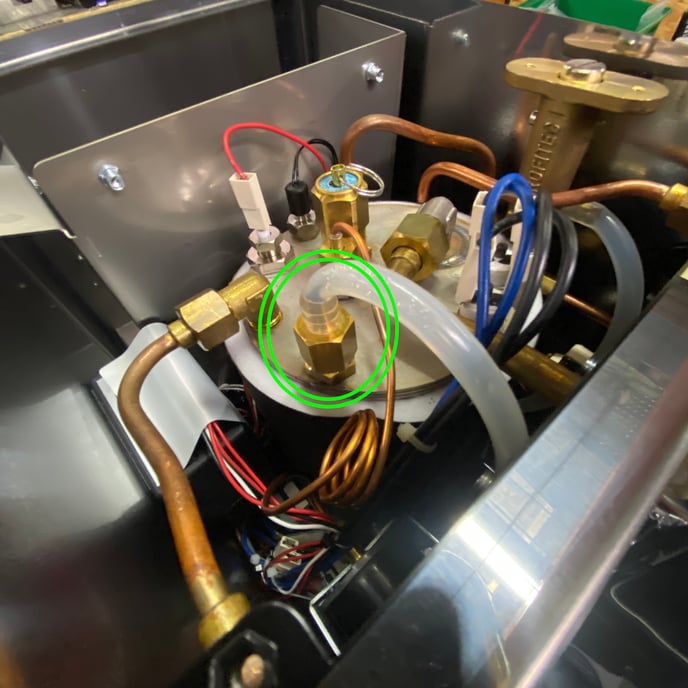
3. Remove the silicone tube from the top cap of the vacuum breaker.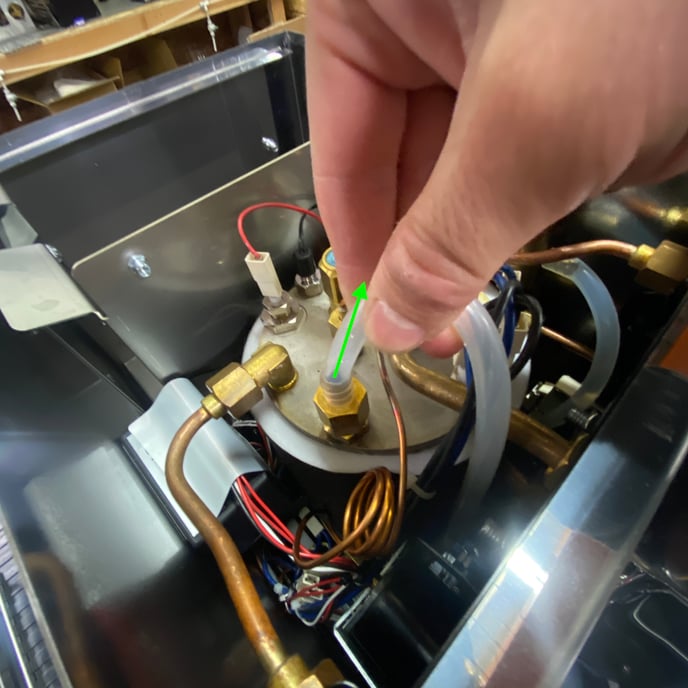
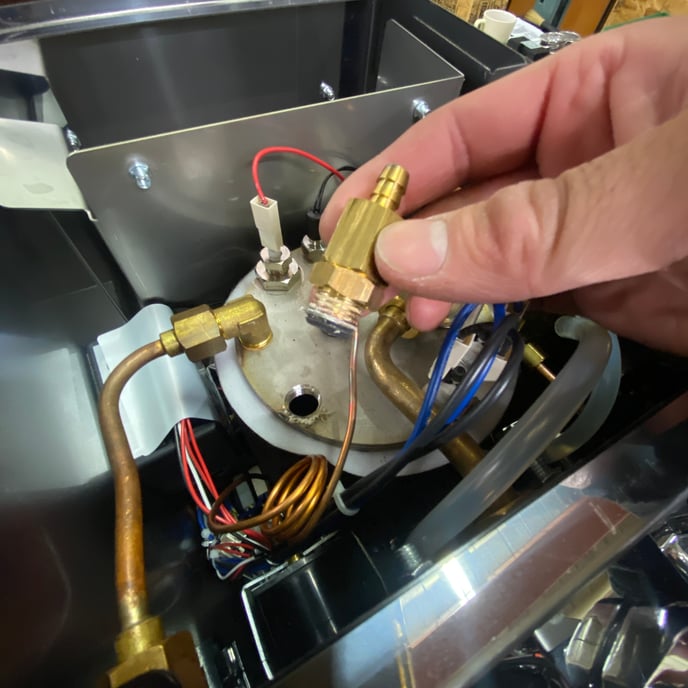
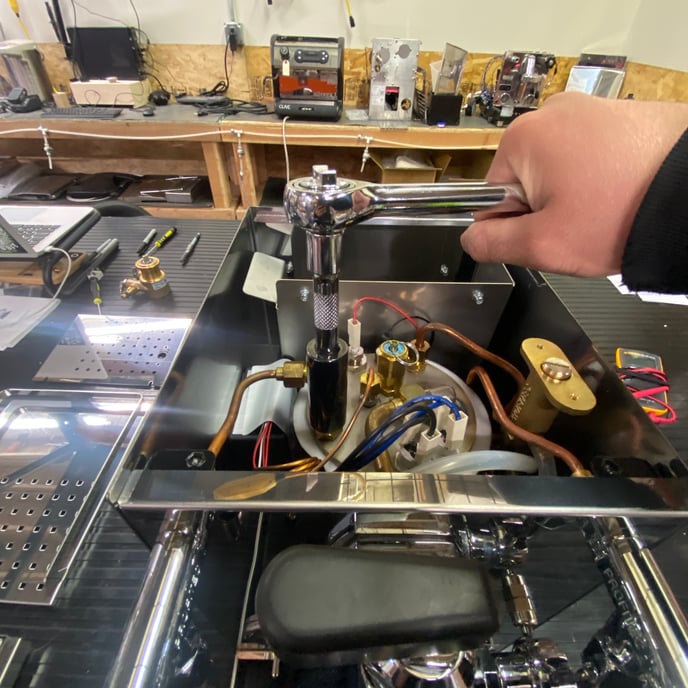
4. Use the 17mm wrench or the adjustable wrench to unscrew the top cap from the vacuum breaker. You may want to remove the side panels from your machine to get a better angle OR use a socket wrench with extension.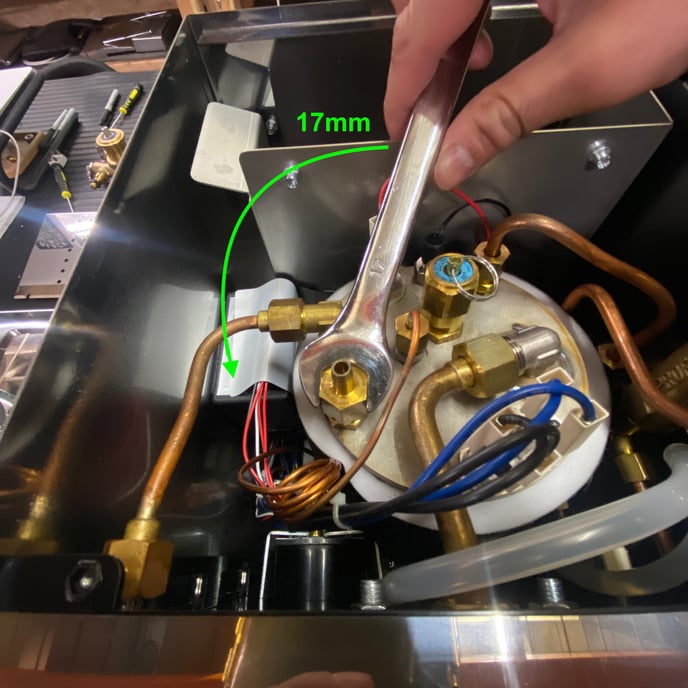

(NOTE: You may need to hold the bottom fitting with a second wrench to keep it from turning with the cap. In that case, you'll need to remove the side panels from the machine as well.)
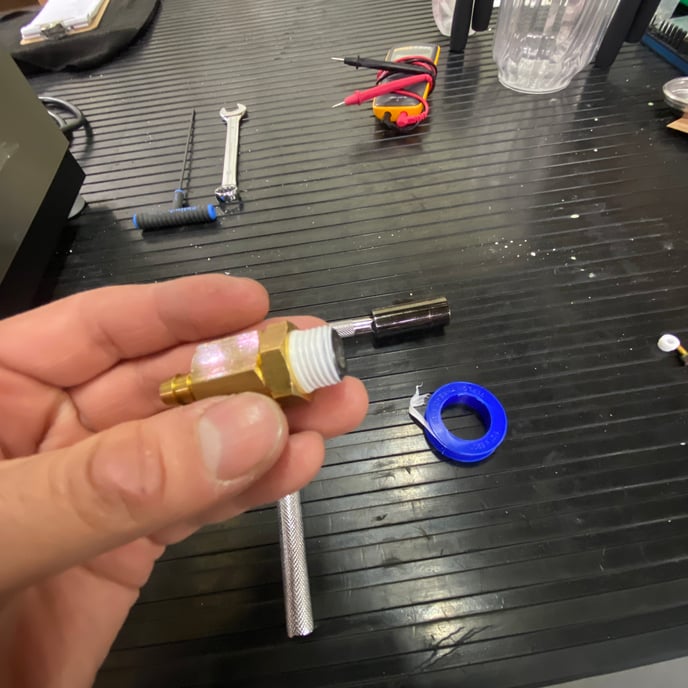
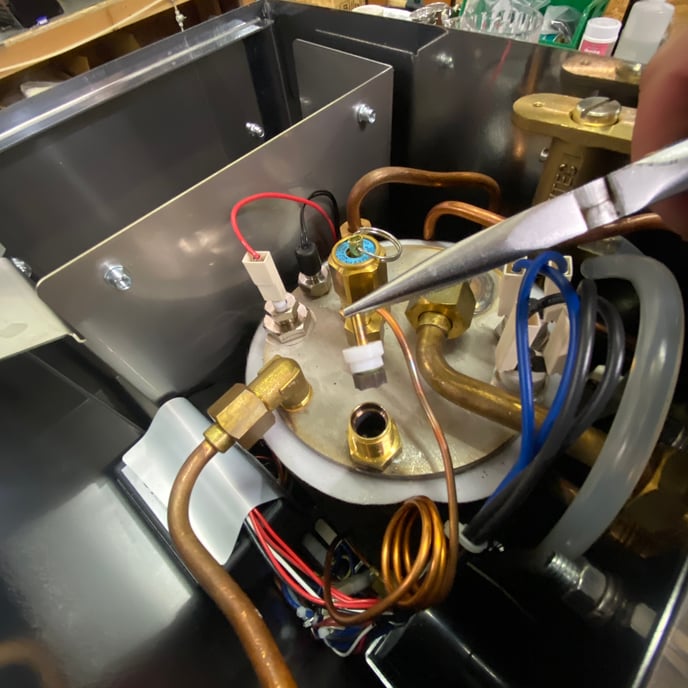
5. Gently grip the vacuum breaker valve stem with the needle-nose pliers and pull the internal components free. Take note of the internal components' assembly orientation.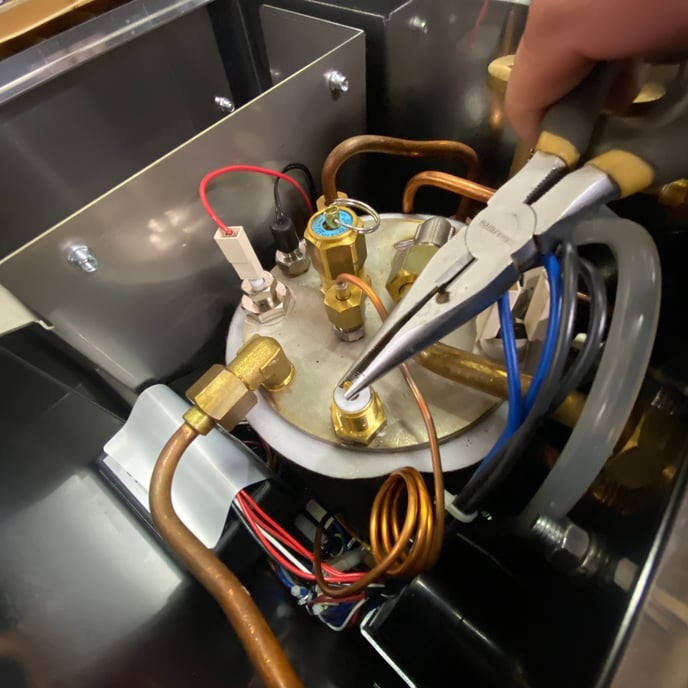
6. Inspect the internal components for scale build-up, debris or signs of wear. It may be possible to resolve the issue by simply cleaning these components thoroughly and reassembling OR you may need to replace them with new parts before reassembly.
(NOTE: The vacuum breaker O-ring is manufactured in various colors — these do not affect the valve's functionality.)
7. Don't forget to inspect and clean inside the cap and lower fitting!
8. Take note of the proper orientation of the internal components, then reassemble the valve by following these steps in reverse order.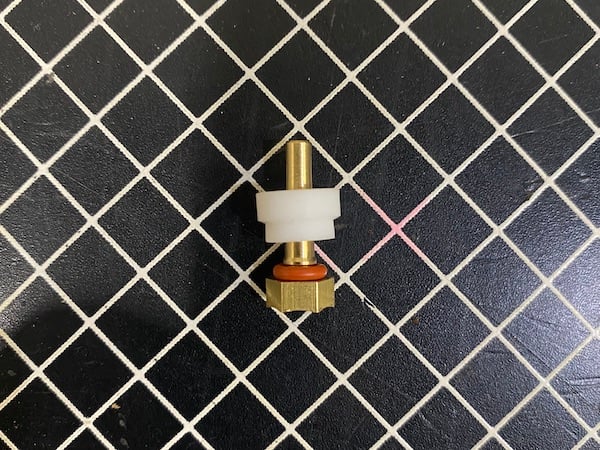
NOTE: If you have to remove the whole vacuum breaker from the machine, make sure to clean the threads on the valve and boiler, then wrap the the valve threads in PTFE tape before re-installing.