- Help Center
- Rancilio Silvia Pro X
-
Getting Started
-
Espresso 101
-
Warranty, Ordering & Returns
-
Bezzera BZ10
-
Bezzera Duo DE
-
Bezzera Duo MN
-
LUCCA A53 (Direct Plumb & Mini) by La Spaziale
-
LUCCA M58 by Quick Mill
-
LUCCA S58 by Profitec
-
LUCCA X58 by Quick Mill
-
La Marzocco Linea Mini
-
La Marzocco GS3
-
Lelit Bianca
-
Lelit Elizabeth
-
Lelit Victoria
-
ECM Synchronika
-
ECM Special Edition Classika PID
-
ECM Mechanika V Slim
-
ECM Casa V
-
ECM Puristika
-
Profitec Pro 300
-
Profitec Pro 400
-
Profitec Pro 500
-
Profitec Pro 600
-
Profitec Pro 700
-
Profitec Pro 800
-
Rocket Appartamento
-
Rocket R58 / Cinquantotto
-
Rocket Giotto
-
Rocket R Nine One
-
La Spaziale S2 EK
-
Rancilio Silvia
-
Rancilio Silvia Pro
-
Rancilio Silvia Pro X
-
Izzo Alex Duetto
-
Quick Mill
-
Breville Oracle
-
Dalla Corte Mina
-
Slayer
-
Lucca Grinders
-
Baratza Grinders
-
LUCCA Atom 75
-
Eureka Grinders
-
ECM Grinders
-
Compak Grinders
-
Fellow ODE Grinder
-
Mahlkonig Grinders
-
Profitec Grinders
-
Breville Grinders
-
Dalla Corte Grinders
-
Macap Grinders
-
Fiorenzato Grinders
-
General Troubleshooting
-
Like New & Trade-In Program
-
Eureka Mignon Libra
-
Eureka Mignon Libra User Manual
-
Rocket Boxer Setup Guide
-
Rocket Boxer Timer User Manual
-
Baratza Encore ESP Setup Guide
-
Baratza Encore ESP User Manual
-
Fellow Opus User Manual
-
Fellow Opus Setup Guide
Rancilio Silvia Pro X: Testing the Brew Pump
A low- or no-flow condition from your Silvia Pro X's group head may indicate an obstruction between the brew pump and the brew boiler. Follow these steps to test pump output.
Tools Needed:
- 13mm crescent wrench
- Multi-grip pliers (aka Channellocks)
- Large measuring cup OR pitcher and tared scale.
- Recommended: 8mm ID or 1/4"-3/8" ID silicone tubing
1. Start by removing the top panel from the machine.
2. Identify the braided line from the pump to the boiler inlet connection.
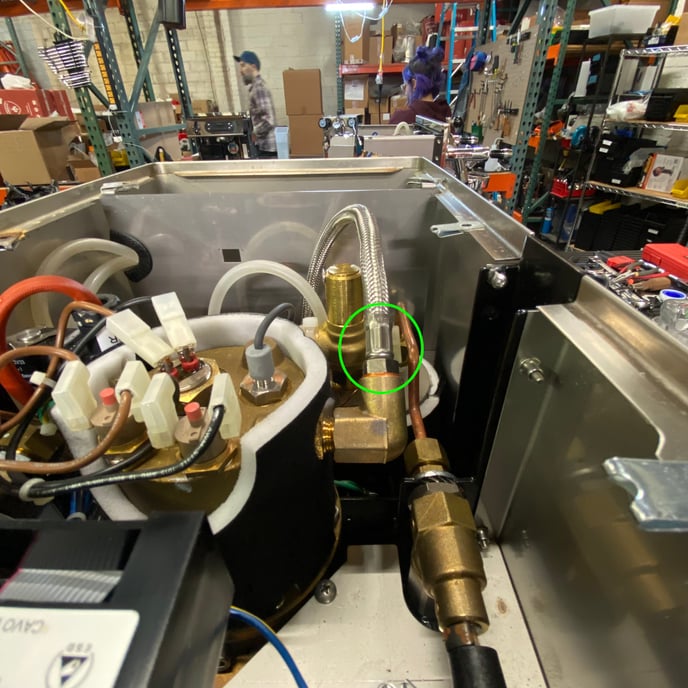
3. Disconnect the braided line at the boiler using the 13mm wrench.
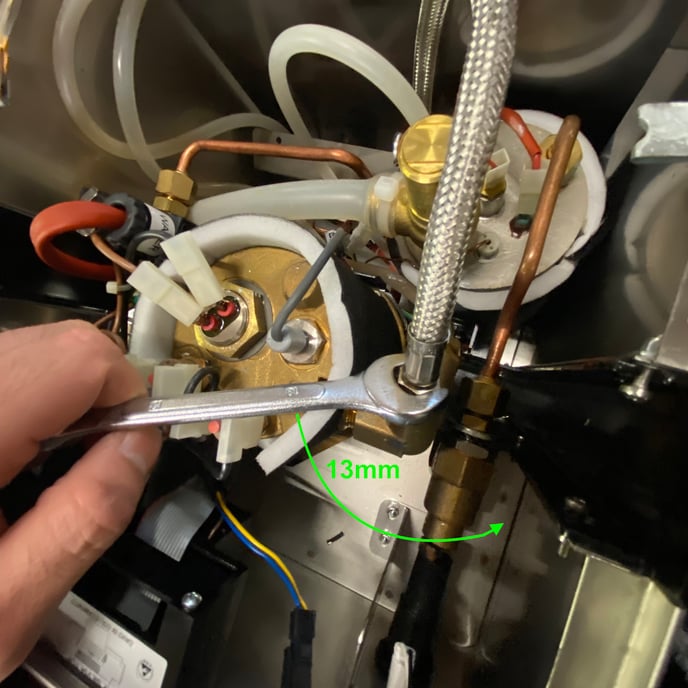
You may need to use a pair of multi-grip pliers to hold the braided line while you turn the hex fitting.
4. Pull the braided line over the side of the machine and direct it into a large measuring cup or pitcher.
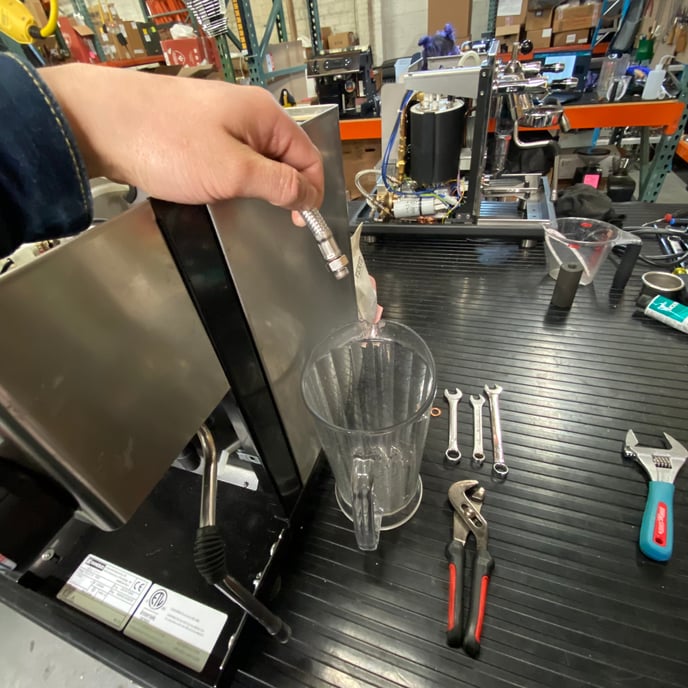
It may be helpful to add a length of silicone tubing to the end of the braided line to prevent spilling water.
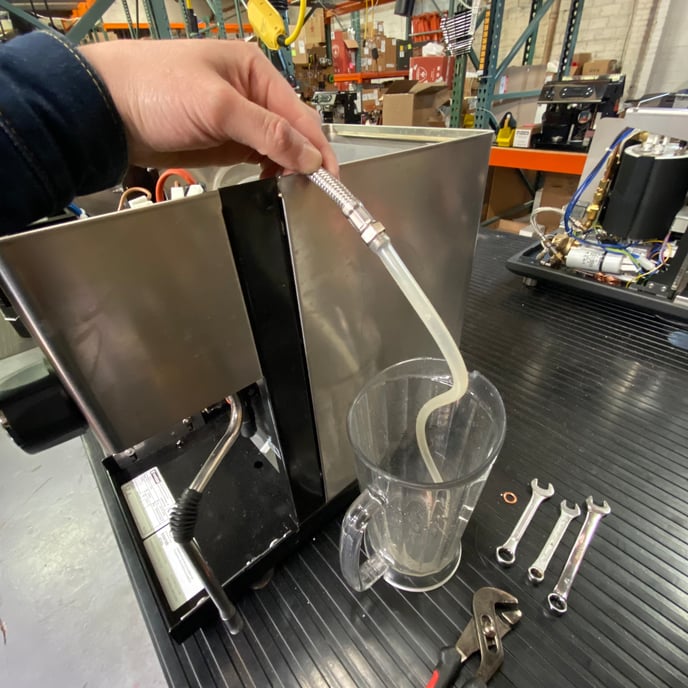
5. Re-install the reservoir and fill it with water. Then power the machine on and flip the brew switch to activate the brew pump*. Observe the output; water should flow freely. If the flow from the braided line is weak or non-existent, you'll have to continue troubleshooting further up the flow path.
A properly working vibratory pump should push at least 200g (~6-8 fl oz) of water in 30 seconds.
*NOTE: Never run a vibratory pump for longer than 1 minute at a time. Doing so could burn the pump out. Allow the pump to rest for 1 minute in between every 1 minute period of activity to prevent overworking the pump.