65 mm Flat steel burrs, 500 Watts, 1290 rpm
Insert the hopper in the top of the grinder and open the tab at the bottom of the neck. You are ready to fill your hopper with beans. You may lock the hopper into place by tightening down the flat head screw at the neck.
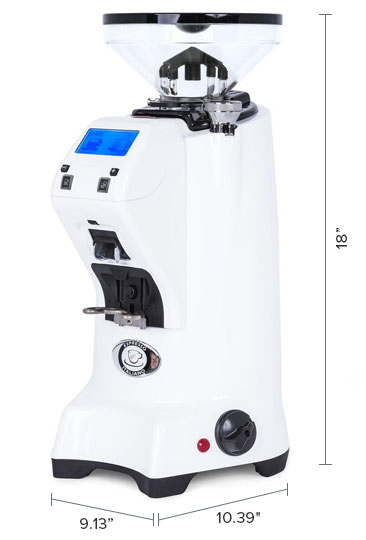
Plug in your grinder into a standard 110 outlet. Power up your grinder by turning the round switch on the bottom right side clockwise, you will see the display screen and led lamp light up.
Program timers for two preset doses, simply select your dose by pressing the one or two cup button, then adjust using the plus or minus time buttons. You have control down to a tenth of a second. Timer settings are automatically saved, to run the dose setting select your one or two cup button then with an empty portafilter push the black button directly below the chute. A single push and release is all that is necessary to engage the timer. To lock your timer settings hold both the plus and minus button and then release, a lock icon will appear, repeat this to unlock.
For continuous grinding Engage the grinder with your portafilter pressing and holding the black button below the chute. You will need to continue to hold the black portafilter button for continuous grind, you will see a round circle appear on screen.
Grind settings can be adjusted by turning the knob on the top right side of the grinder, clockwise to adjust the grind finer and counter clockwise to adjust courser. Make adjustments gradually turning 1-2 notches maximum and running the motor especially when adjusting finer. Over-tightening may cause the burrs to seize and your grinder will stop running. If this happens back up the adjustment to the course setting until your motor is able to run again. You will see noticeable changes in your espresso with 1/4 number adjustments.
Adjustments for the chute will direct the angle of dispersion. Push the chute in or out and you will hear it click. In addition, the portafilter holder fork height adjustment will accommodate various portafilter sizes. Loosen the screw at the portafilter fork using a Philips-head screwdriver, do not remove the screw completely. Move your fork up or down into a position that fits your preferred portafilter so that the basket sits level and secure without needing to be held. Tighten down the screw to lock your adjustment setting in place.