*NOTE: If you are installing the updated PID in the ECM Synchronika, you will also need to have the updated 2.5bar safety valve installed: Pro 700 Updated Safety Valve
Tools Needed:
- Adjustable Wrench
- 21mm Wrench
- 2.5mm + 3mm Allen Wrenches
1. Remove the panels of the Pro 700:
2. Remove the brew boiler from the machine.
3. Replace the PID
Below are photo instructions of key points in the swap process.
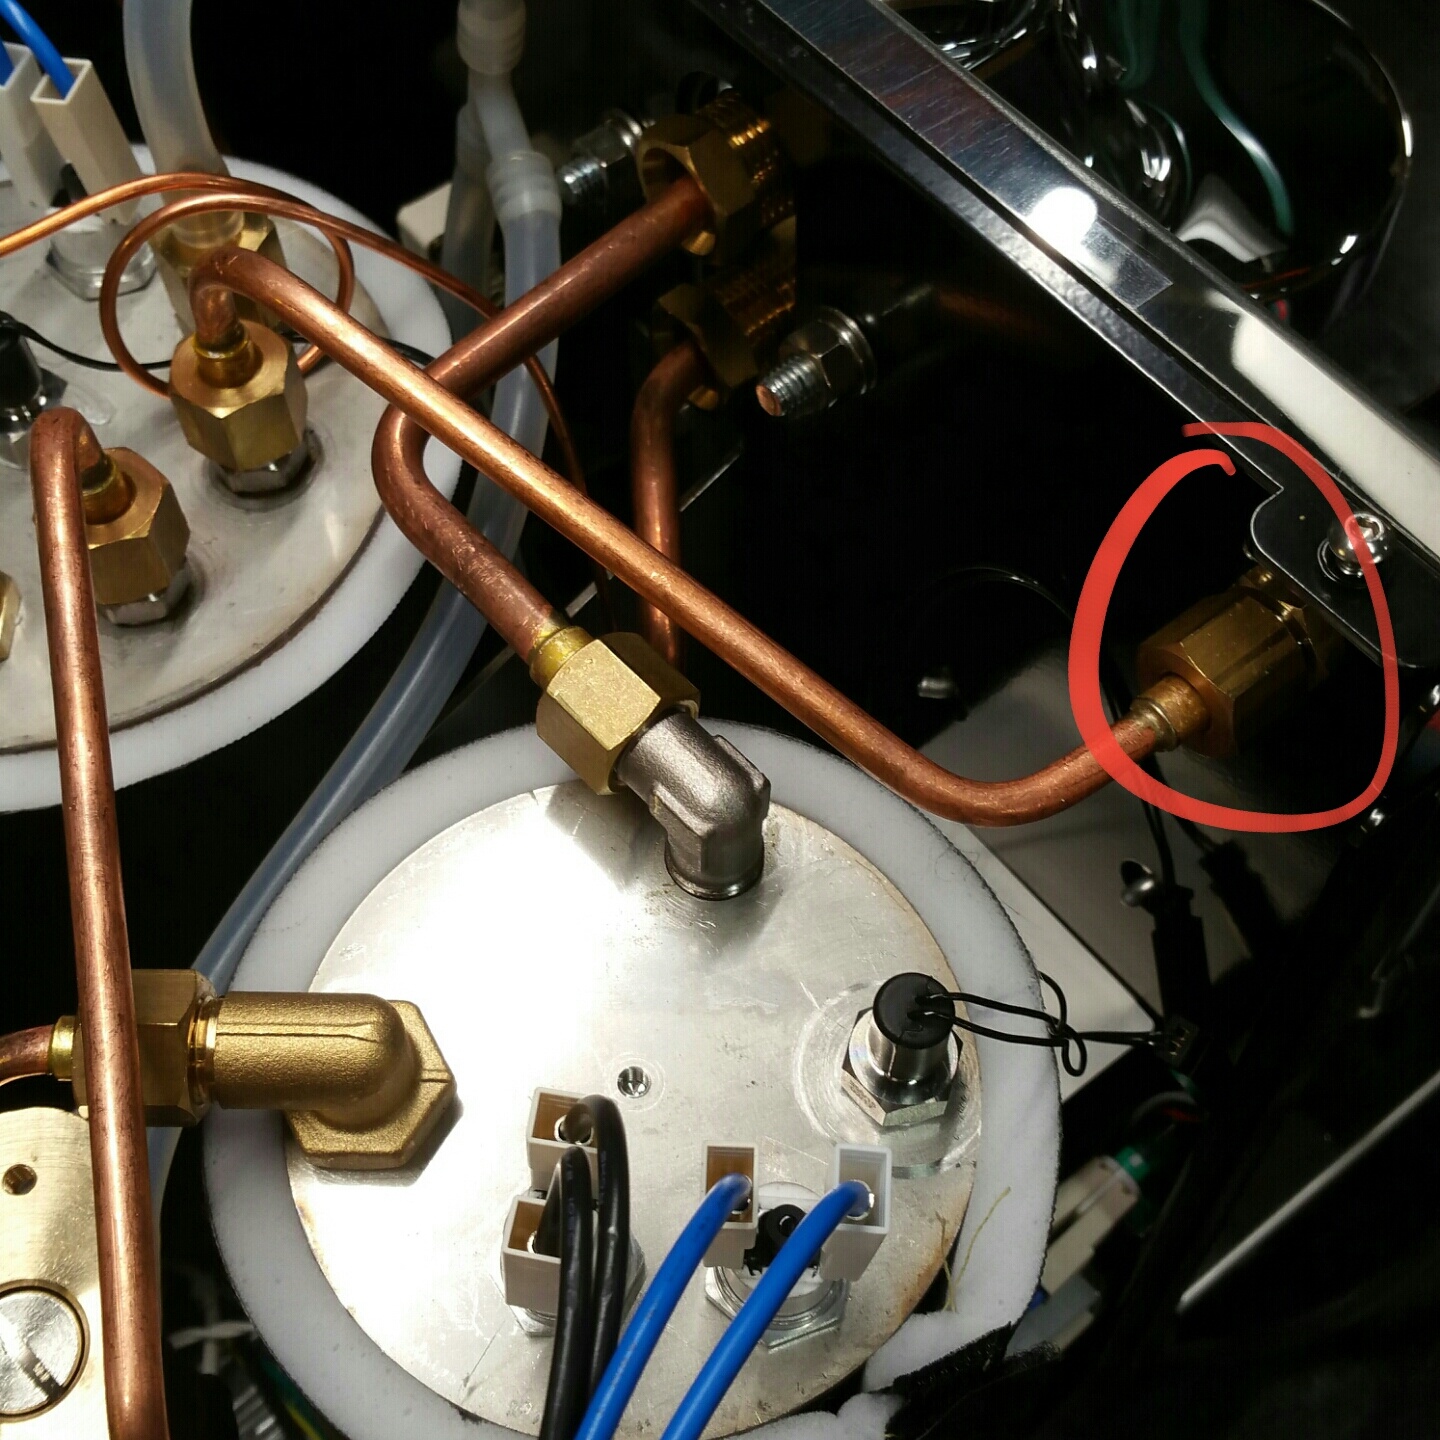
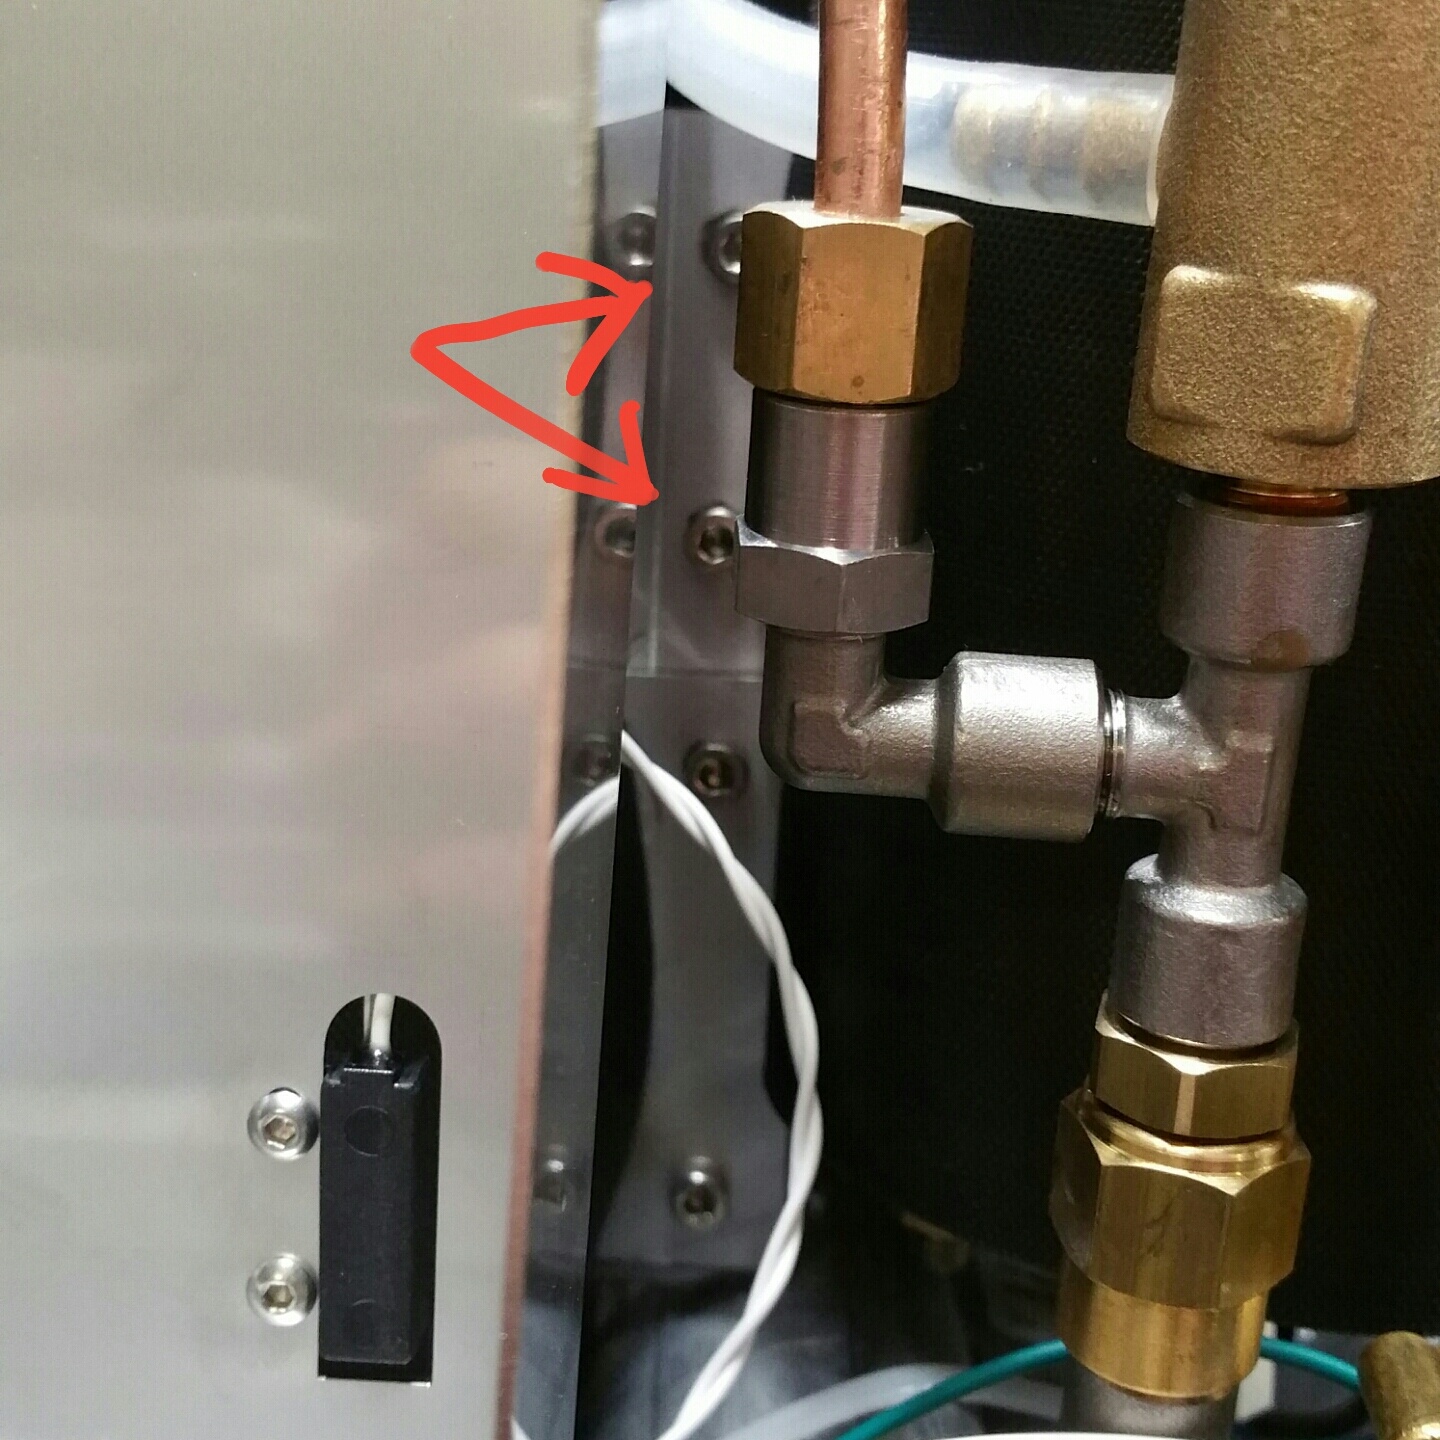
- Remove the copper fitting here and bend the pipe slightly out of the way.
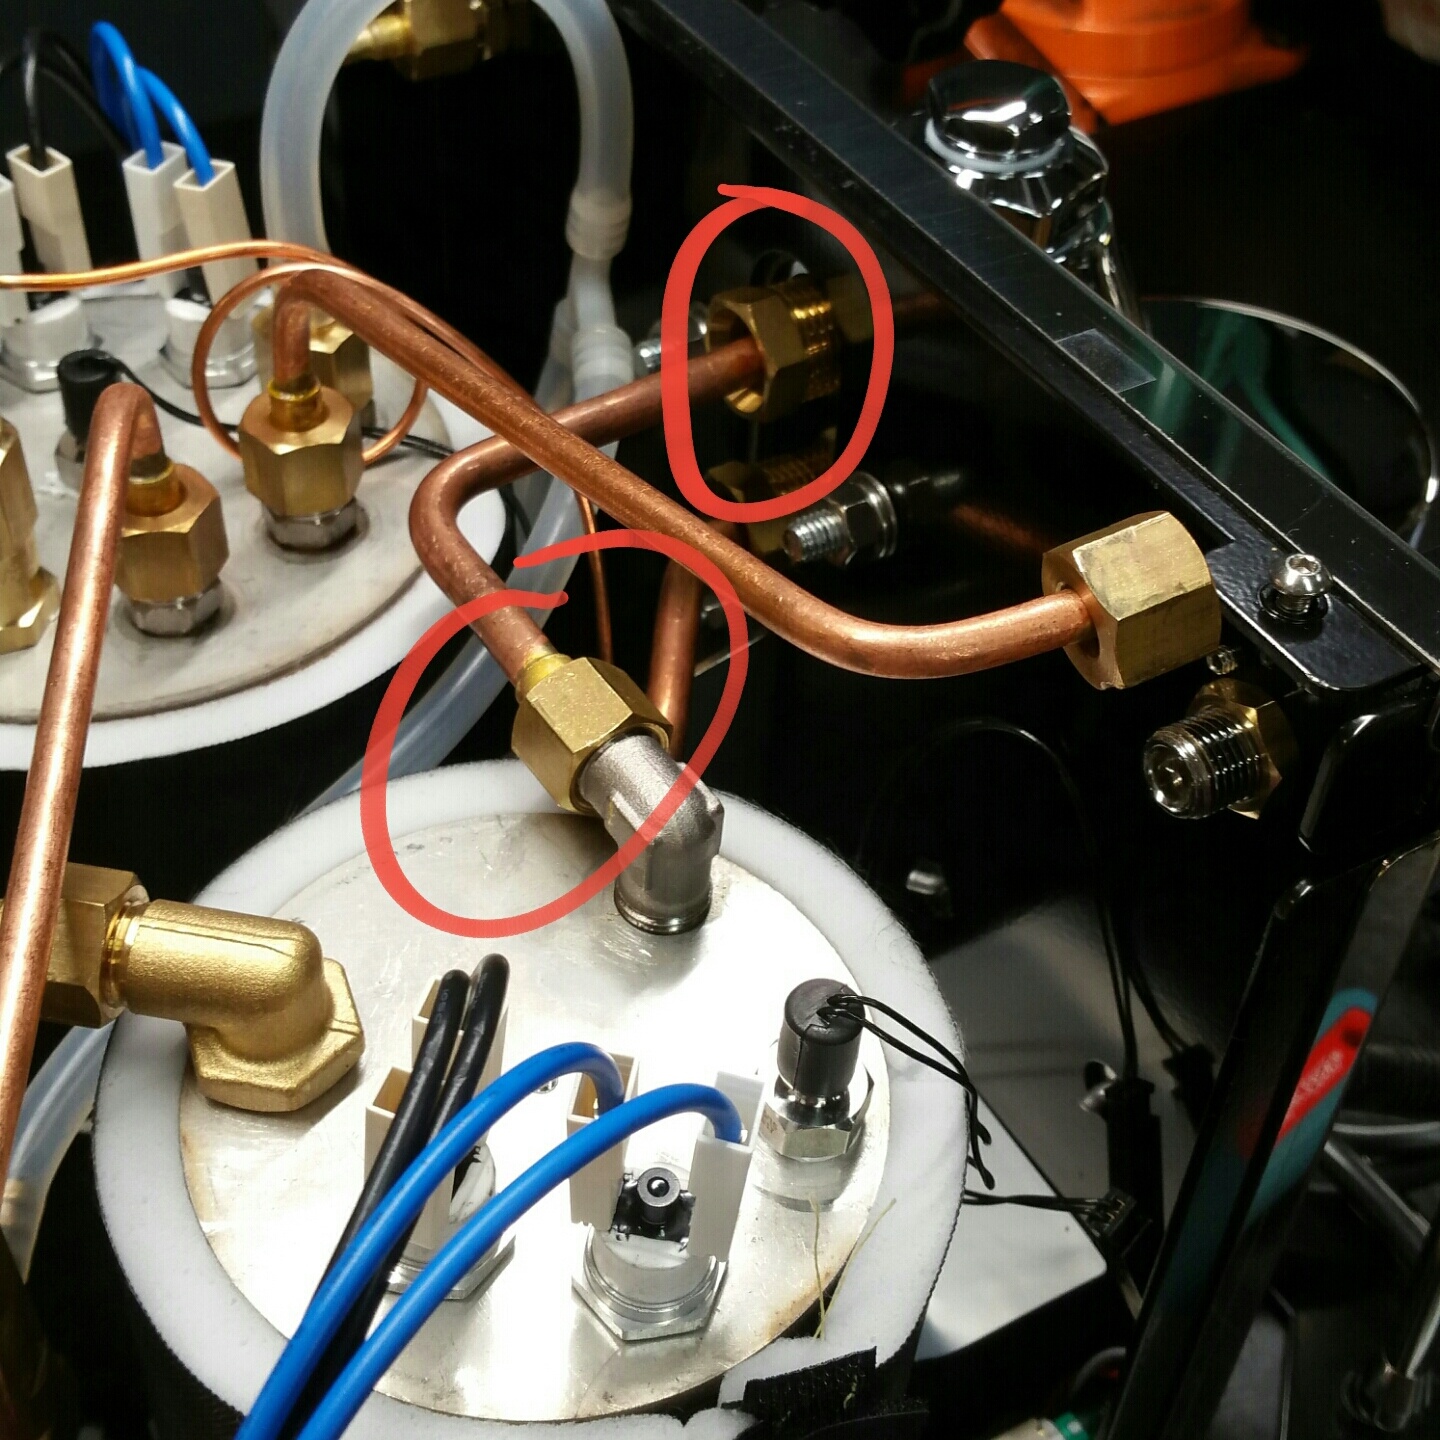
2. Remove the whole copper pipe by removing these two fittings circled here.
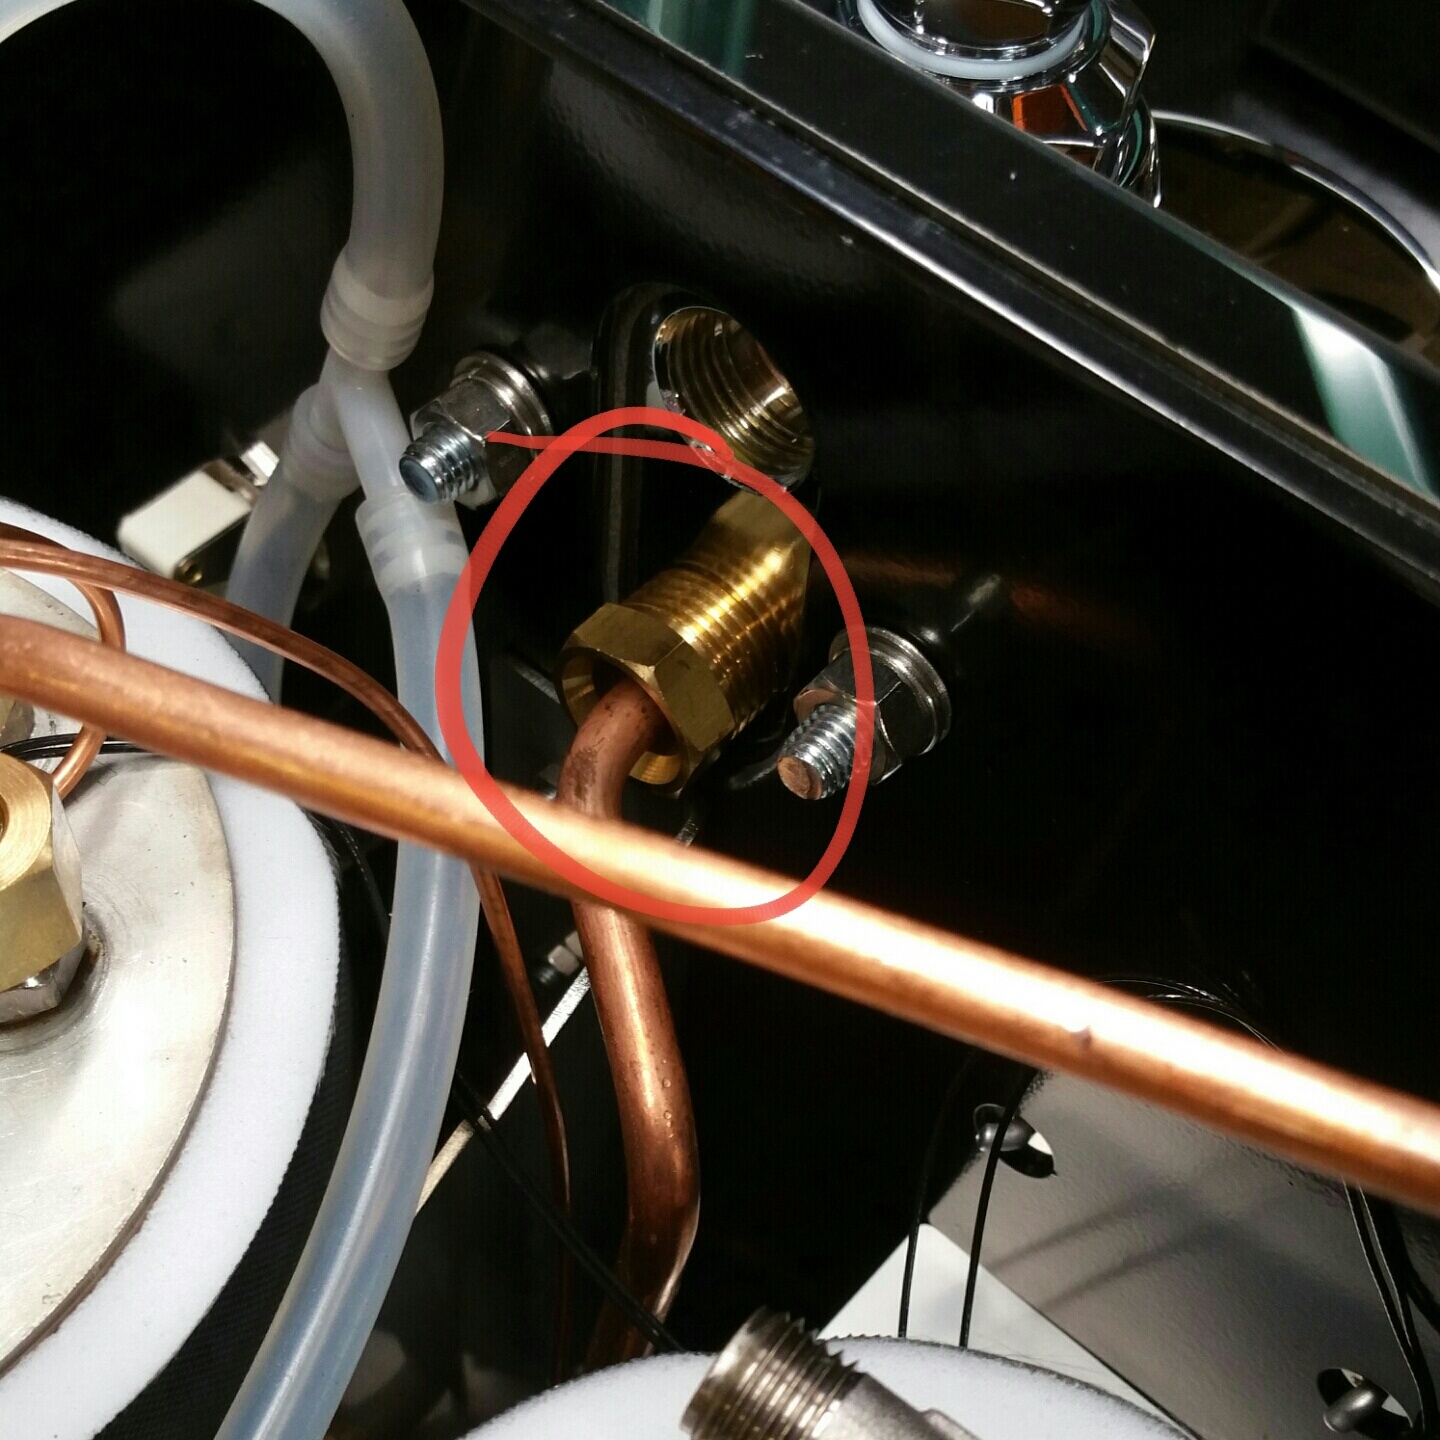
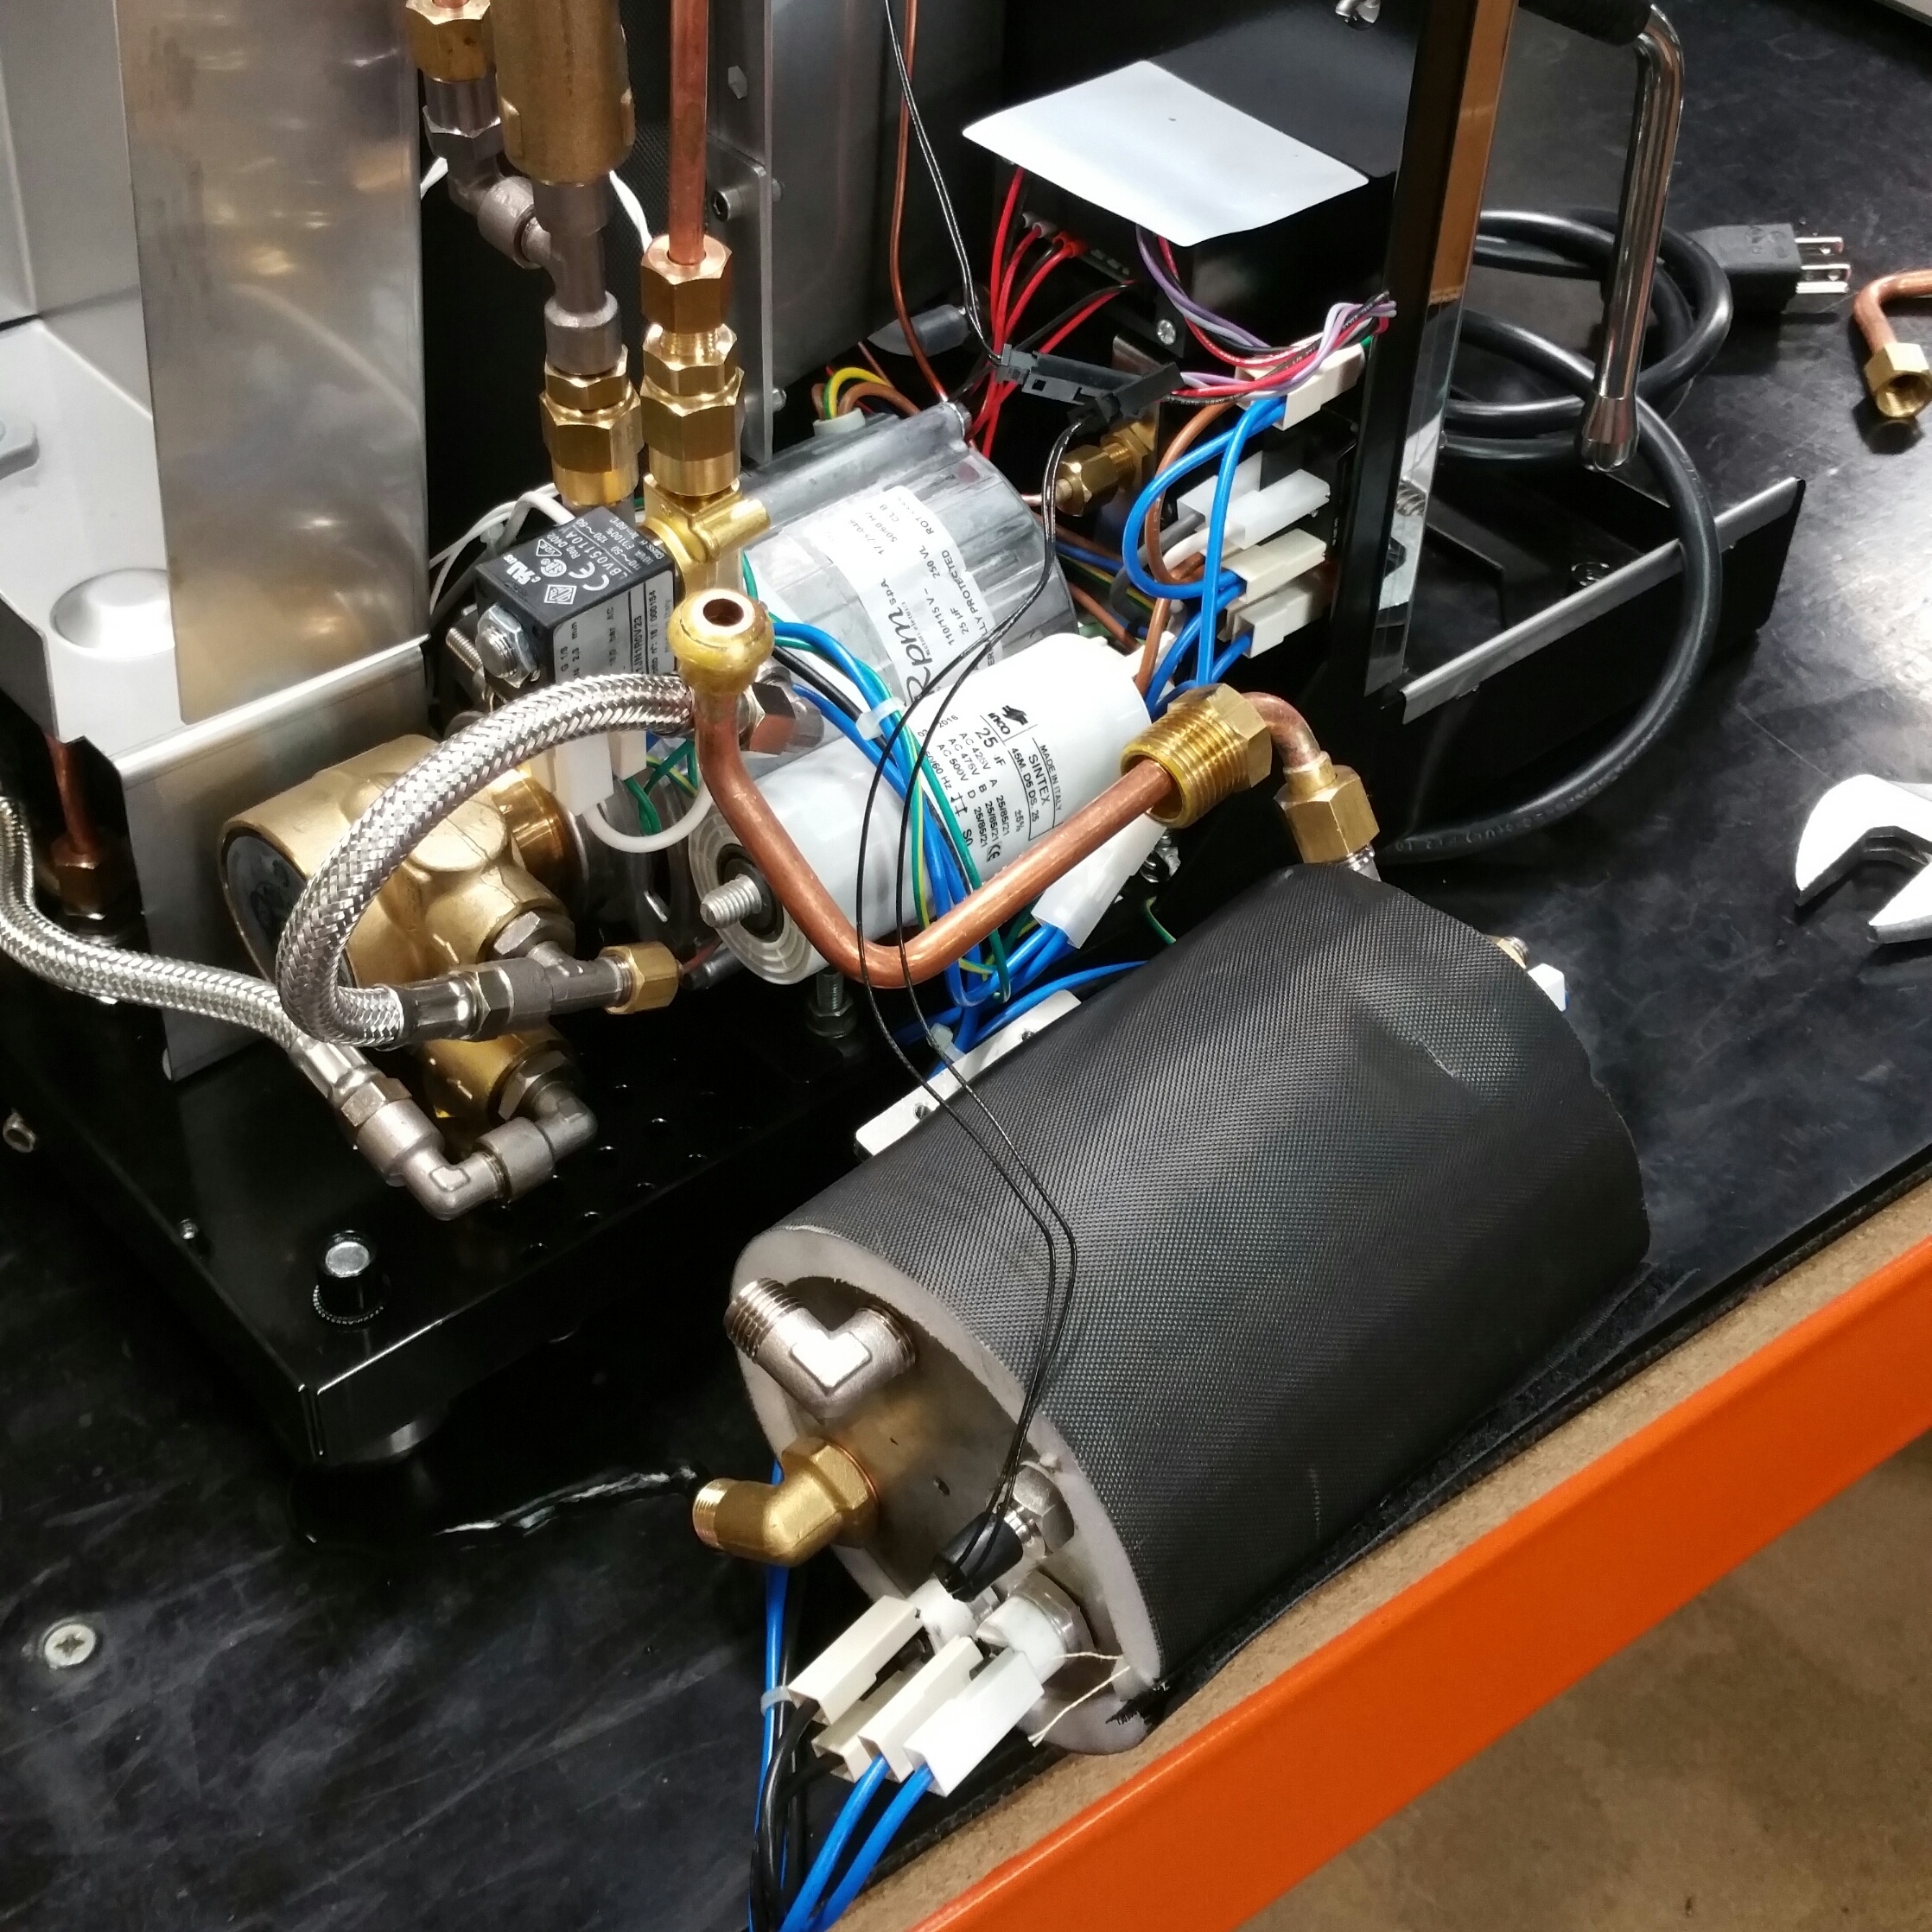
3. Use the 21mm wrench to remove this fitting circled here.
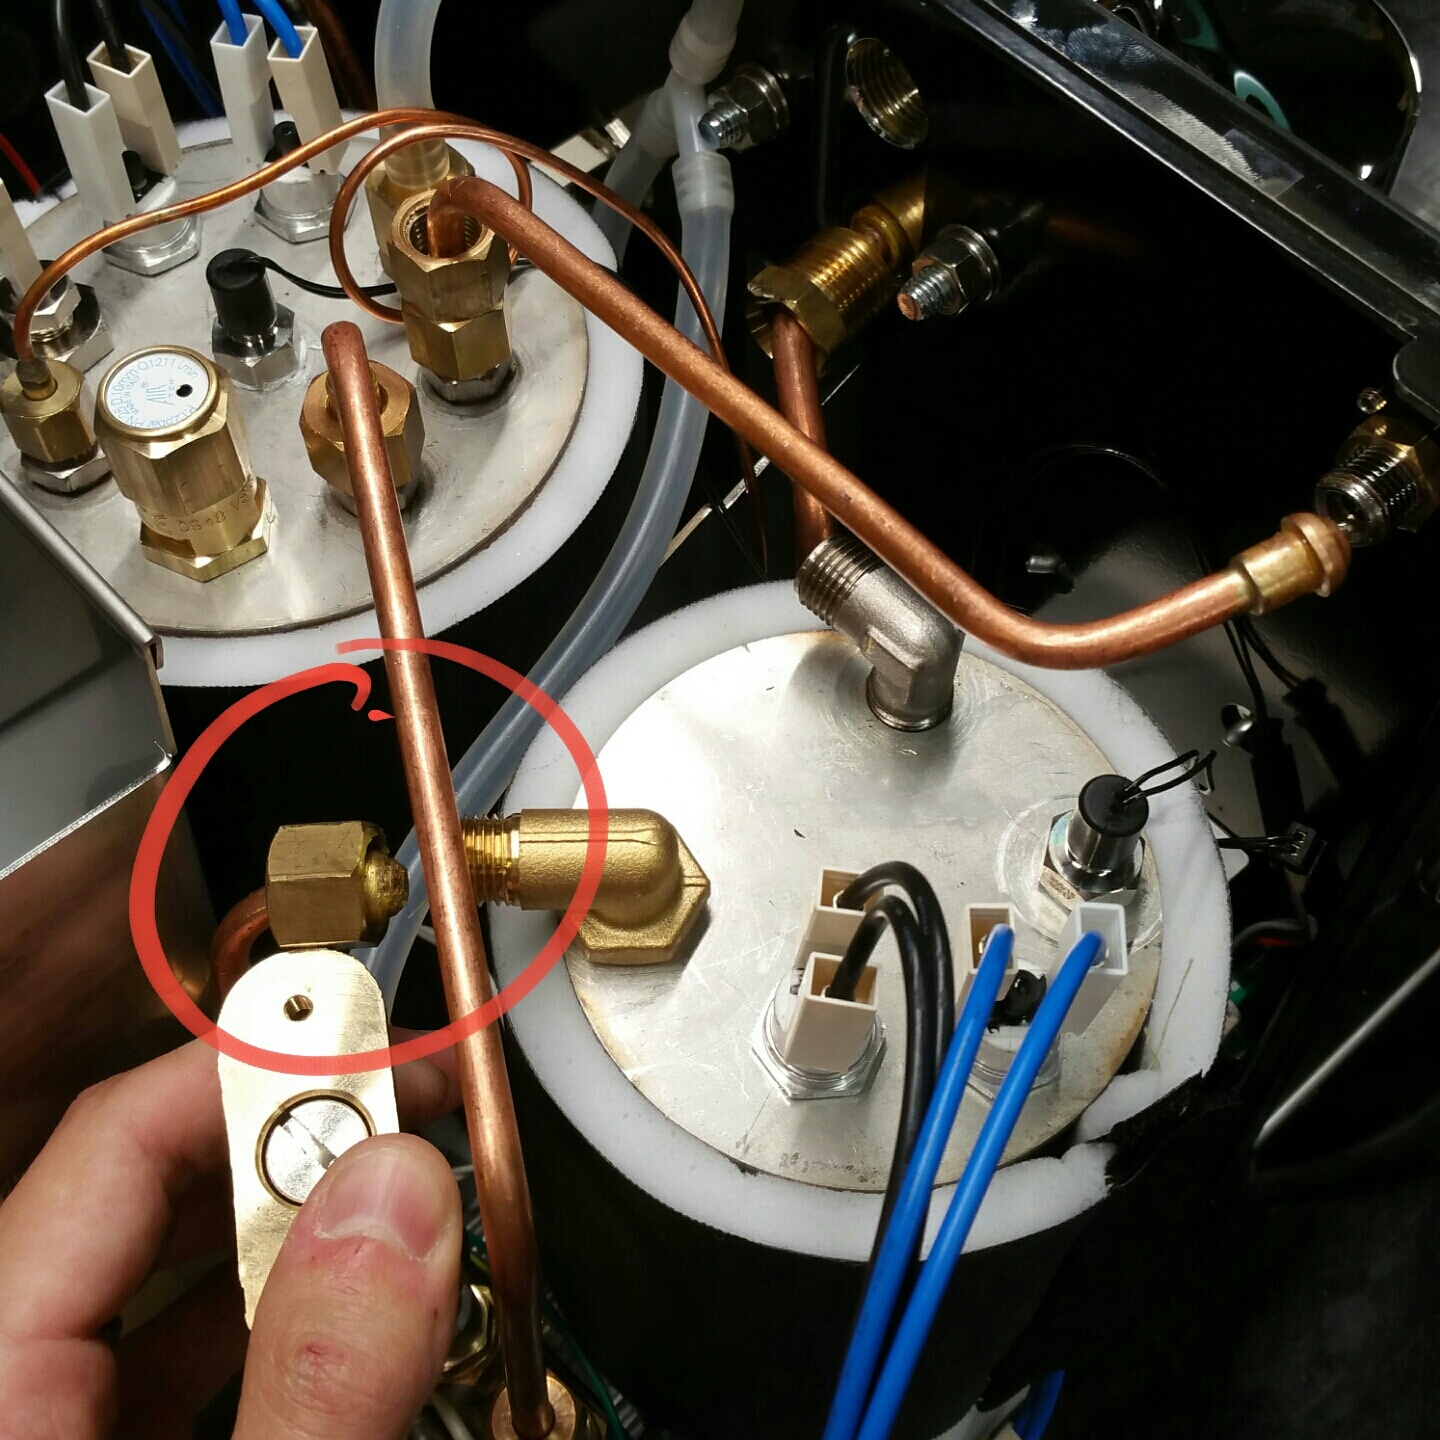
4. Remove the fitting circled here.
5. Remove the top two screws that are holding the coffee boiler in place.
6. Set the coffee boiler carefully to the side of the machine, careful not to pull any wires.
7. Remove the two screws in the back of the PID casing.
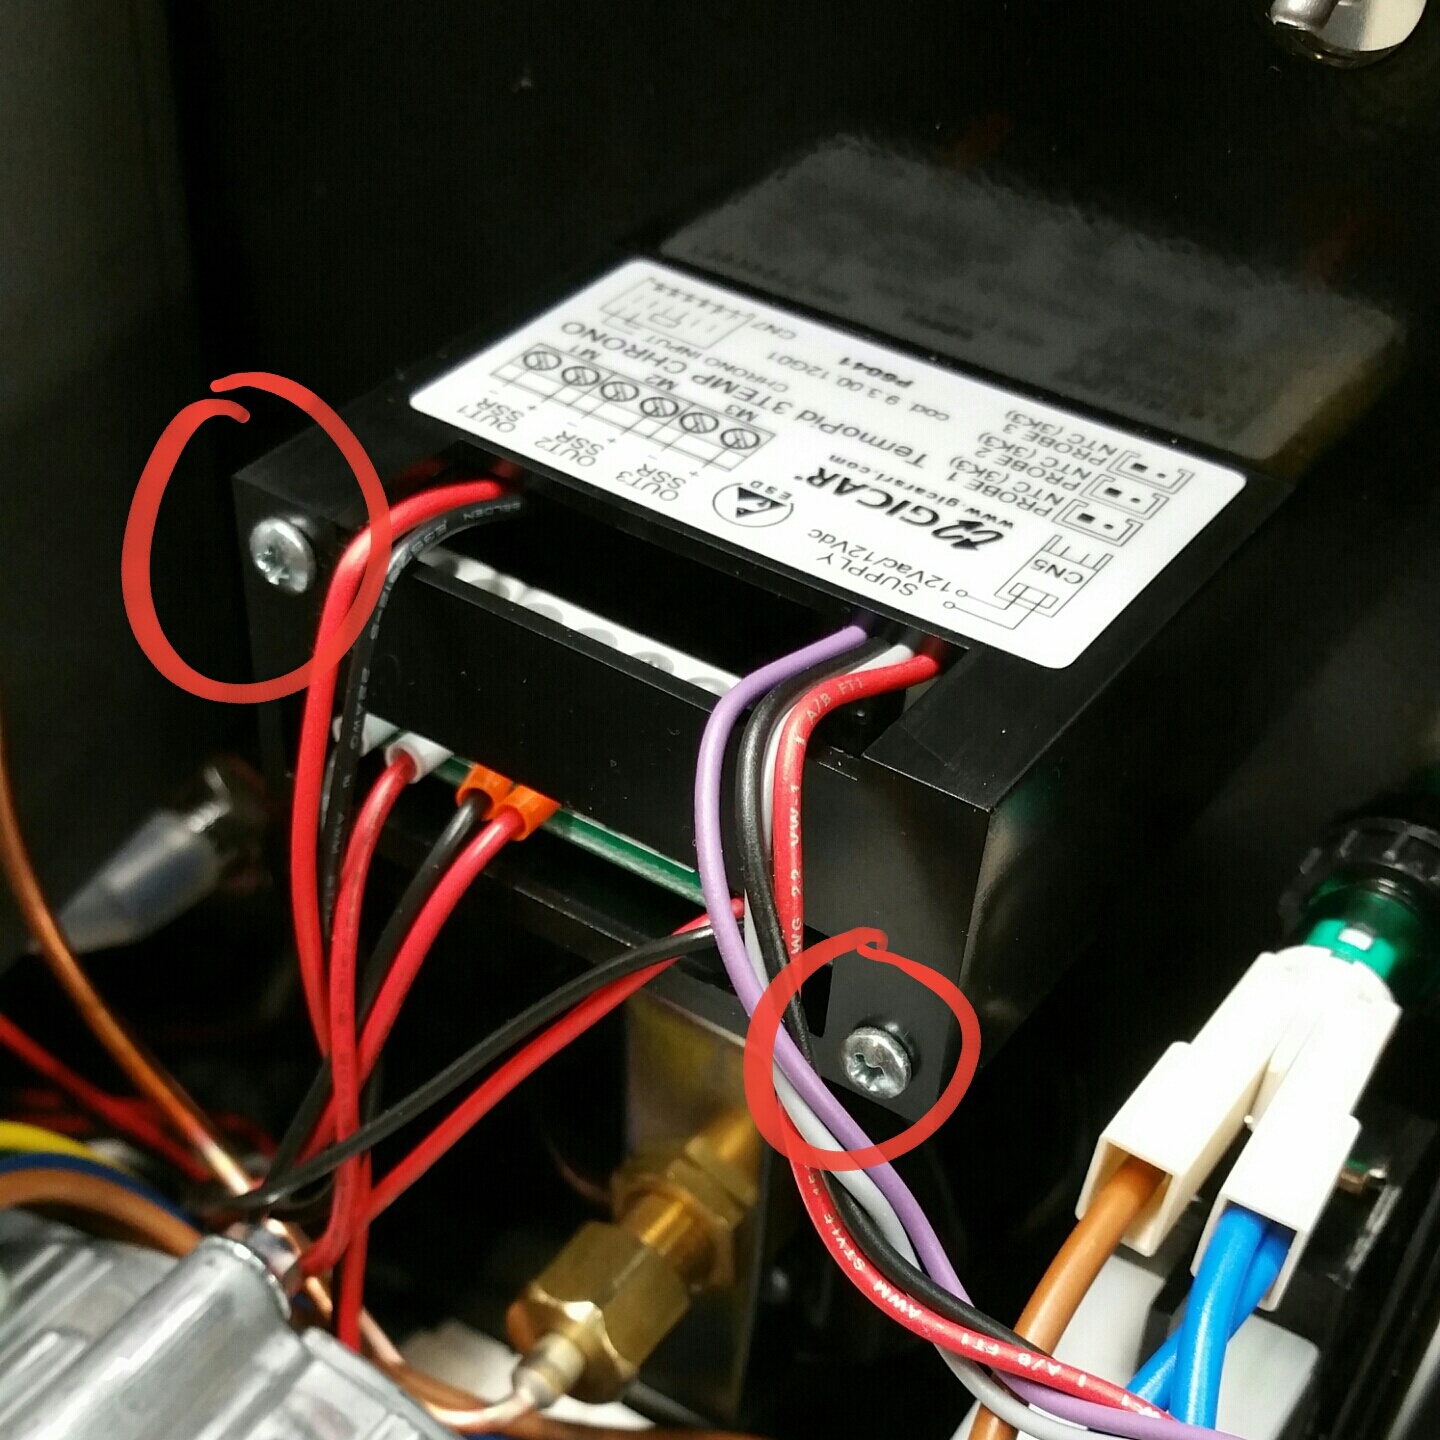
8. Remove all of the wires from the PID, easily done if you pull the PID out of the front of the machine, swap all the wires over to the new PID and then reinstall everything.

9. Reinstall the boiler of the machine, give it a test* before reinstalling the panels so you can check for any leaks at any of the fittings.
*After installing the new PID you will get a "FIL" code on your PID. Update the settings by following along with our Updated PID Settings article to clear this.