If your ECM Classika begins to leak from the steam wand even when the joystick is closed OR if you're getting inconsistent or no steam out of the steam wand, you may need to replace the gasket on the inside of the steam valve assembly. Below you will find step by step instructions on how to remove the steam wand, and replace the gasket.
NOTE: Allowing leftover steam to cool inside the boiler will cause damage to the joystick seal gasket. The boiler must be refilled and flushed thoroughly after steaming and before powering down. Damage that occurs to the joystick seal gasket or steam valve assembly because of improper use is not covered under warranty.
NOTE: Newer Classika models come equipped with a Synchronika-style steam arm, follow those instructions instead if your Classika's steam arm doesn't match the instructions below:
ECM Synchronika: Hot Water Valve Seal Inspection/Replacement
Be sure the machine is fully cooled and unplugged before proceeding.
Tools Needed:
- 17mm wrench
- Adjustable wrench
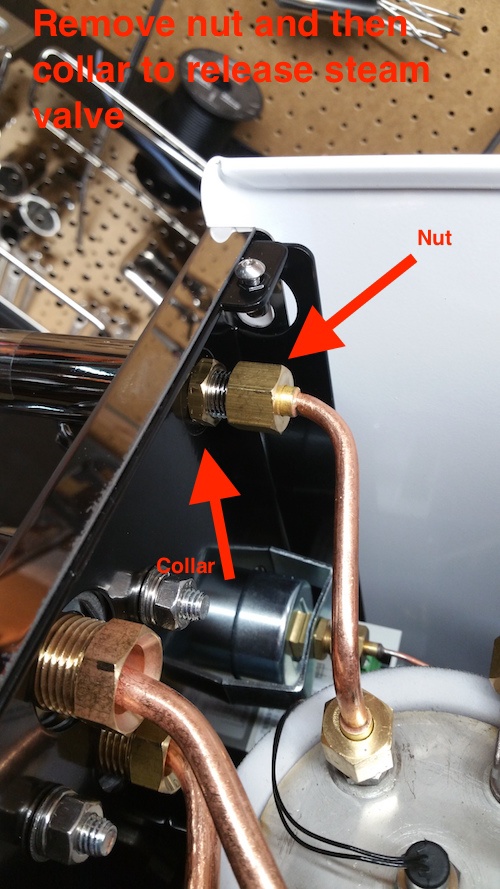
1. Remove the panels from your Classika. Inside you will see the inside piece of the steam valve, which is held on by a collar and attached to the copper pipe by a nut. Remove the nut first, and then the collar and the valve will be free.
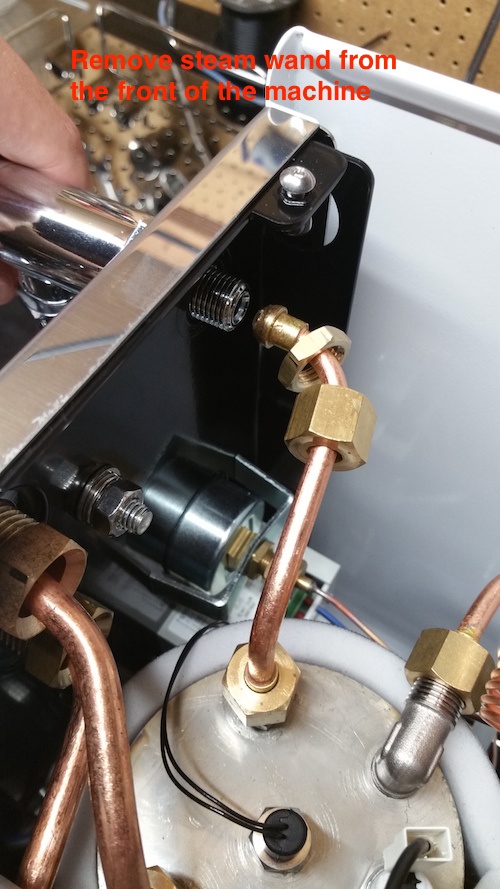
2. Once you have the nut and the collar removed, the steam valve will come out of the front side of the machine in one piece.
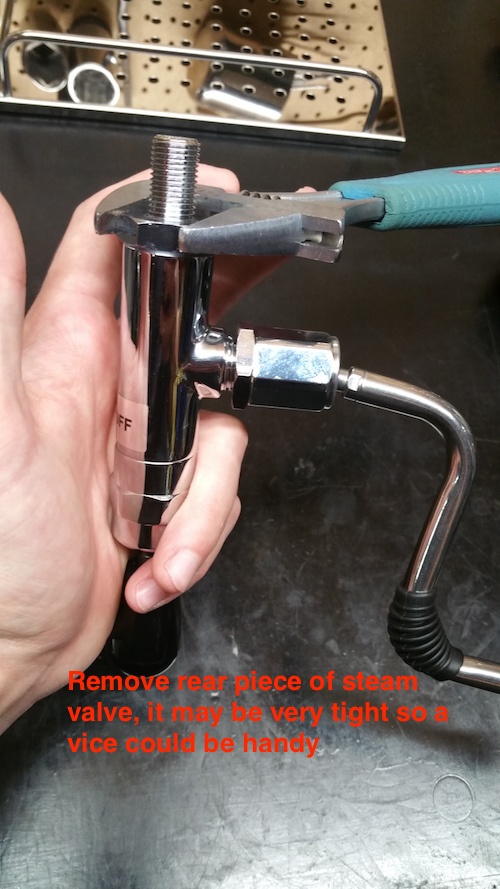
3. Remove the rear piece of the valve, this is where a vice may come in handy.
(Old Style)
(New Style)
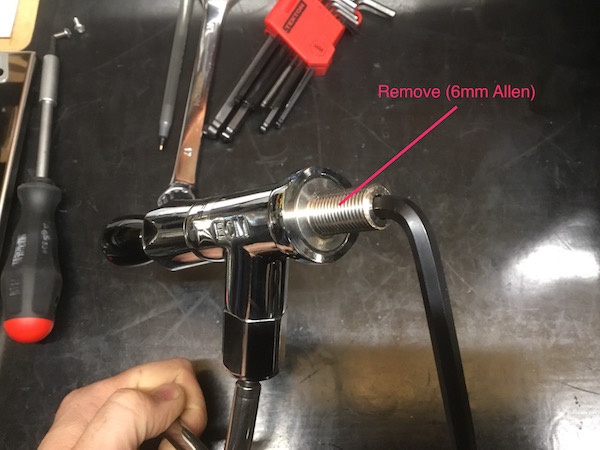
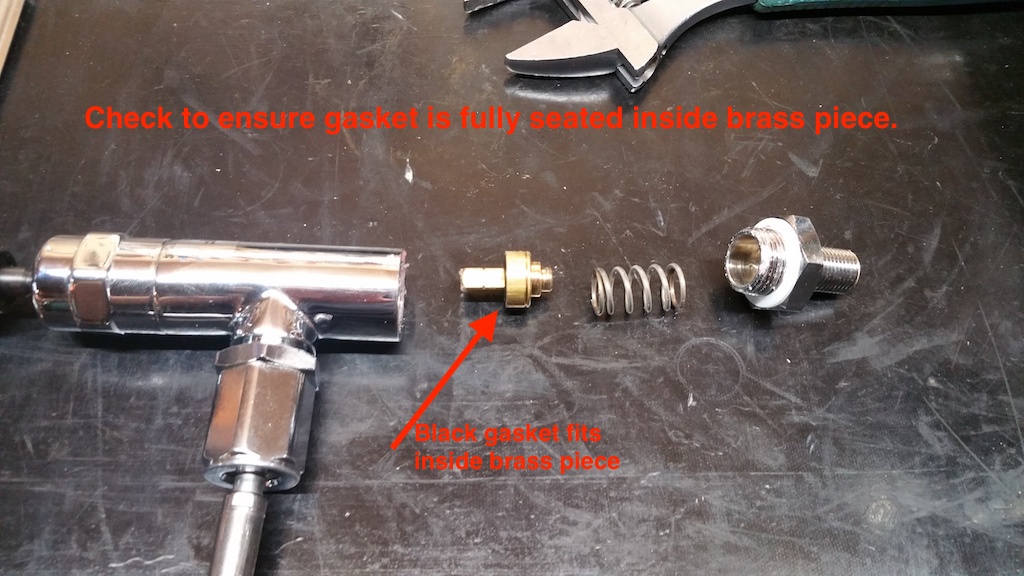
4. Once the pieces are separated, you may find the gasket not fully seated inside the brass fitting. Generally, we recommend replacing the entire brass piece, as the gaskets can be very difficult to get into the piece.
You will want to use a small amount of food-safe lubricant on the black gasket to prevent the inside of the valve from sticking to it.
5. Once all the previous steps are finished, follow the steps backward and put it all back together and you should be set to go with a new seal.
A badly worn joystick seal gasket: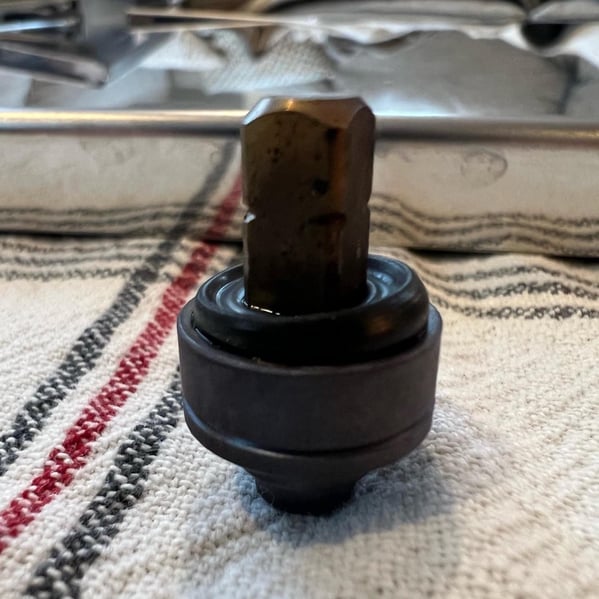
This used joystick seal gasket may still be re-usable, we'll need to clean it up and
re-install to test it out: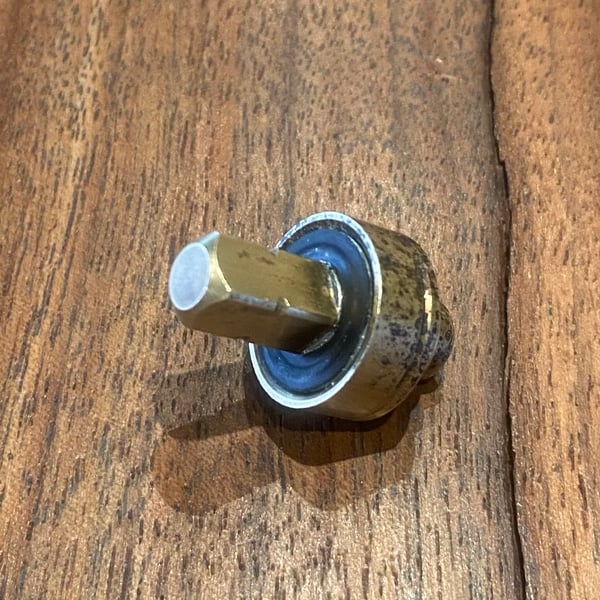
A brand new joystick seal gasket: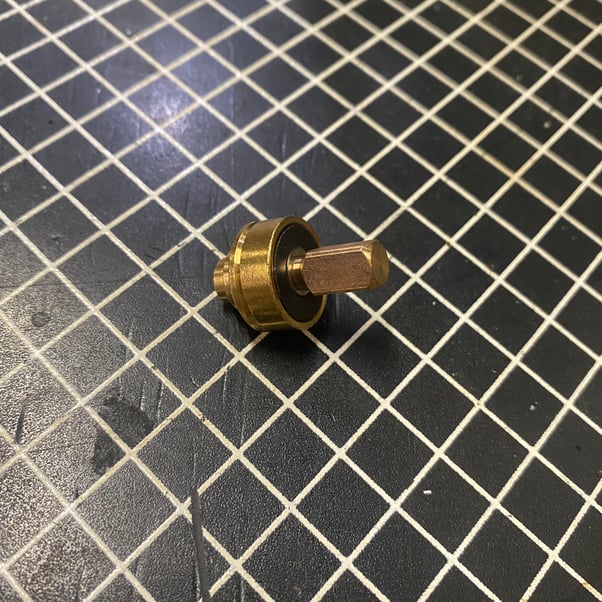
NOTE: If your Classika is equipped with the newer one-piece style ECM steam arm as shown below, follow these instructions instead.