Tools Needed:
- 8mm Allen key or hex driver
- Pipe cleaner or similar implement
- Compressed air
1. Remove the front panel.
2. Remove the group head gasket, shower screens, and dispersion plate.
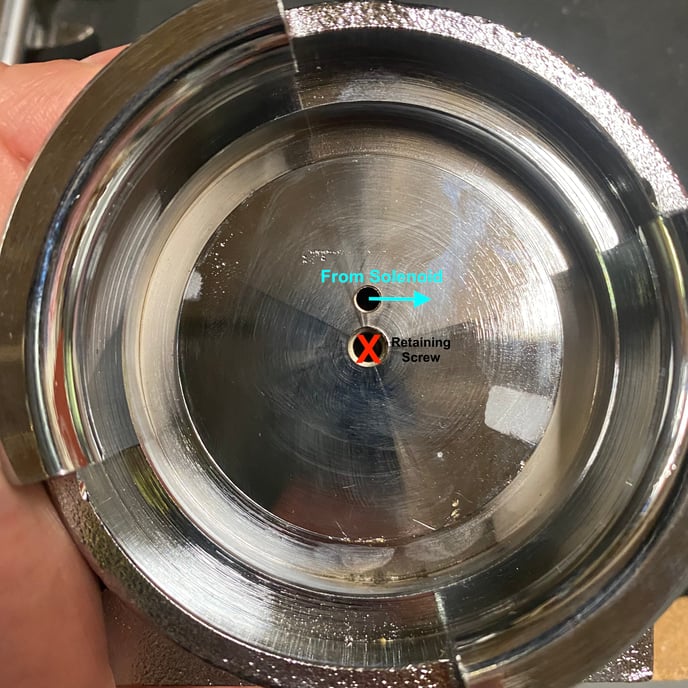
3. Separate the 3-way solenoid from the group head:
Pre-2019 A53 Machines
2019-Present A53 Machines
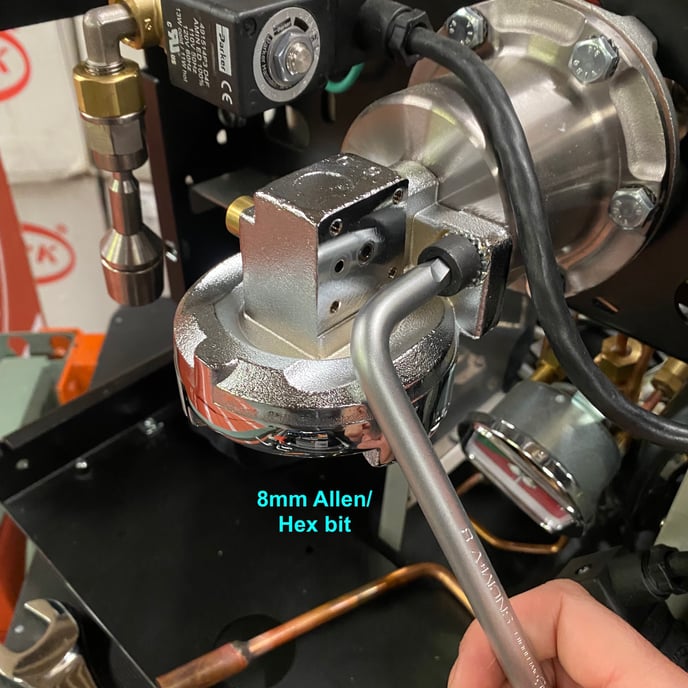
4. Use the 8mm Allen key or hex driver to remove the group head mounting bolts.
- 8mm Allen key or hex driver
- Pipe cleaner or similar implement
- Compressed air
1. Remove the front panel.
2. Remove the group head gasket, shower screens, and dispersion plate.
3. Separate the 3-way solenoid from the group head:
Pre-2019 A53 Machines
2019-Present A53 Machines
4. Use the 8mm Allen key or hex driver to remove the group head mounting bolts.
5. Make sure the boiler outlet is clean and free of any scale debris or blockage. Clean or replace the o-ring gasket as needed.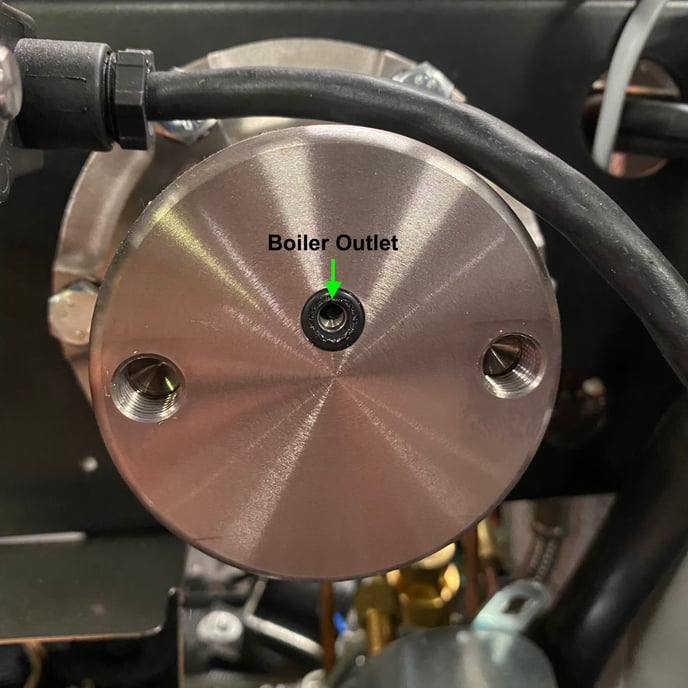
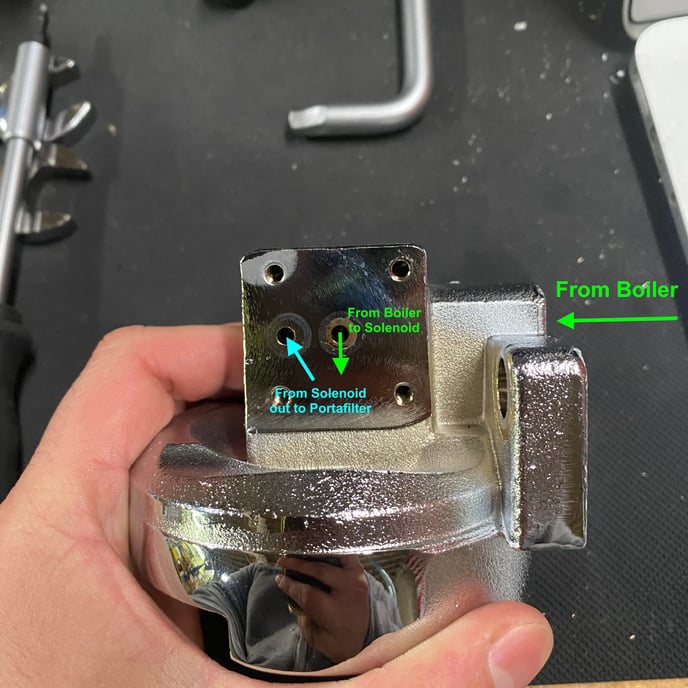
6. Clean the sealing faces on the group head. Use an implement like a pipe cleaner to push any scale debris through and out of the passages.
NOTE: It may be helpful to flush the passages with water or blow compressed air through to make sure all of the labeled passages are clear.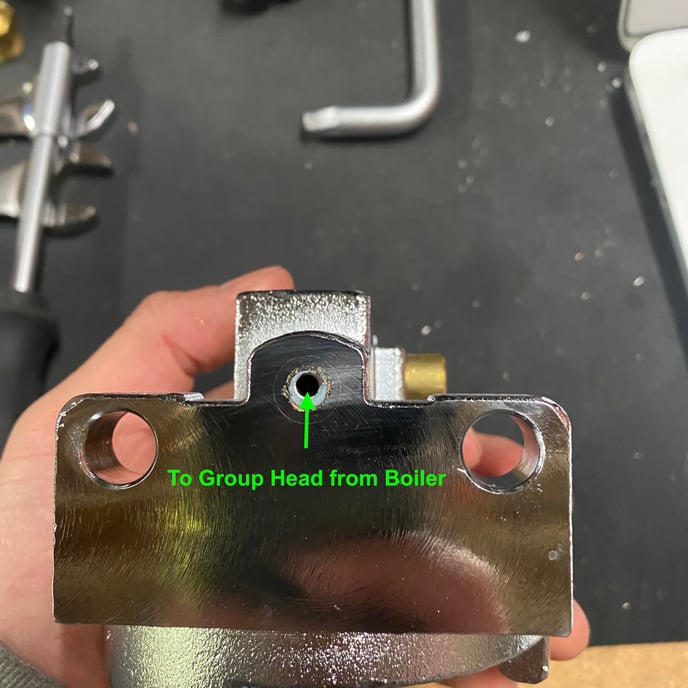
7. Use these instructions in reverse to re-assemble the group head.